Once you click the Verify My Account button, you are directed right to your PhotoDay Studio Panel Home page.
Before you can start selling your photos, you need to set up a few key items related to your business. Navigate to the Settings tab in the top right of your Home screen, and click My Studio from the sub-navigation menu.
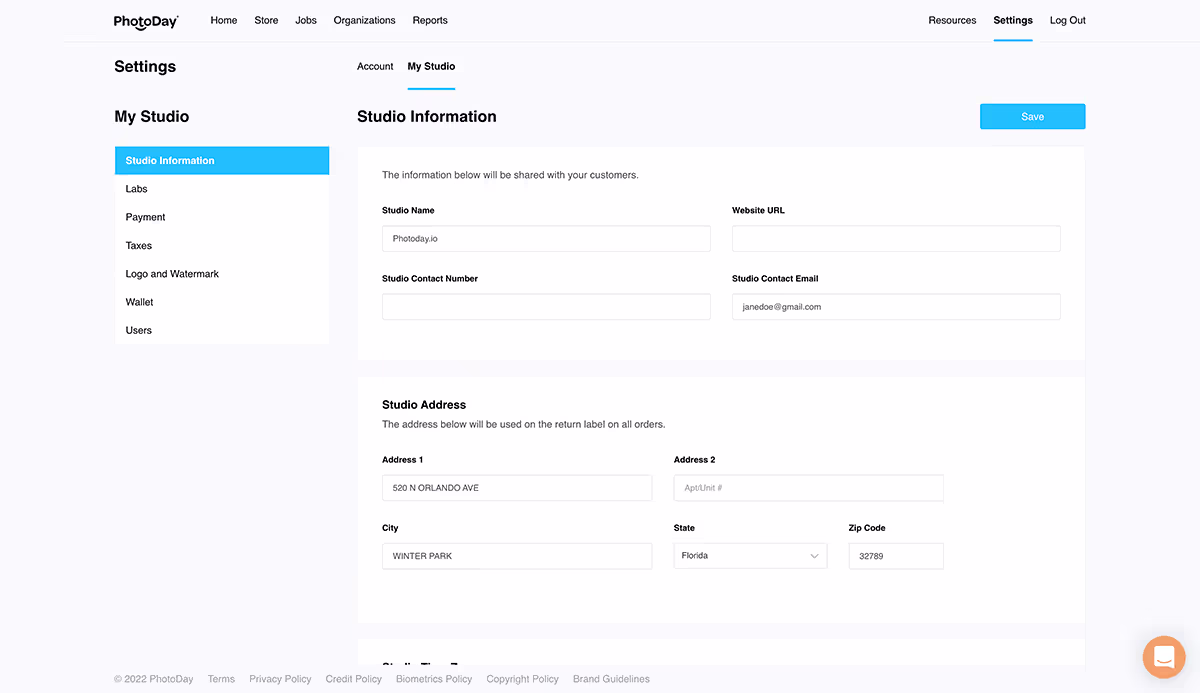
First up is the Studio Information section. Note the menu on the left side of the page with links to more sections.
During sign-up, you already filled out most of this information, but it’s always good to double-check and make sure everything’s accurate! You can also update your studio information here in case anything changes (e.g. contact information, address, time zone, etc.).
Once you have verified your Studio Information page for accuracy, navigate to the menu on the left and begin going down the list.
Labs
First up is the Labs section. This is where you can see the labs to which your account is currently connected. Right now, it will just be the lab you chose at sign-up, but you can always add more of our partner labs with the click of a button. You can add as many labs as you’d like to your account.
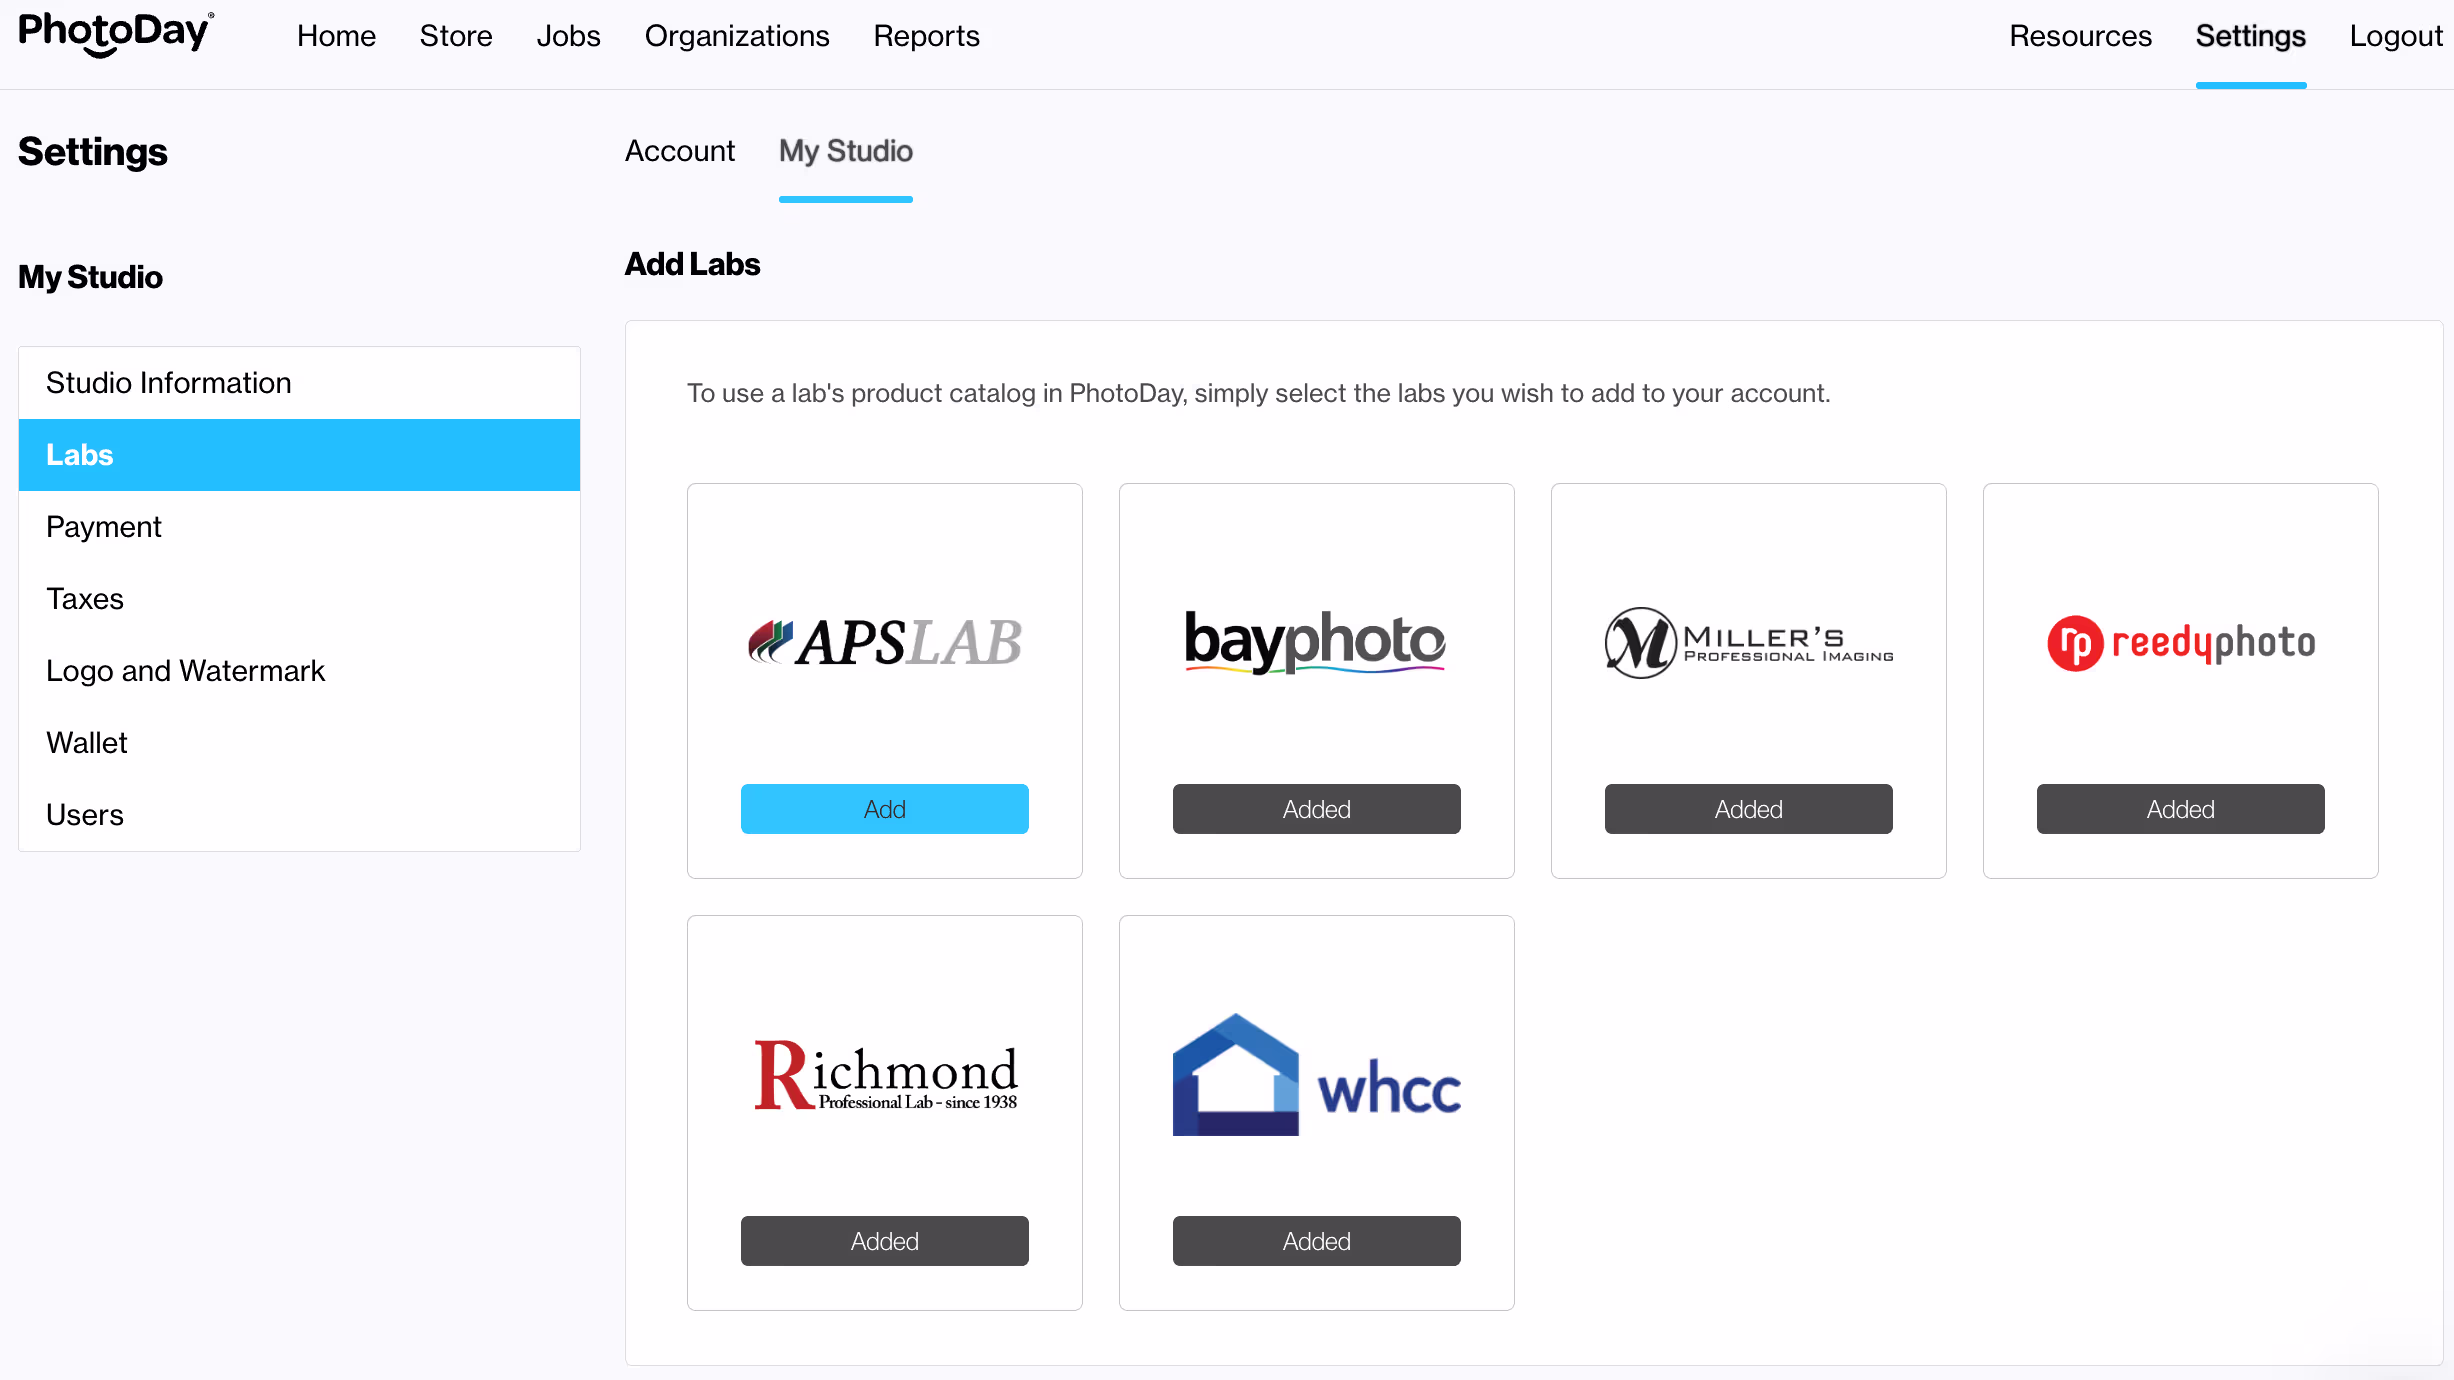
When you choose a lab, you not only are utilizing their quality printing services, but you are also gaining access to each one’s extensive product catalog. These range from standard prints, all the way to custom items like greeting cards, statuettes, and even Christmas ornaments!
Additionally, each PhotoDay lab partner offers different themes and collections of graphics for customizable products. When you add a lab to your account, that lab's themes are automatically made available, as well! Learn more about templates and themes for graphic products in PhotoDay.
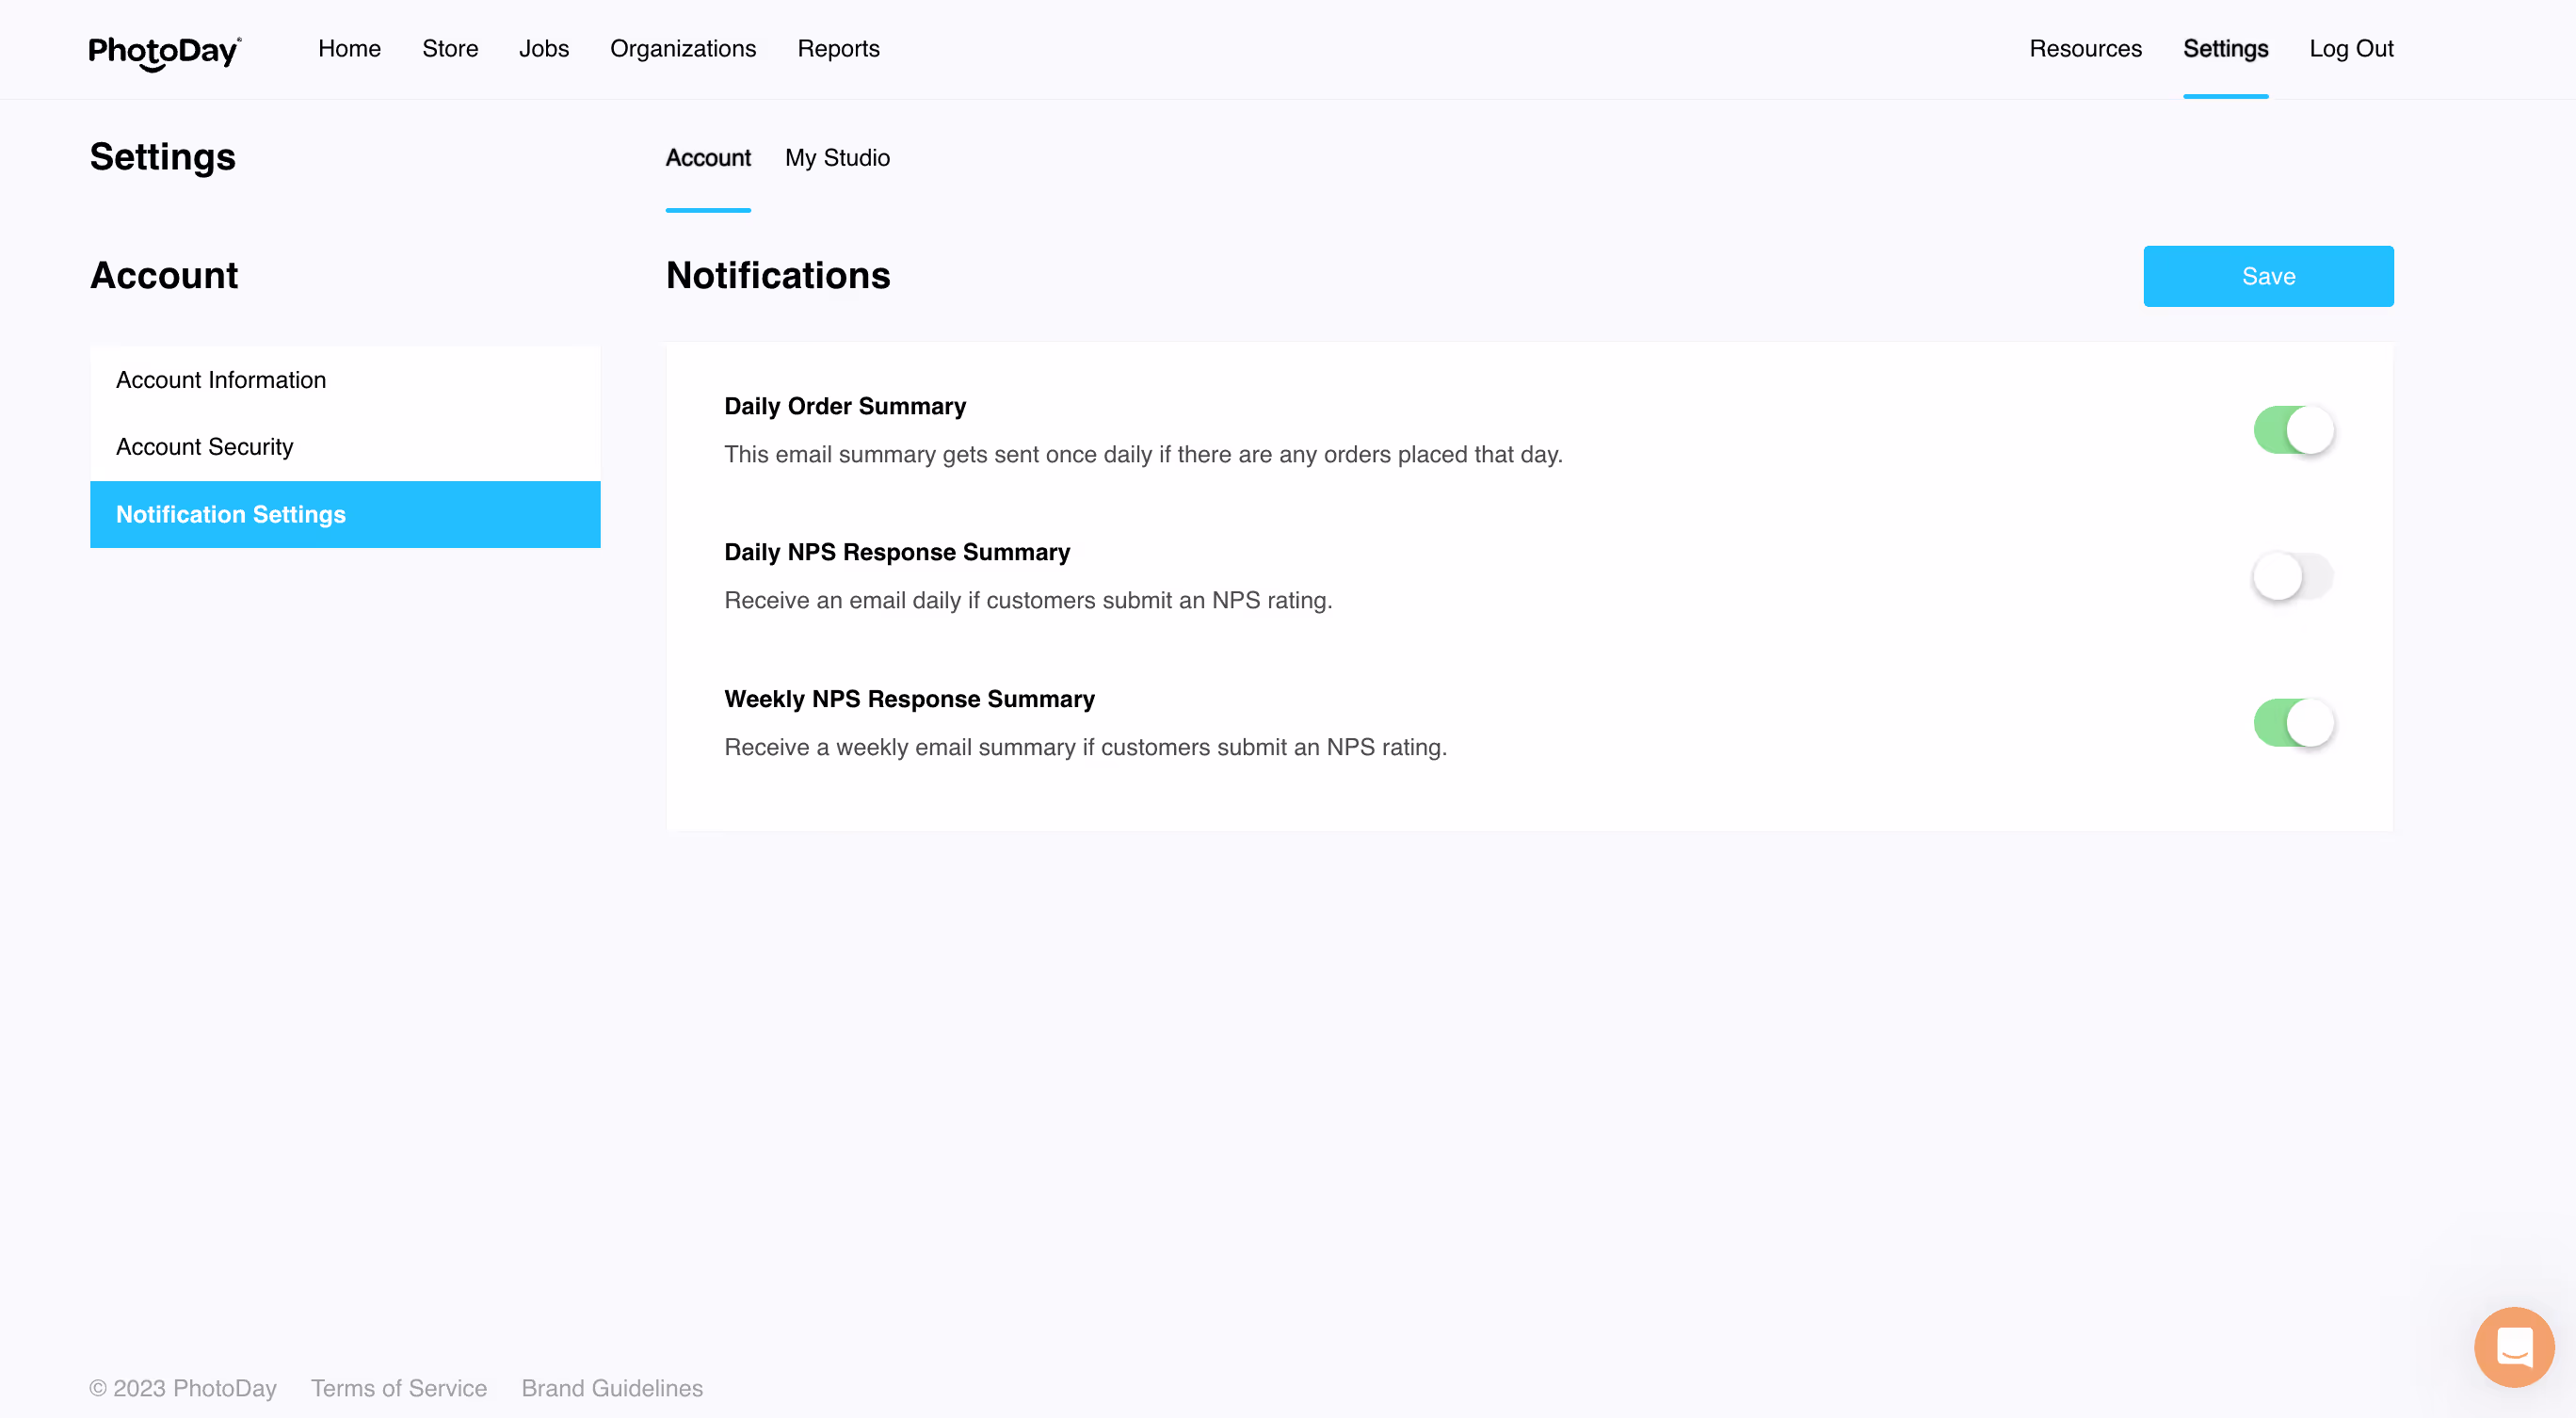
Email Notifications
Under Settings > Account, you can manage your email notification settings for customer orders and NPS responses.