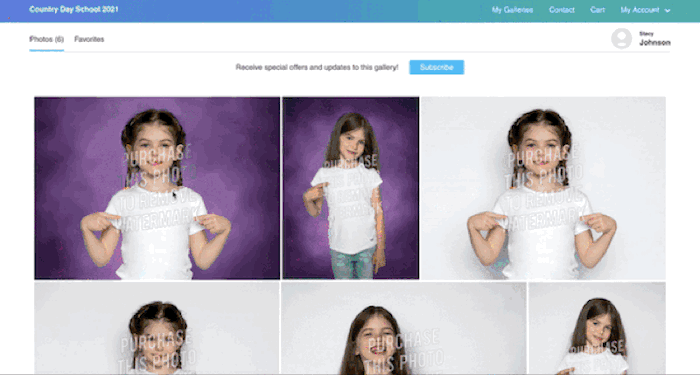
PhotoDay’s Backgrounds feature allows you to create a collection of backgrounds–up to 12 per collection–to give customers the choice of swapping backgrounds for different poses and products. Customers can mix and match poses and backgrounds for packages and products with a simple swipe and preview. They can rotate and zoom to crop the image on the background, and you can mix and match both horizontal and vertical images and backgrounds.
Please note that Backgrounds is only available with certain labs. For a complete up-to-date list of labs that support backgrounds, please visit this article. In order to use this feature, you must be connected to and have one of the supported labs’ price sheets attached to the job.
Designing Your Backgrounds
With this feature, you can create your own backgrounds or use the ones provided by us. You can create and upload your own or even mix and match with a combination of PhotoDay's backgrounds and your own.
Before you start designing your own backgrounds, we recommend you read the following articles to ensure what you see is what your customers will get:
- How do I create optimal Backgrounds for PhotoDay?
- Monitor Calibration
- ICC Profiles
- Color Management FAQs
PhotoDay does not recommend adding text to backgrounds. This could contribute to potential errors and a negative experience for both you and your customers. Read more about creating optimal backgrounds for your images here.
Backgrounds must be sized to 2400 x 3000 pixels or 3000 x 2400 pixels, in RGB, JPG format.
PhotoDay Background Collections
We've also created 4 collections of backgrounds for you to use in PhotoDay. These backgrounds are already optimized and ready to plug into your studio. View and download PhotoDay Backgrounds.
Creating Backgrounds Collections
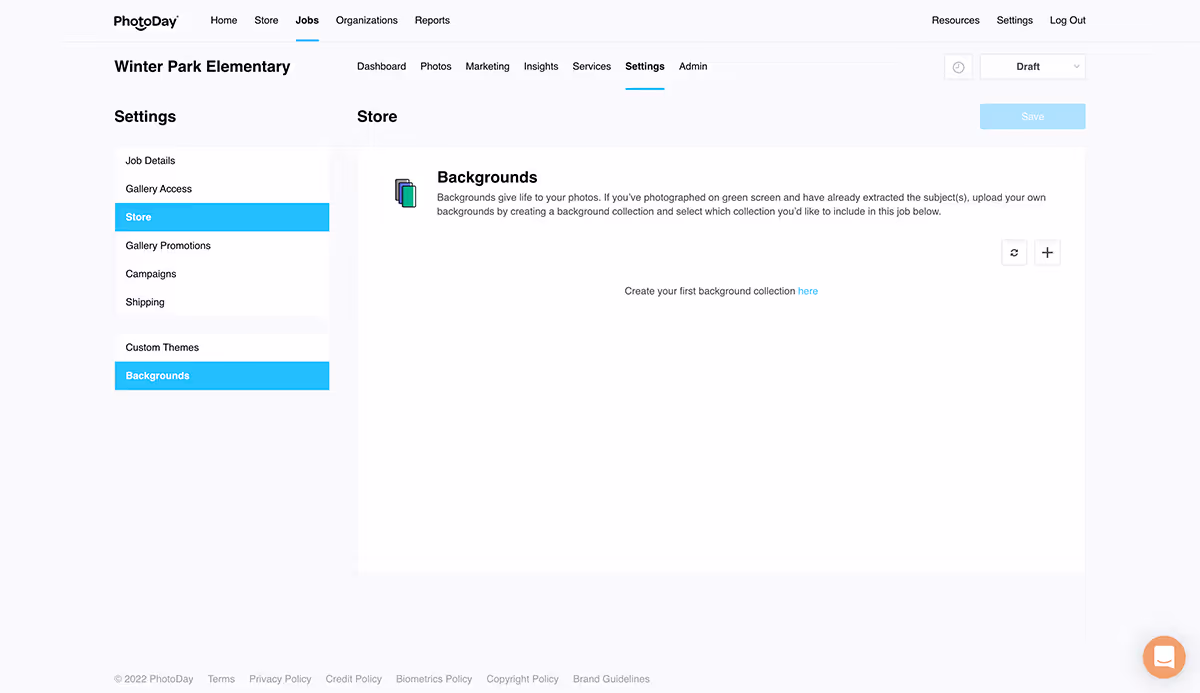
Once you’ve chosen your backgrounds, it’s time to set up your collection. From the Studio Panel, go to Store > Backgrounds.

Tap the + sign to add a new collection. This will open the Add Background Collection window. Once you’ve read and agreed to the policy, click Continue.

Name your collection and add your files. You can click Upload or drag and drop up to 12 backgrounds into the window.
.gif)
Click Save and give us a moment to prepare and upload your new background collection! If you run into any upload errors, please double-check your file sizes and color space.
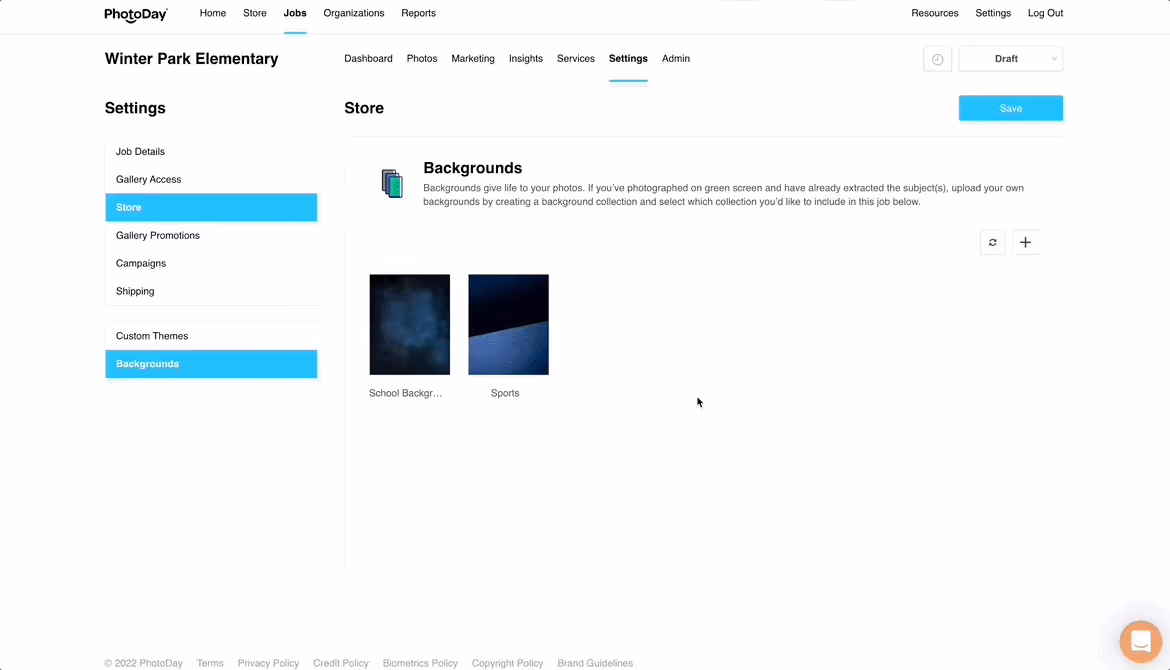
When it’s done uploading, the backgrounds page will update automatically. Click the gear icon to edit a collection. Add more collections by clicking the + sign.
Adding Backgrounds to a Job
Now you’re ready to add the Background Collection to your job. Open a job and go to Settings. First, make sure you have a price sheet for a lab that supports backgrounds attached to the job. Once a relevant price sheet is attached, you will see the Backgrounds section appear in the sub-navigation on the left.
Here you will see all of your background collections. Select the collections you want to make available for this job.
Next, set a default background. This is the background customers will see when they first enter the gallery. It will be used as the primary background when customers view their photos. For private jobs, the default background will also be used when exporting service item and yearbook export files.
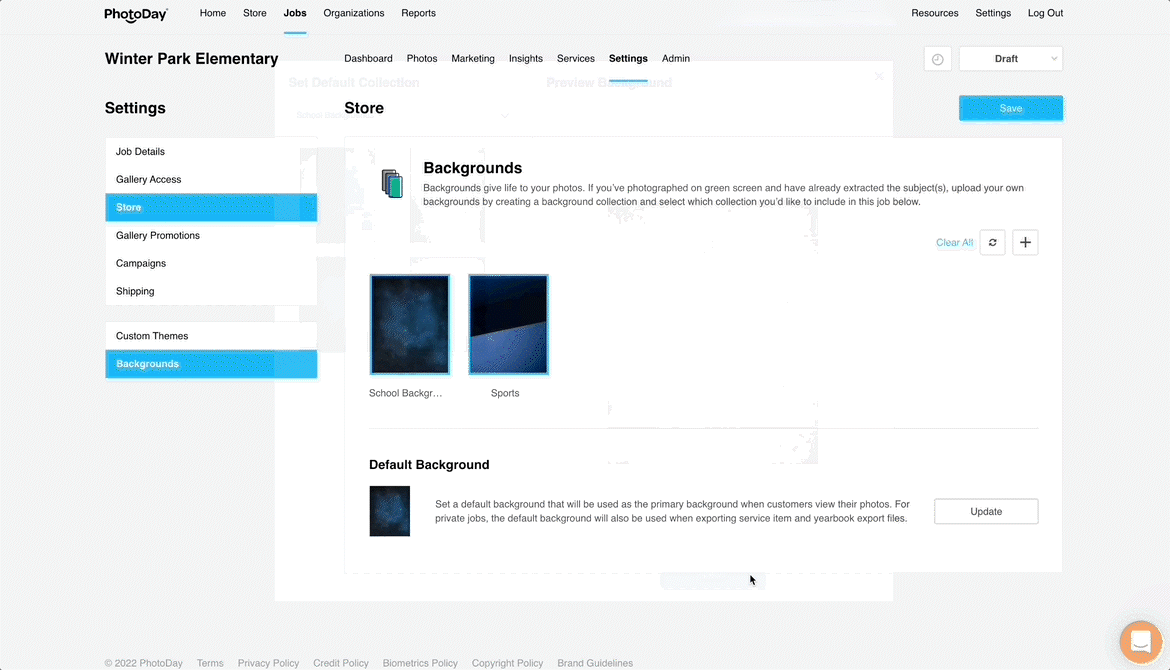
When you’re happy with your selections, be sure to click Save to commit all changes.
Now you can now upload PNGs to the job. We’ll walk you through that in the next section of this guide. You can also upload a combination of both PNGs and JPGs to offer variety to your customers. Only PNGs will be eligible for background swapping, but you don’t have to limit your gallery—the possibilities are endless with PhotoDay!