Everyone likes a good deal, right? Offers are a great way to motivate your customers to purchase more and purchase now! This is why we’ve included a way for you to create these incentives within PhotoDay in the form of the Offers section. While creating offers is entirely optional, it’s a great way to help you close more sales.
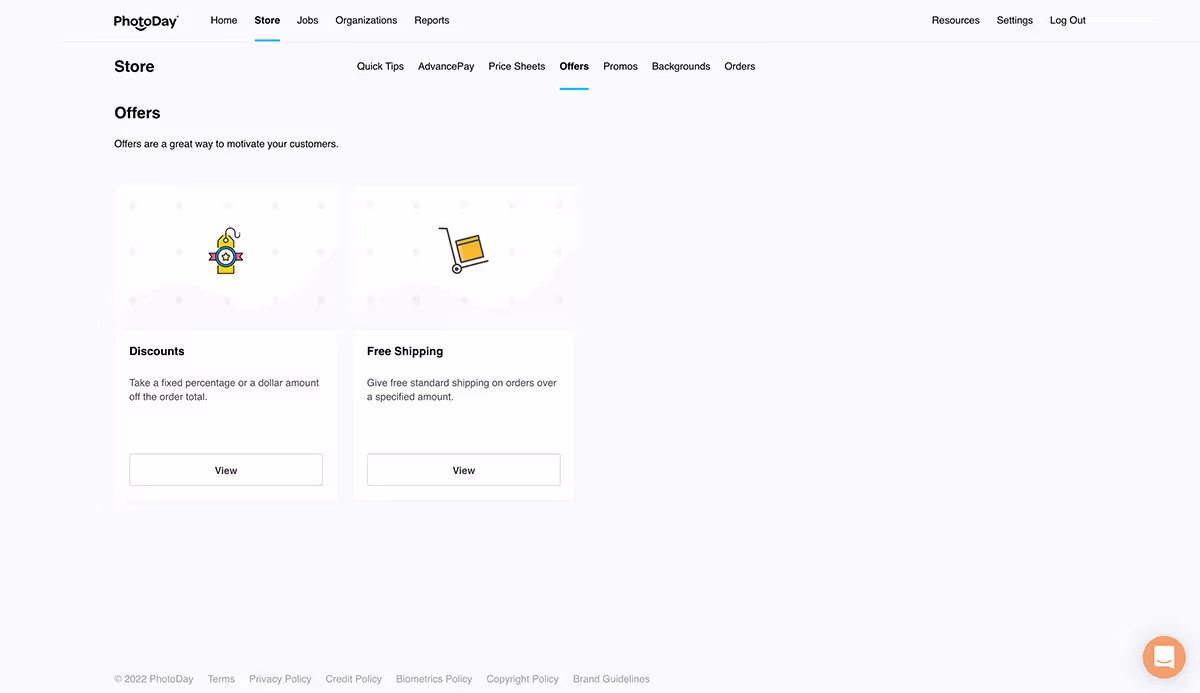
The two main types of offers in PhotoDay are Discounts and Free Shipping. Once created, these offers can be used in a multitude of ways (AdvancePay offers, Gallery Promotions, Seasonal Promos, etc.). We’ll discuss those later, but let’s get started with the basics:
Discount offers are great when you want to offer a percentage or fixed dollar amount off a purchase.
Free Shipping offers remove the shipping cost from the order total.
Helpful Tip: While multiple offer codes can be attached to a gallery, a customer can only apply one code to their purchase.
Creating Offers
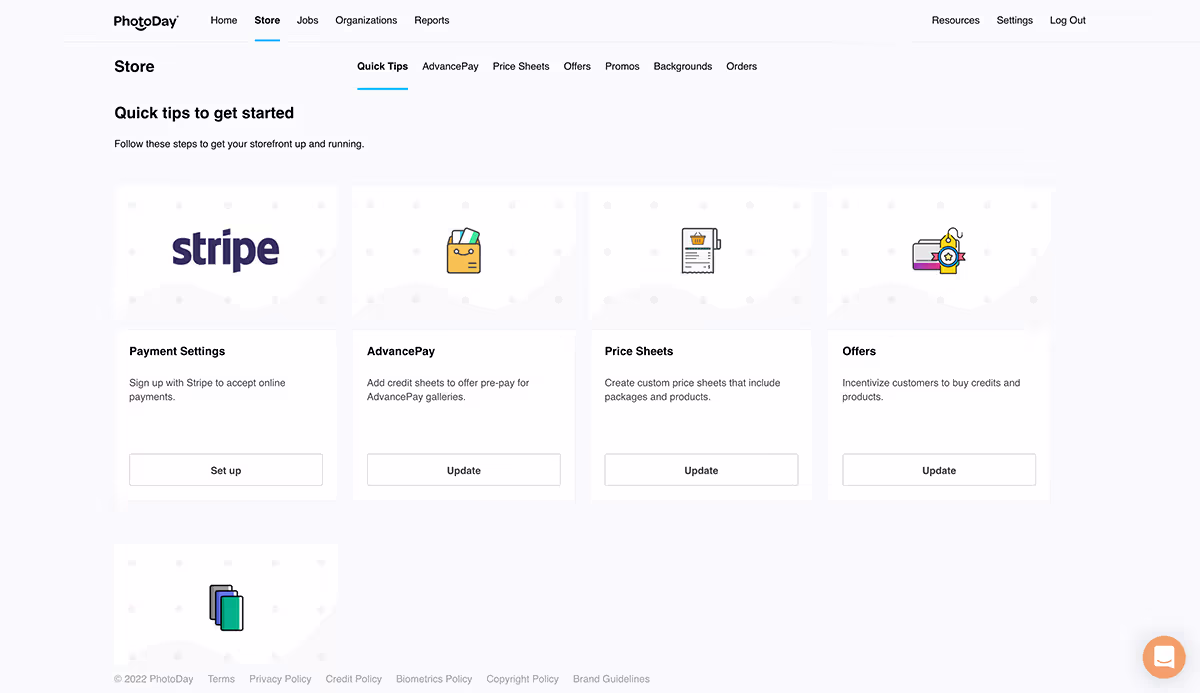
To begin creating your first offer, head to the Store section of your studio panel, then click Offers in the sub-navigation menu or click the Offers icon from the Quick Tips page.
You will see two options: Discounts and Free Shipping. Let’s start with Discounts.
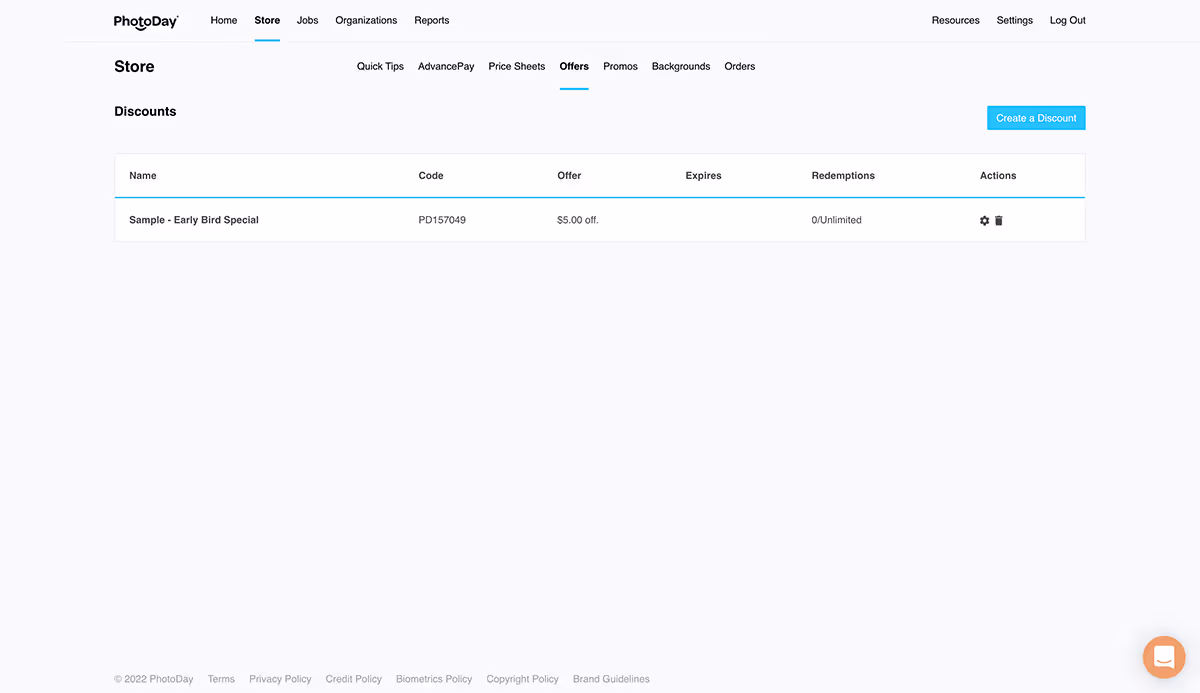
Click the Discount icon to view the Discounts page. Here is a list of discount offers you have created. It might be completely empty if you’ve never been here before, so let’s go ahead and change that by creating a discount. Click the “Create a Discount” button.
This will open the Create a Discount Offer window where you can define and customize your new discount offer.
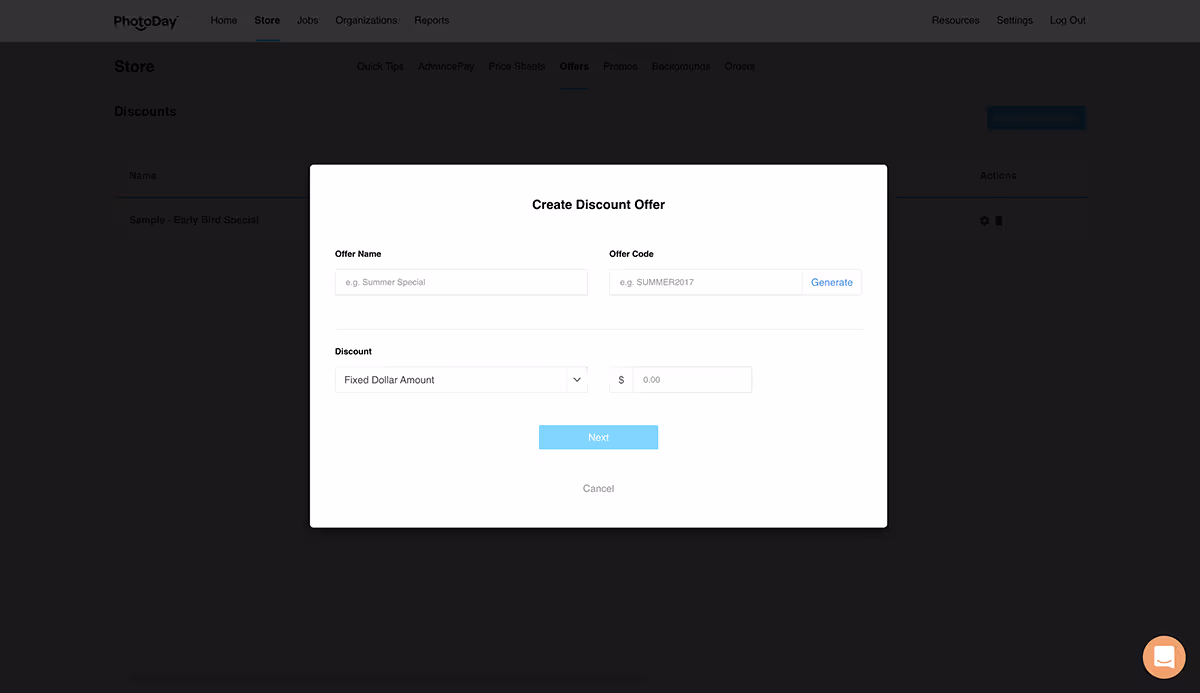
First, give your offer a name (this is only for your reference) and assign it a unique offer code (this is what your customer will see and use). Try and make it something memorable for your customers, as they’ll be tasked with entering it during checkout to apply the discount to their order! You can also click the Generate button and PhotoDay will auto-generate an offer code for you.
Next, click the drop-down menu to choose whether you want your discount to be a fixed dollar amount subtracted from the order subtotal or a percentage subtracted from the order subtotal. Depending on which option you choose, enter either a dollar amount or a percentage amount in the field to the right.
Once you have that information completed, click the Next button to be brought to the second part of the discount set up process.
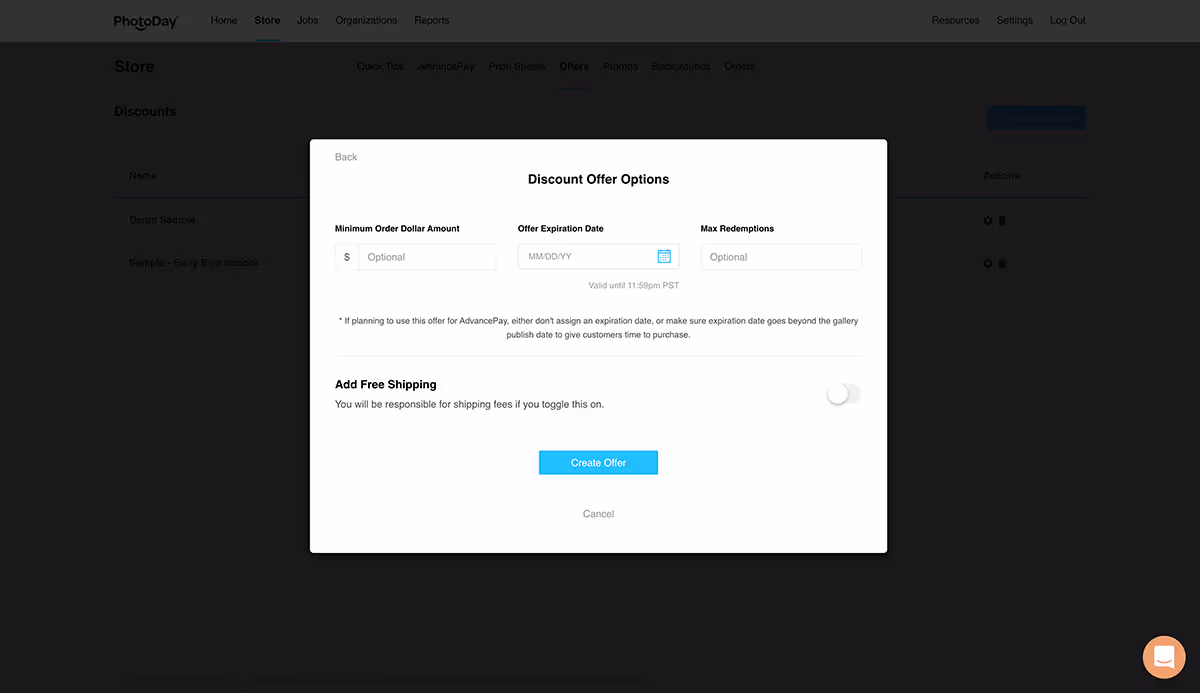
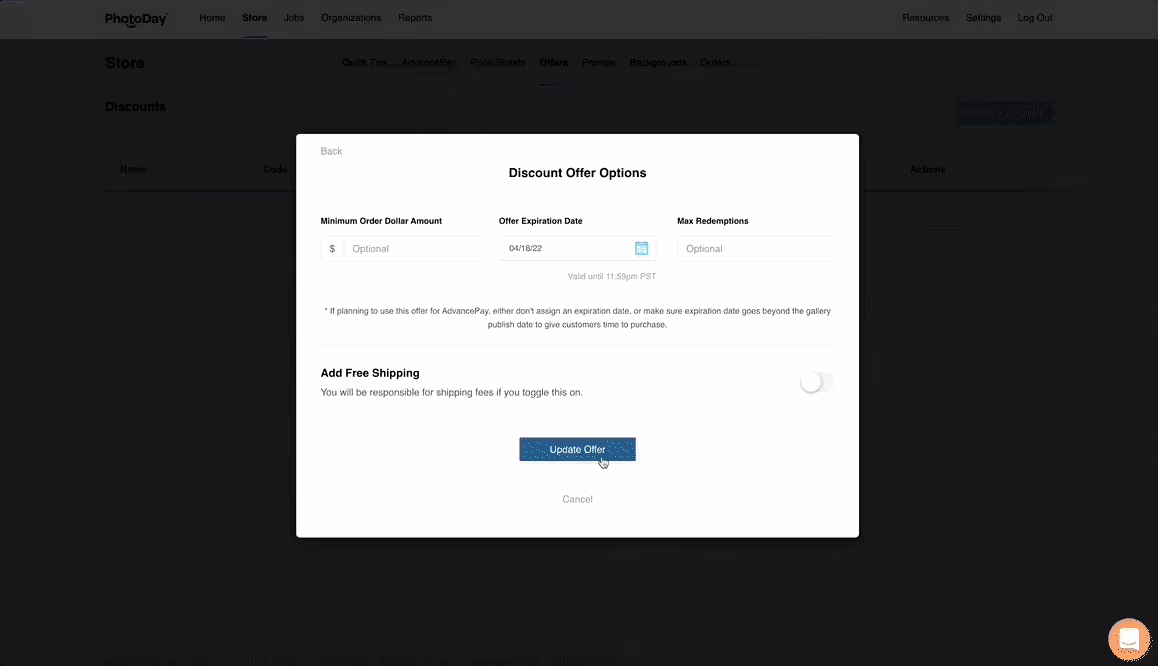
Here, you can further refine the offer by defining a minimum order amount, an expiration date, or maximum redemptions. Minimum order amounts can be used to encourage customers to add more items to their order, expiration dates can create a sense of urgency to order as soon as possible, and maximum redemptions incentivizes your early bird customers. You also have the option to add free shipping to your discount offer.
Helpful Tip: If you are planning to use this offer for AdvancePay, either don't assign an expiration date or make sure the expiration date goes well beyond the gallery publish date to give customers time to purchase.
Once you have your discount offer set up to your liking, click Create Offer, and it will be added to your list of available discounts.
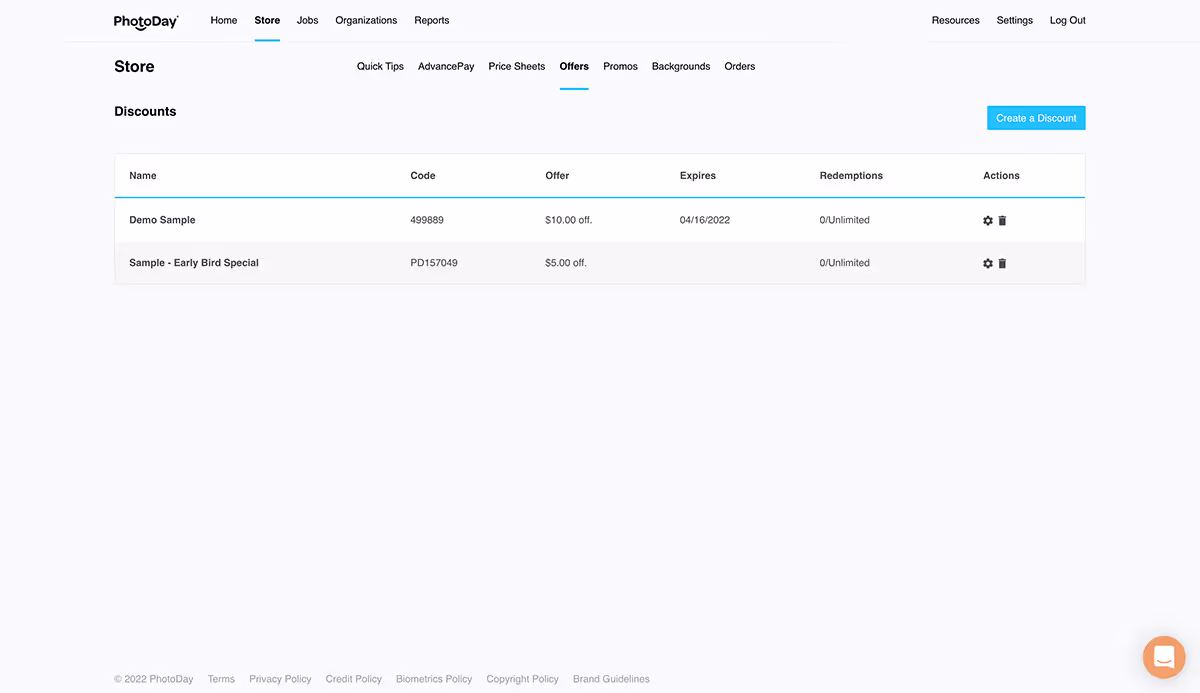
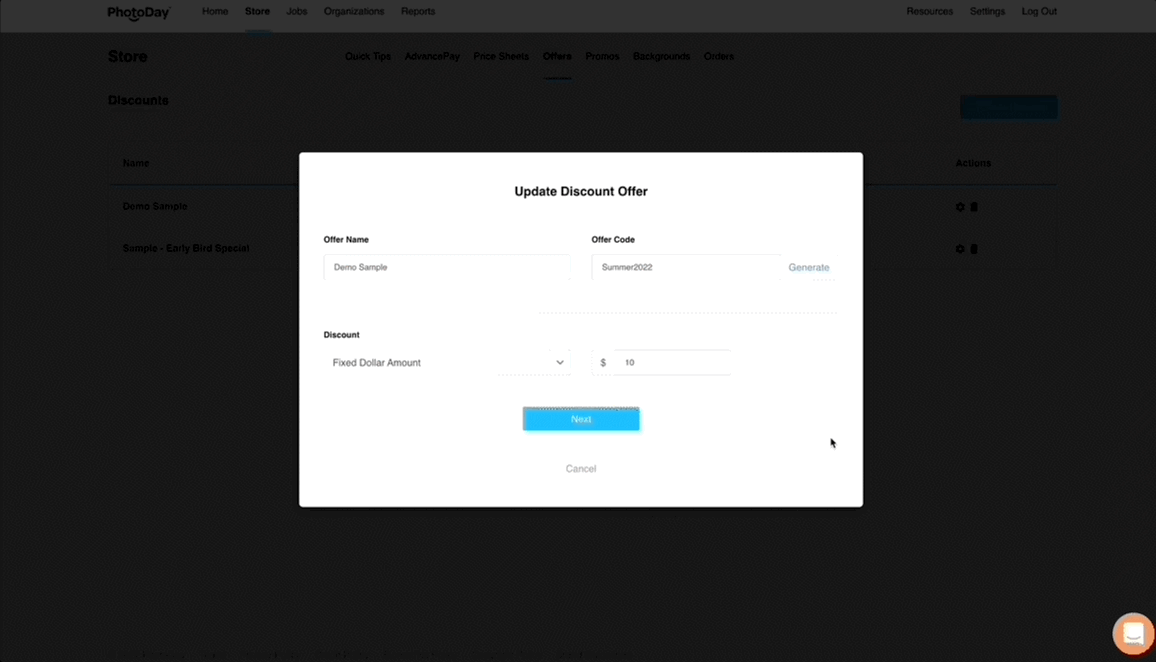
The Discounts page will now show you an overview of your offers. You can easily view the name, code, offer description, expiration date, and redemptions for each offer. Click the gear icon to edit an existing offer or click the trashcan icon to delete.
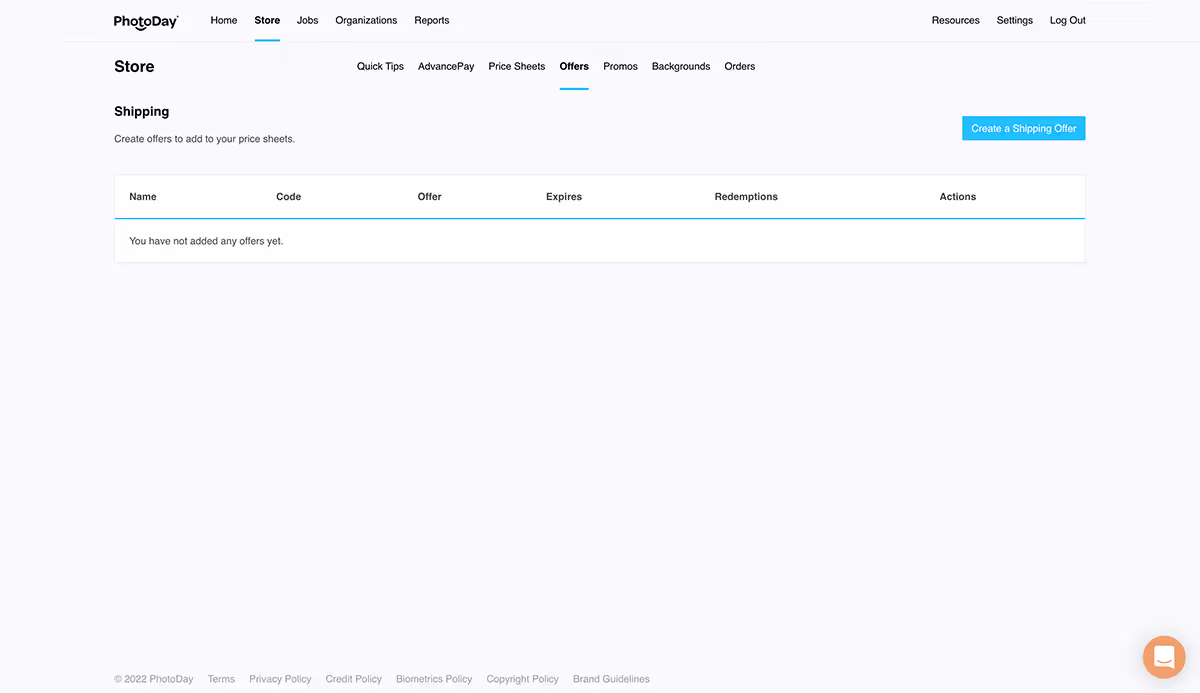
Now it’s time to create a separate free shipping offer. Navigate back to your Offers page and click the Free Shipping icon.
This will take you to the Shipping page. Here is a list of free shipping offers you have created. It might be completely empty if you’ve never been here before, so click the Create a Shipping Offer button.
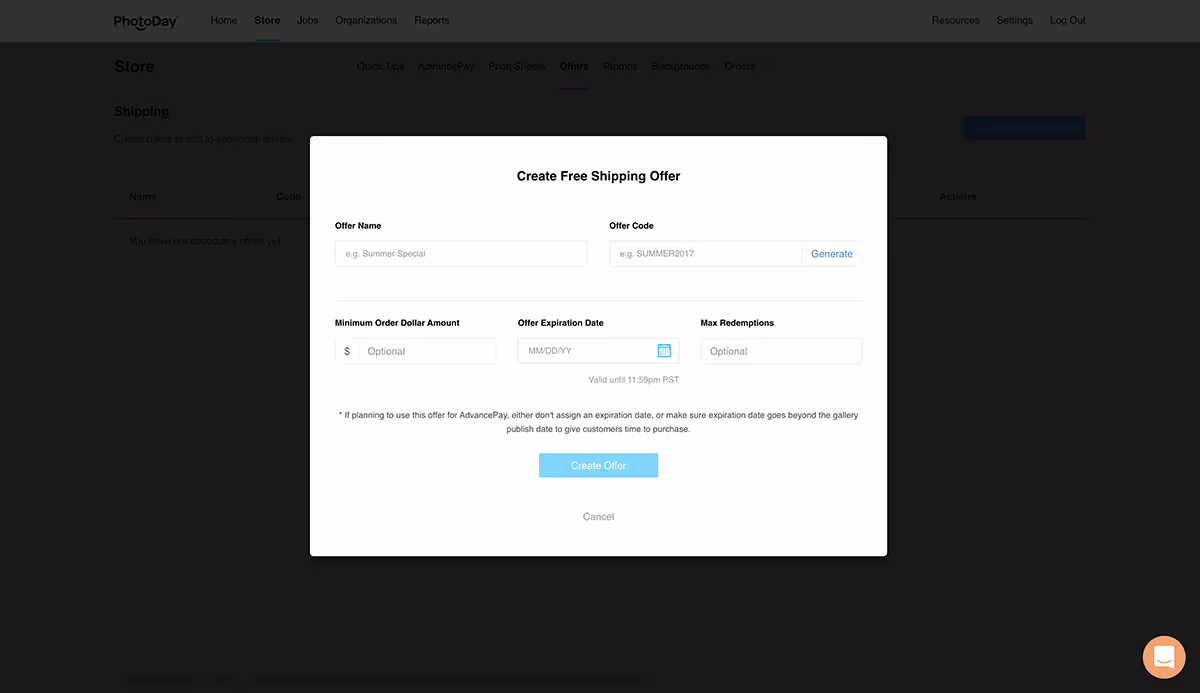
This will open the Create a Free Shipping Offer window where you can specify the parameters of this offer. As with discount offers, you will need to give this free shipping offer a name and an offer code. You can also optionally indicate a minimum order subtotal amount for the order to apply, an expiration date, and a maximum number of redemptions.
Helpful Tip: If you are planning to use this free shipping offer for AdvancePay, either don't assign an expiration date or make sure the expiration date goes well beyond the gallery publish date to give customers time to purchase.
Once you’re done setting up the offer, click Create Offer, and it will be added to your list of free shipping offers!
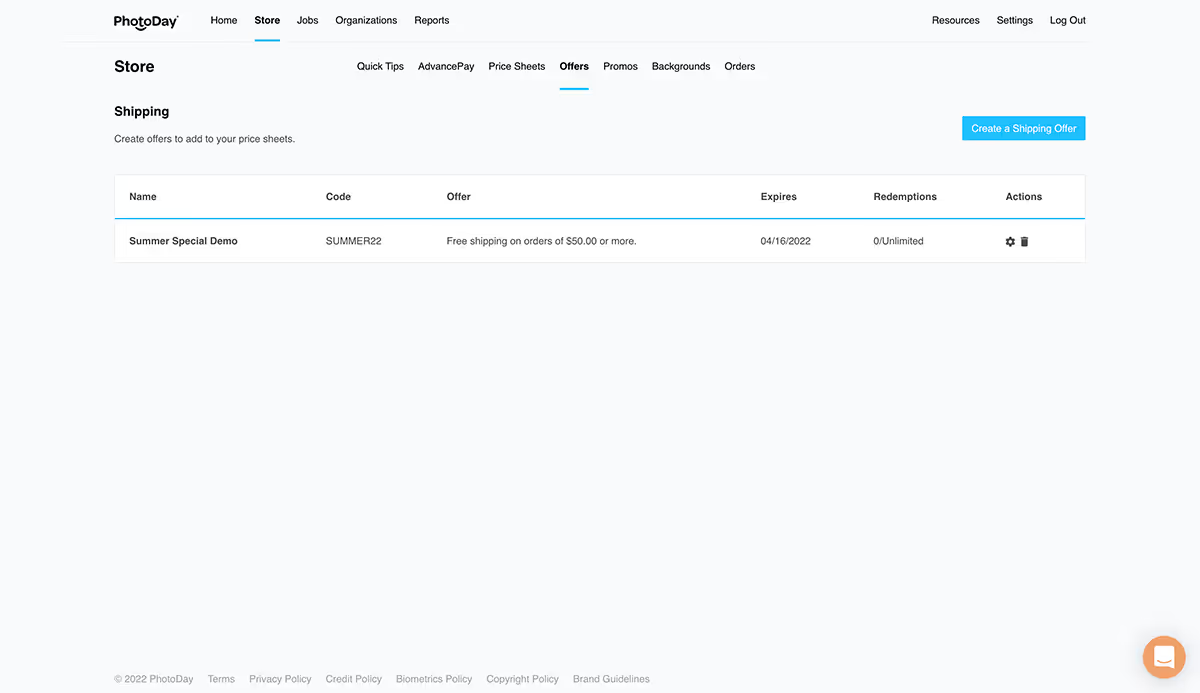
The Shipping page will now show you an overview of your offers. You can easily view the name, code, offer description, expiration date, and redemptions for each offer. Click the gear icon to edit an existing offer or click the trashcan icon to delete.
AdvancePay Offers
Incentivize your customers to get a jump start on picture day by attaching an offer to your gallery while it’s in AdvancePay Status. This allows you to start the sales cycle early, and reward customers with an offer they can’t refuse.
If you would like to add an offer with AdvancePay to a particular job, here’s how. Go to the Job > Settings > Store > AdvancePay Credits and select one of your pre-created offers from the next drop-down menu or click “add a new AdvancePay offer.”
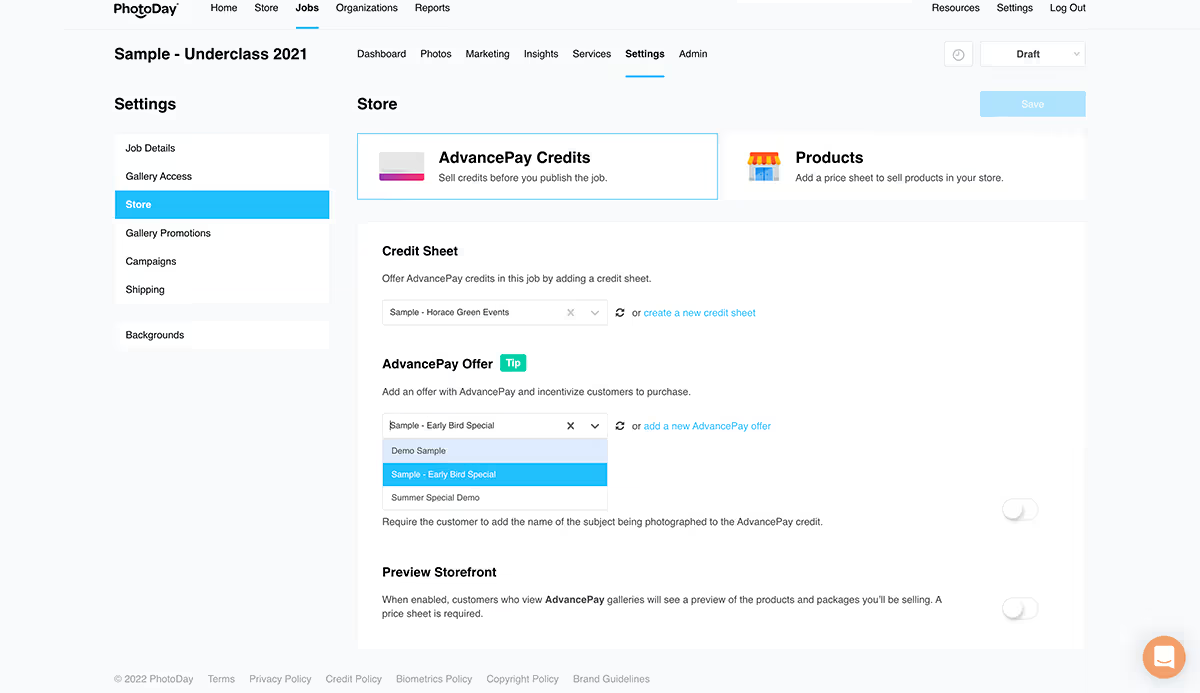
When creating or selecting an offer that's going to be used specifically for AdvancePay, we have some important recommendations!
- It's important not to set an expiration date for AdvancePay offers. The offer code is a coupon, and it cannot be used past the expiration date, just like a coupon. The ability to receive the coupon stops when the gallery status is updated from AdvancePay to Published. However, the offer needs to remain active and redeemable in order for customers to use it whenever they want. If the code expired when you published, they never would have a chance to order and use the offer code.
If you do want to set an expiration date for the offer, we suggest not expiring offer codes for at least 6 weeks after the gallery has been published. This keeps customers happy and ordering simple.
- Minimum order amounts can be used to encourage customers to add more items to their order. Since offers are global, this can help protect you in the event that any customers decide to share the code with someone else.
- We do not recommend setting a maximum redemption since it can create a negative customer experience if they purchased an AP credit, go to use their offer, and it's unavailable to them.
Gallery Offers
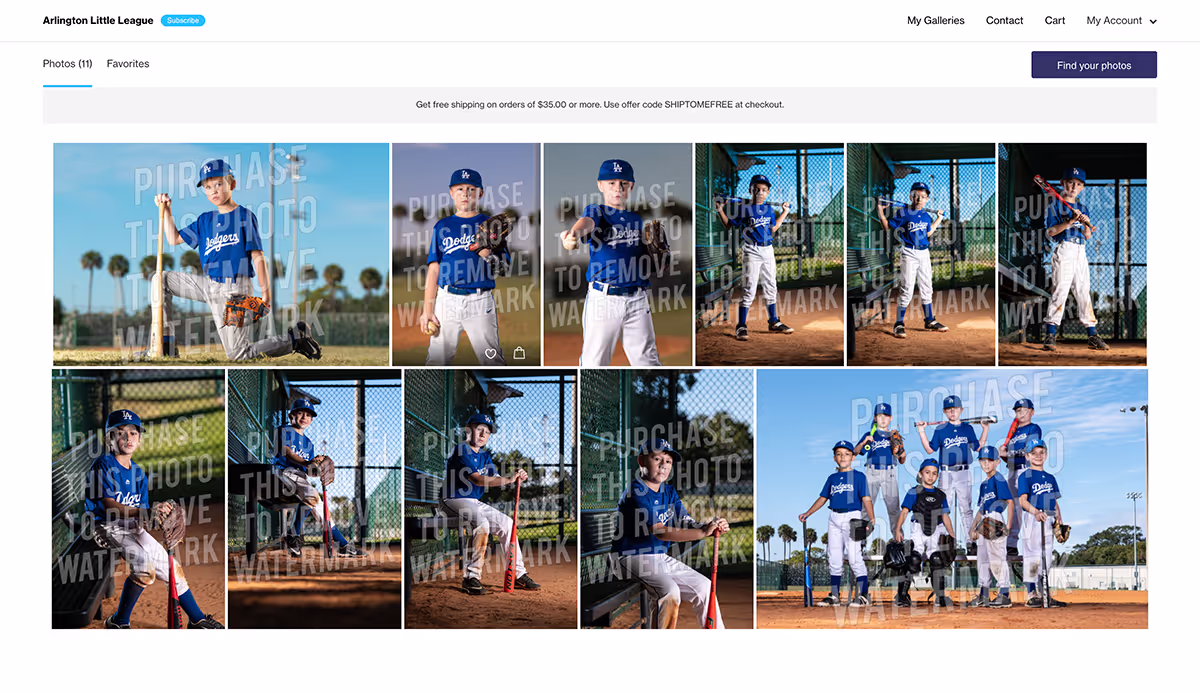
The Gallery Offers feature allows you to attach an offer to a published gallery. A banner will display at the top of the gallery as customers are shopping. It will also be included in any automatic marketing sent to your customers. All customers will have access to this offer. If your offer has a minimum order rule, PhotoDay will prompt your customer to add more to their cart to redeem the offer! It’s the perfect way to offer all of your customers a special deal for a limited time.
Gallery offers can only be accessed within each individual job. To get started, open a Job > Settings > Gallery Promotions.
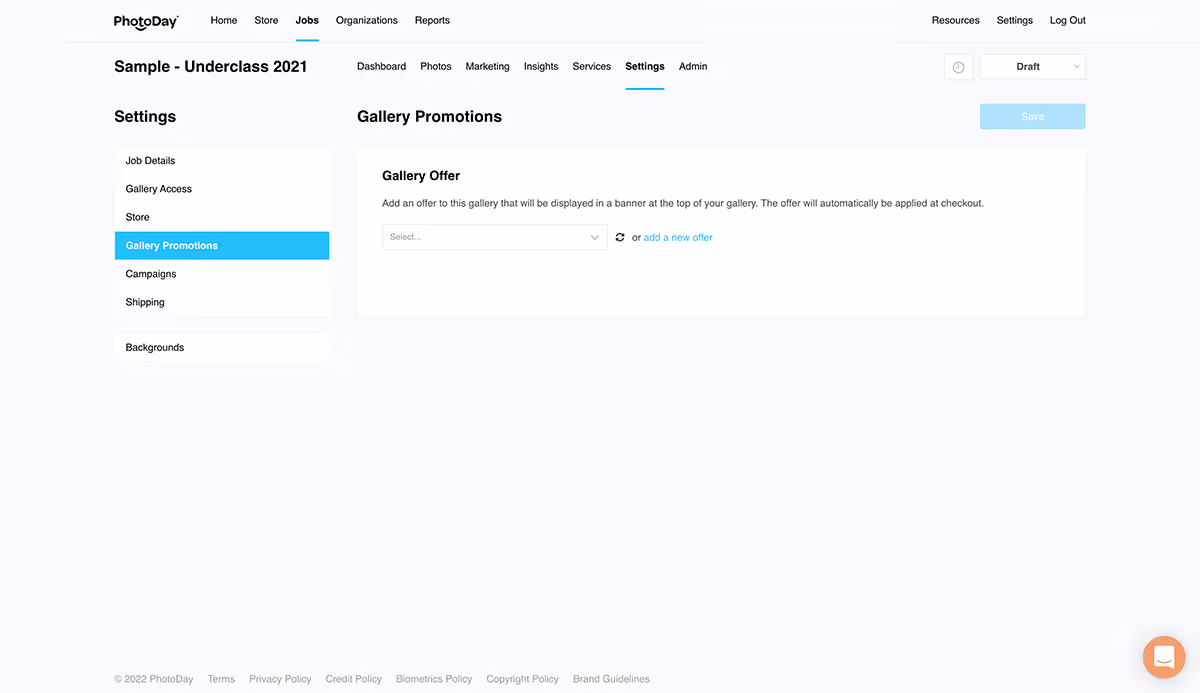
Select one of your pre-created offers from the next drop-down menu or click on “add a new offer.” Click on the blue Save button when you’re done.

Custom SMS Promos
While PhotoDay makes sure to cover nearly all of a studio’s promotional needs and direct contact with their customers, there are times when a studio might require extra communications—for example: flash sales, new photos uploaded, best price series, etc. That's where custom sms promos come in!
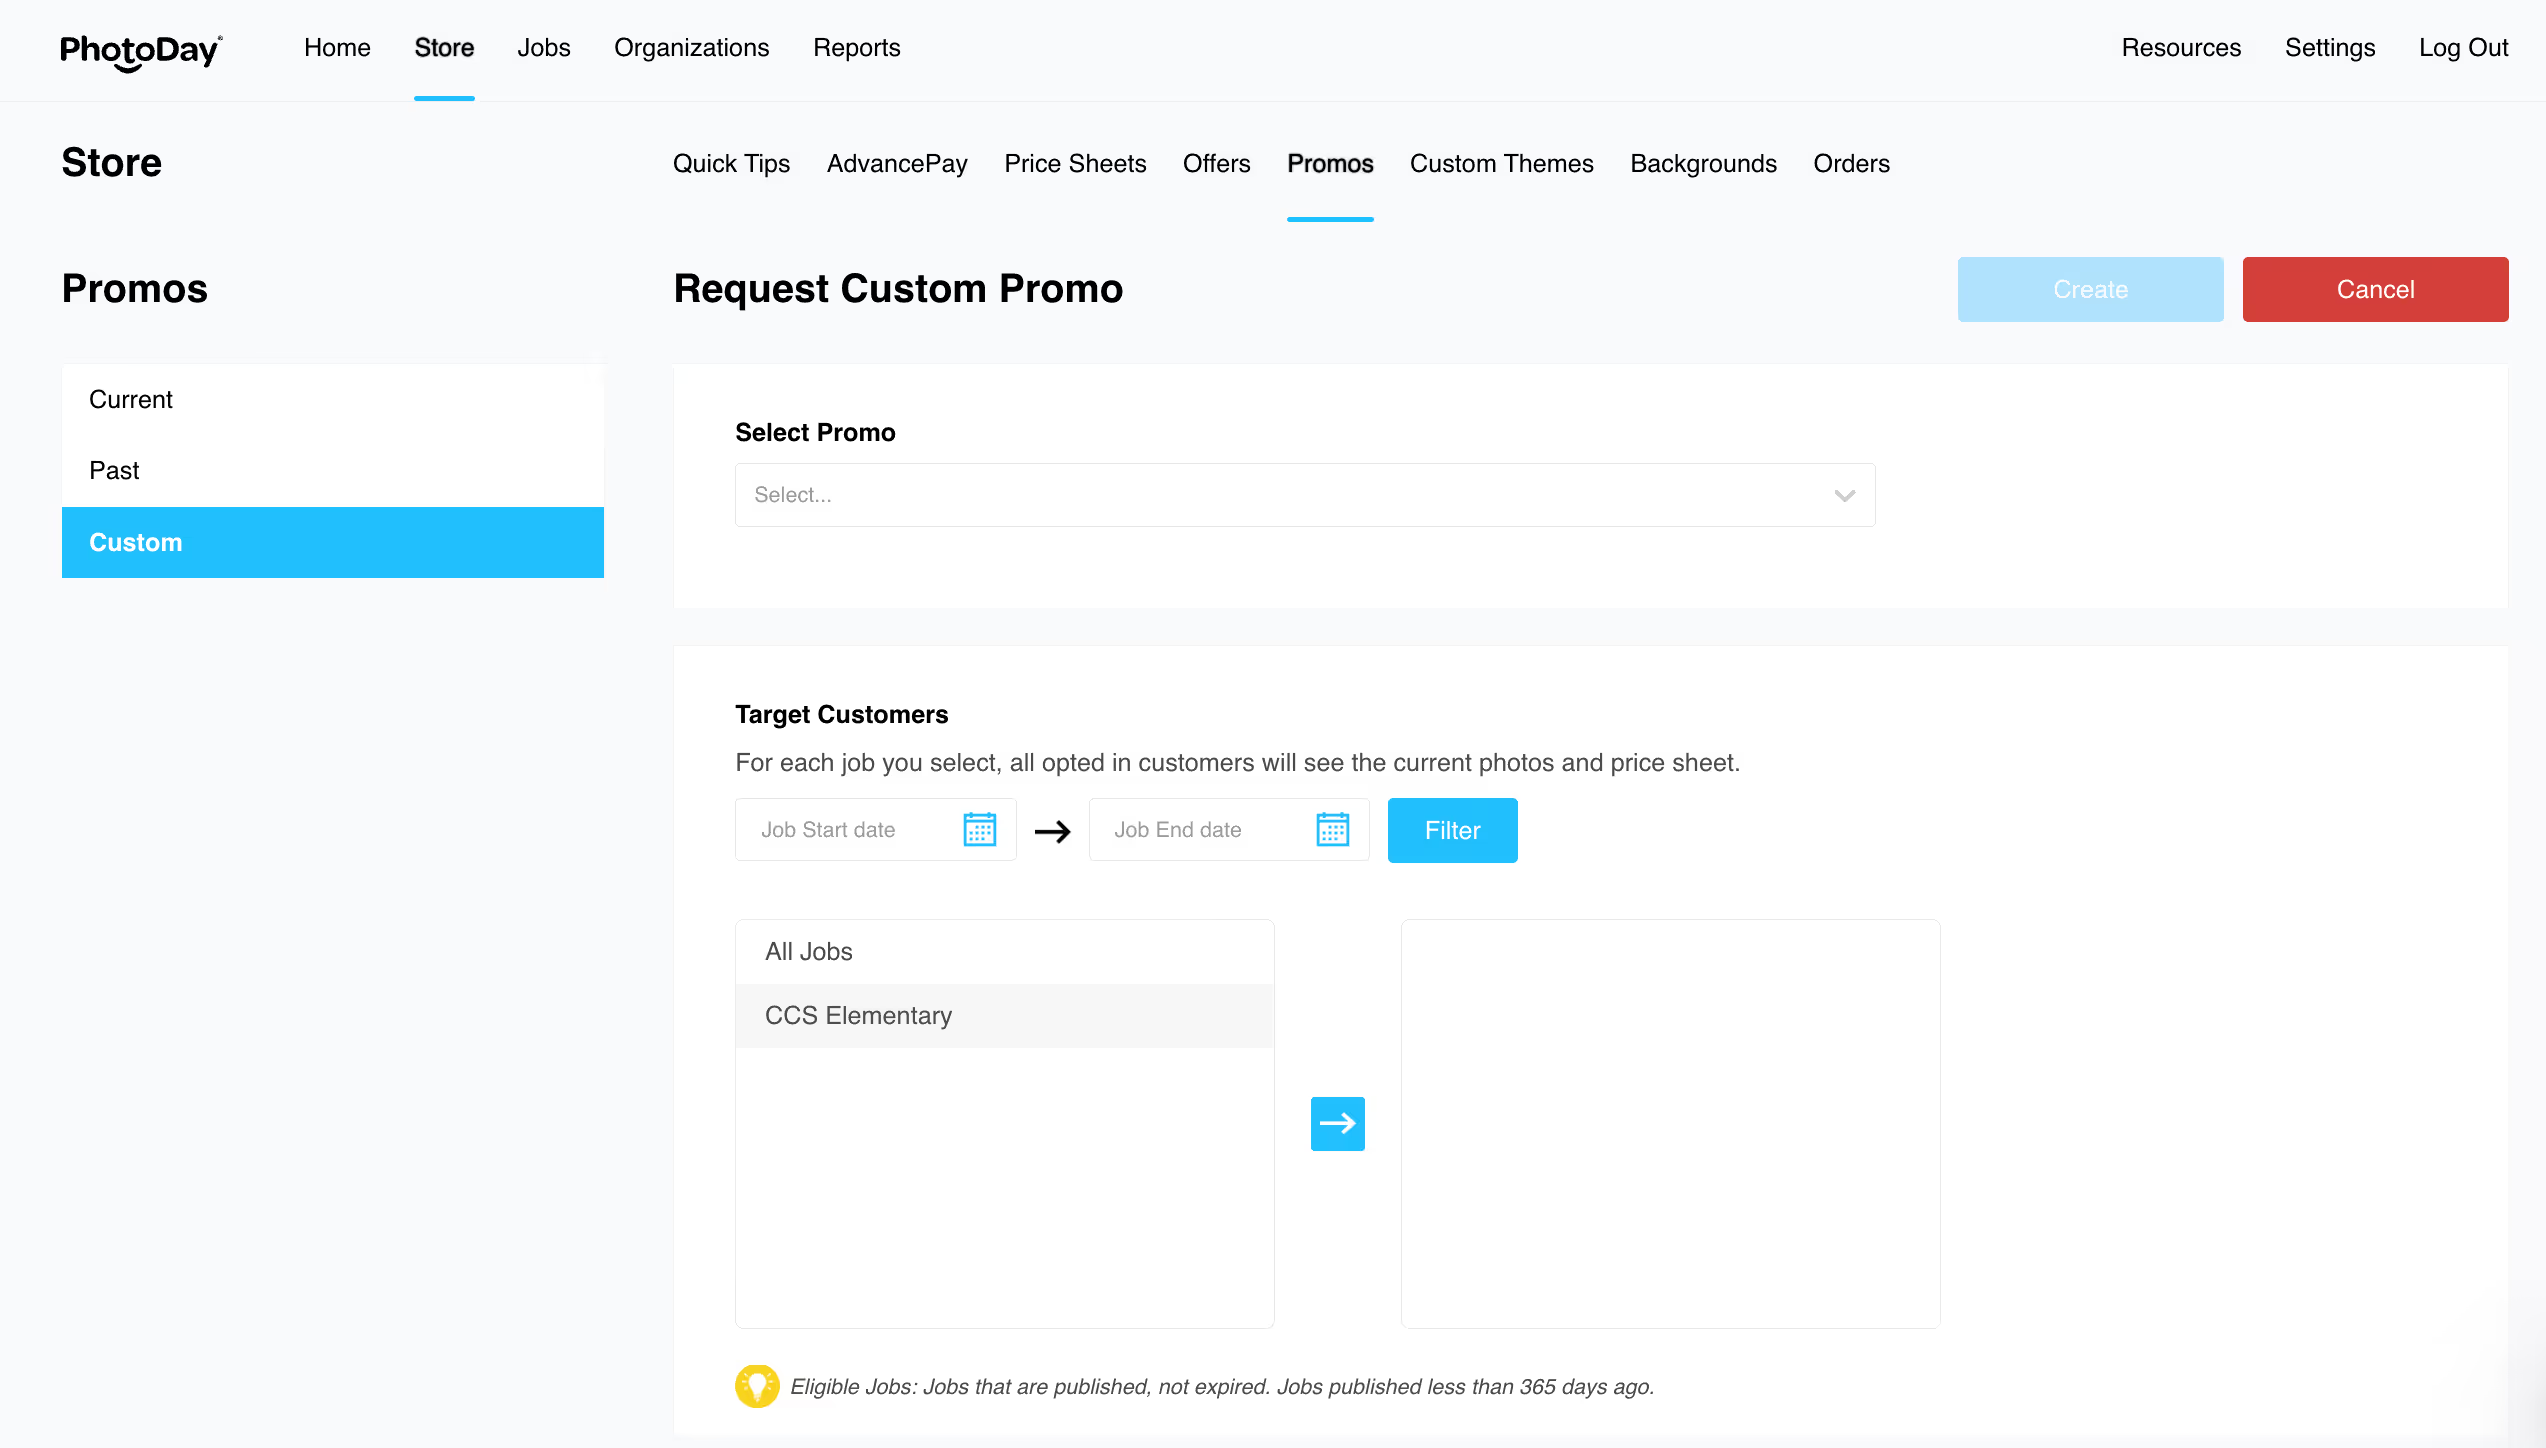
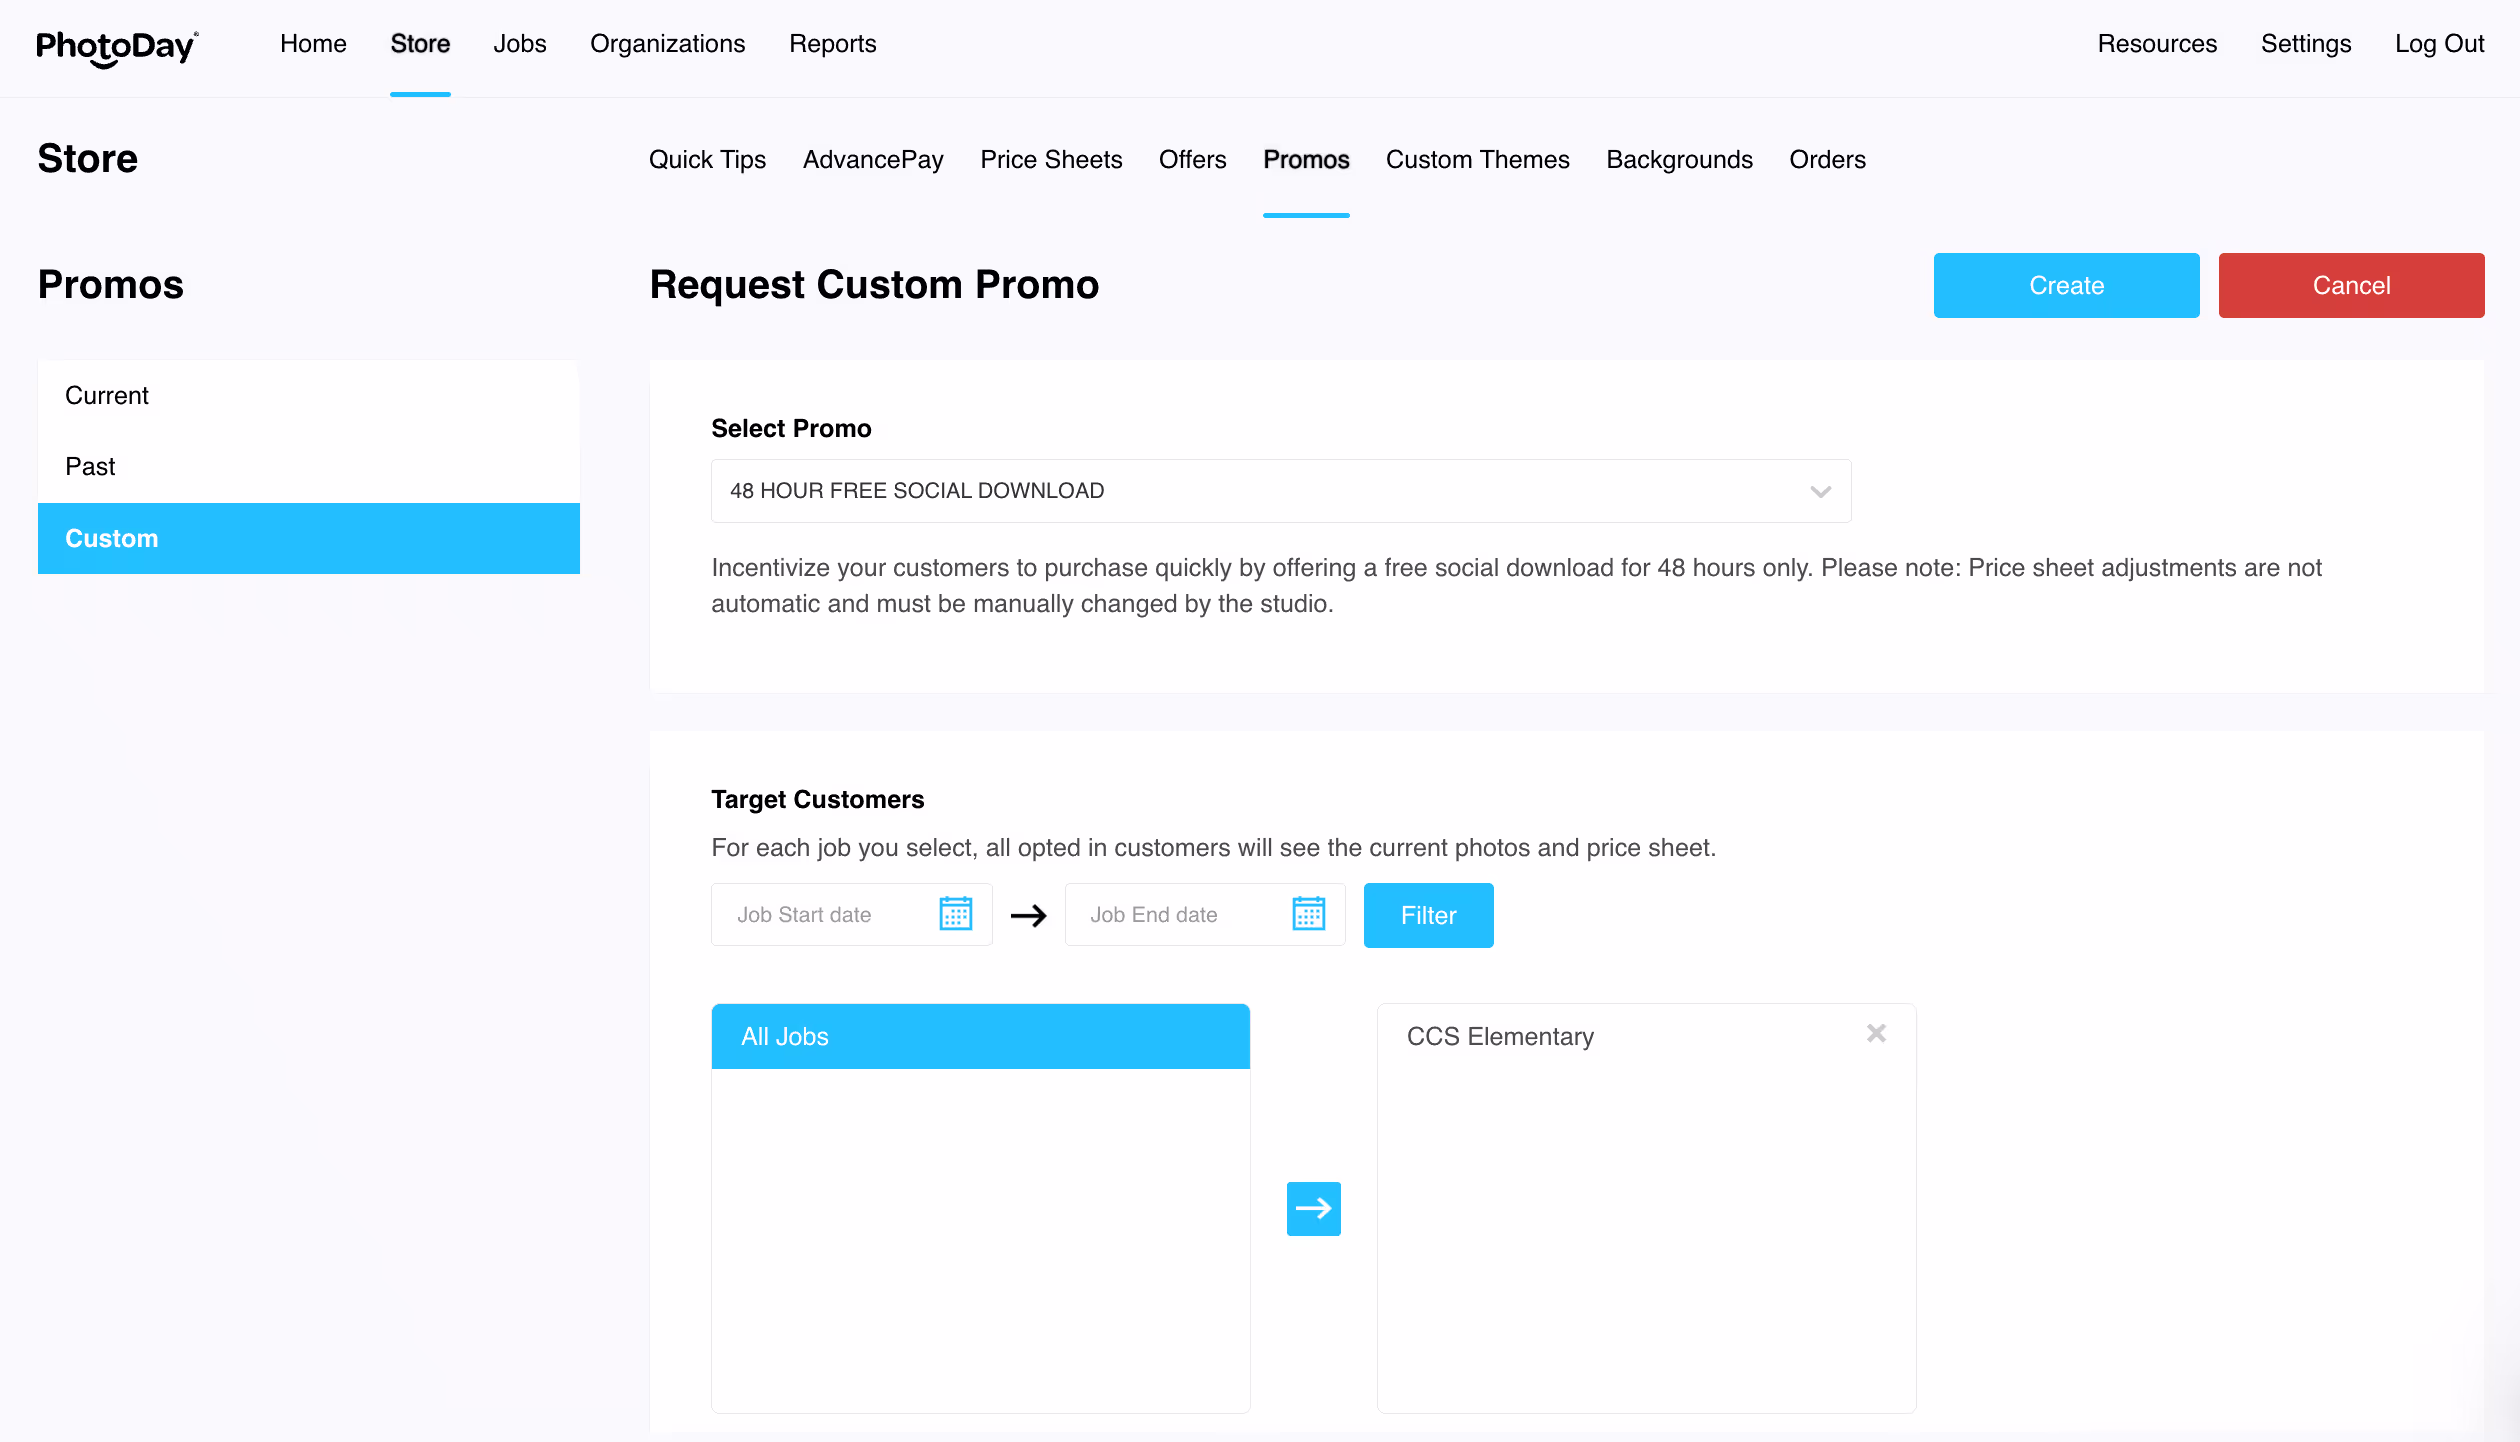
Under Store > Promos > Custom, you'll find the area to request these custom messages.
Custom messages can be requested on a per-need basis directly in the Studio Panel. Please review the following guidelines for custom SMS requests before requesting:
- Messages are sent only to customers who have not yet ordered and/or to customers with unused AdvancePay credits.
- Galleries must be less than 365 days old to qualify.
- Once you’ve selected which message you want to request, follow the steps below to submit a request.
- Before submitting, be sure to double-check and confirm the custom campaign you've selected. Once submitted, a custom SMS request cannot be edited or canceled.
- If your custom text qualifies, it will be added to the schedule. The Customer Success team will reach out if there are any concerns.
- PhotoDay reserves the right to refuse a message request.
How to Request Custom SMS
In your Studio Panel, go to Store > Promos > Custom.
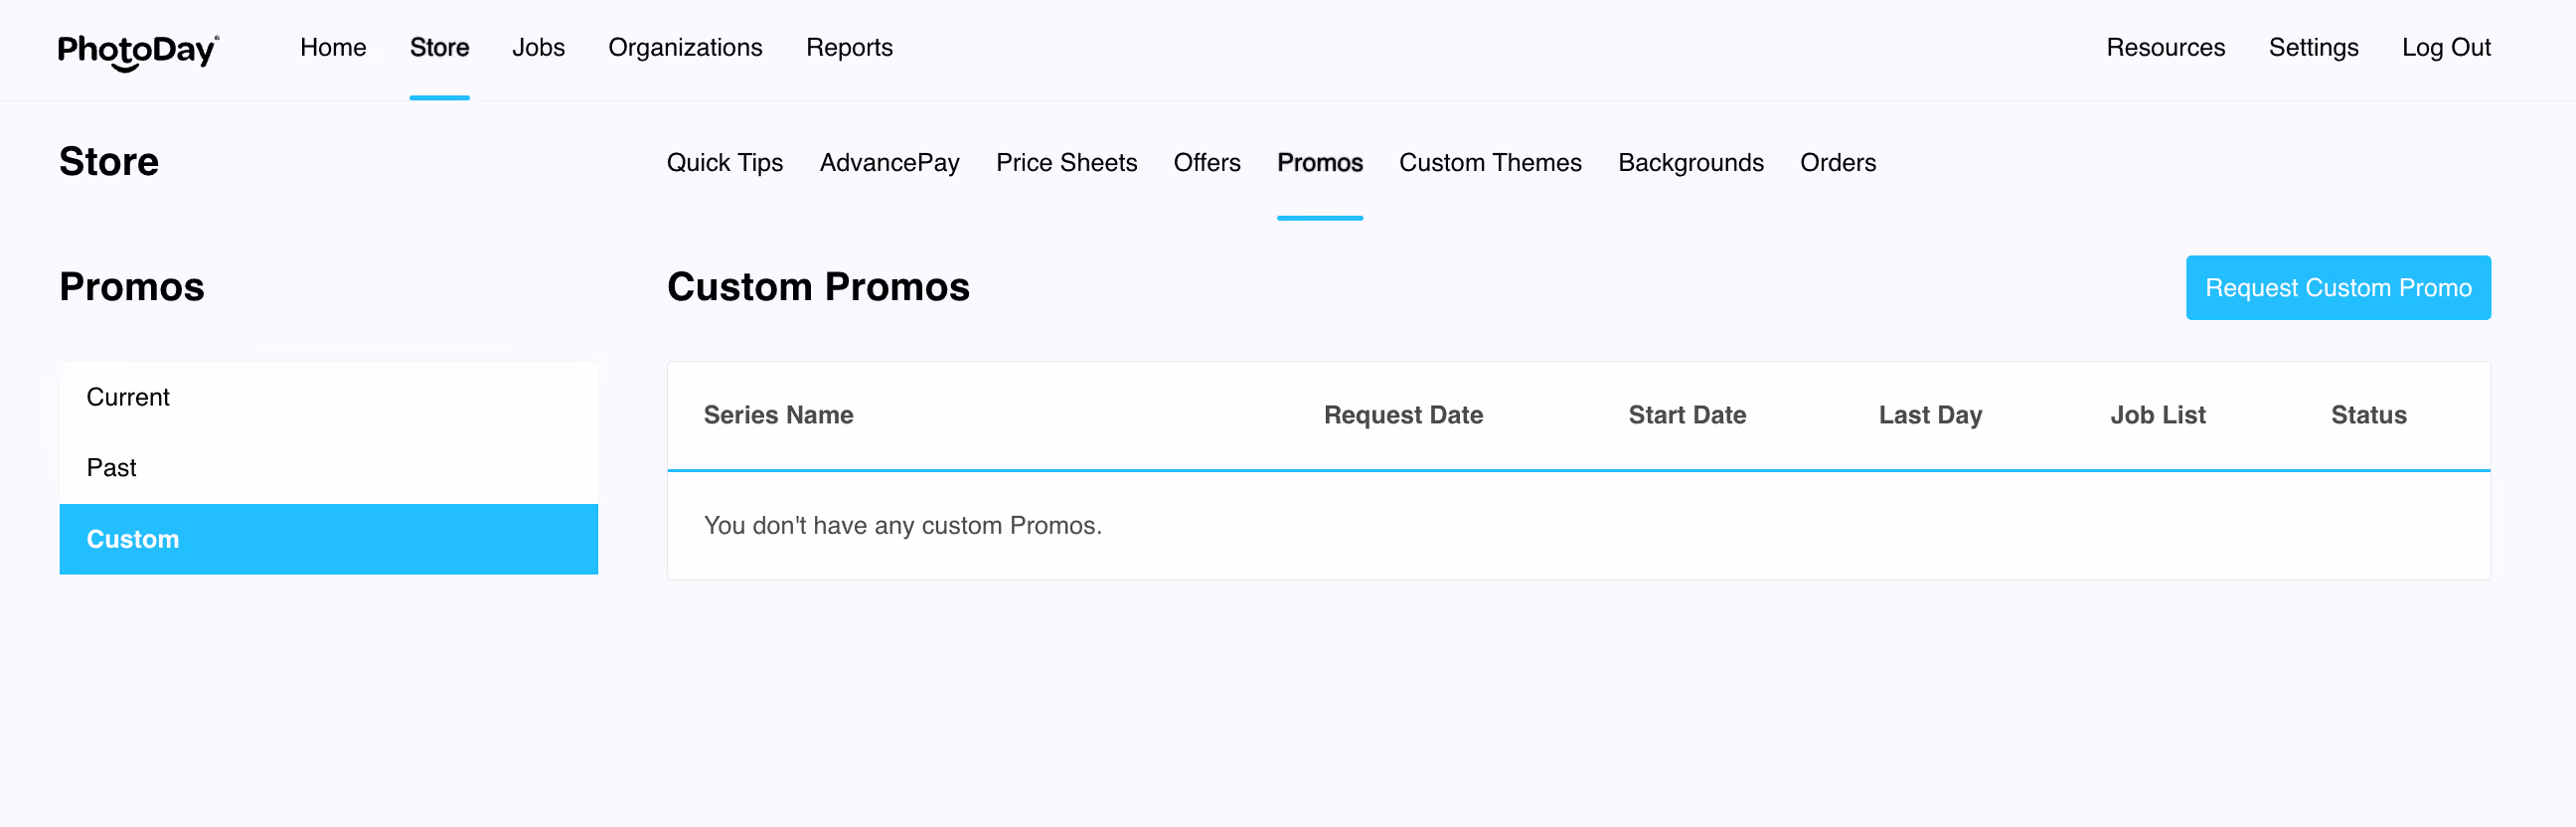
Click the blue Request Custom Promo button to open the request page.
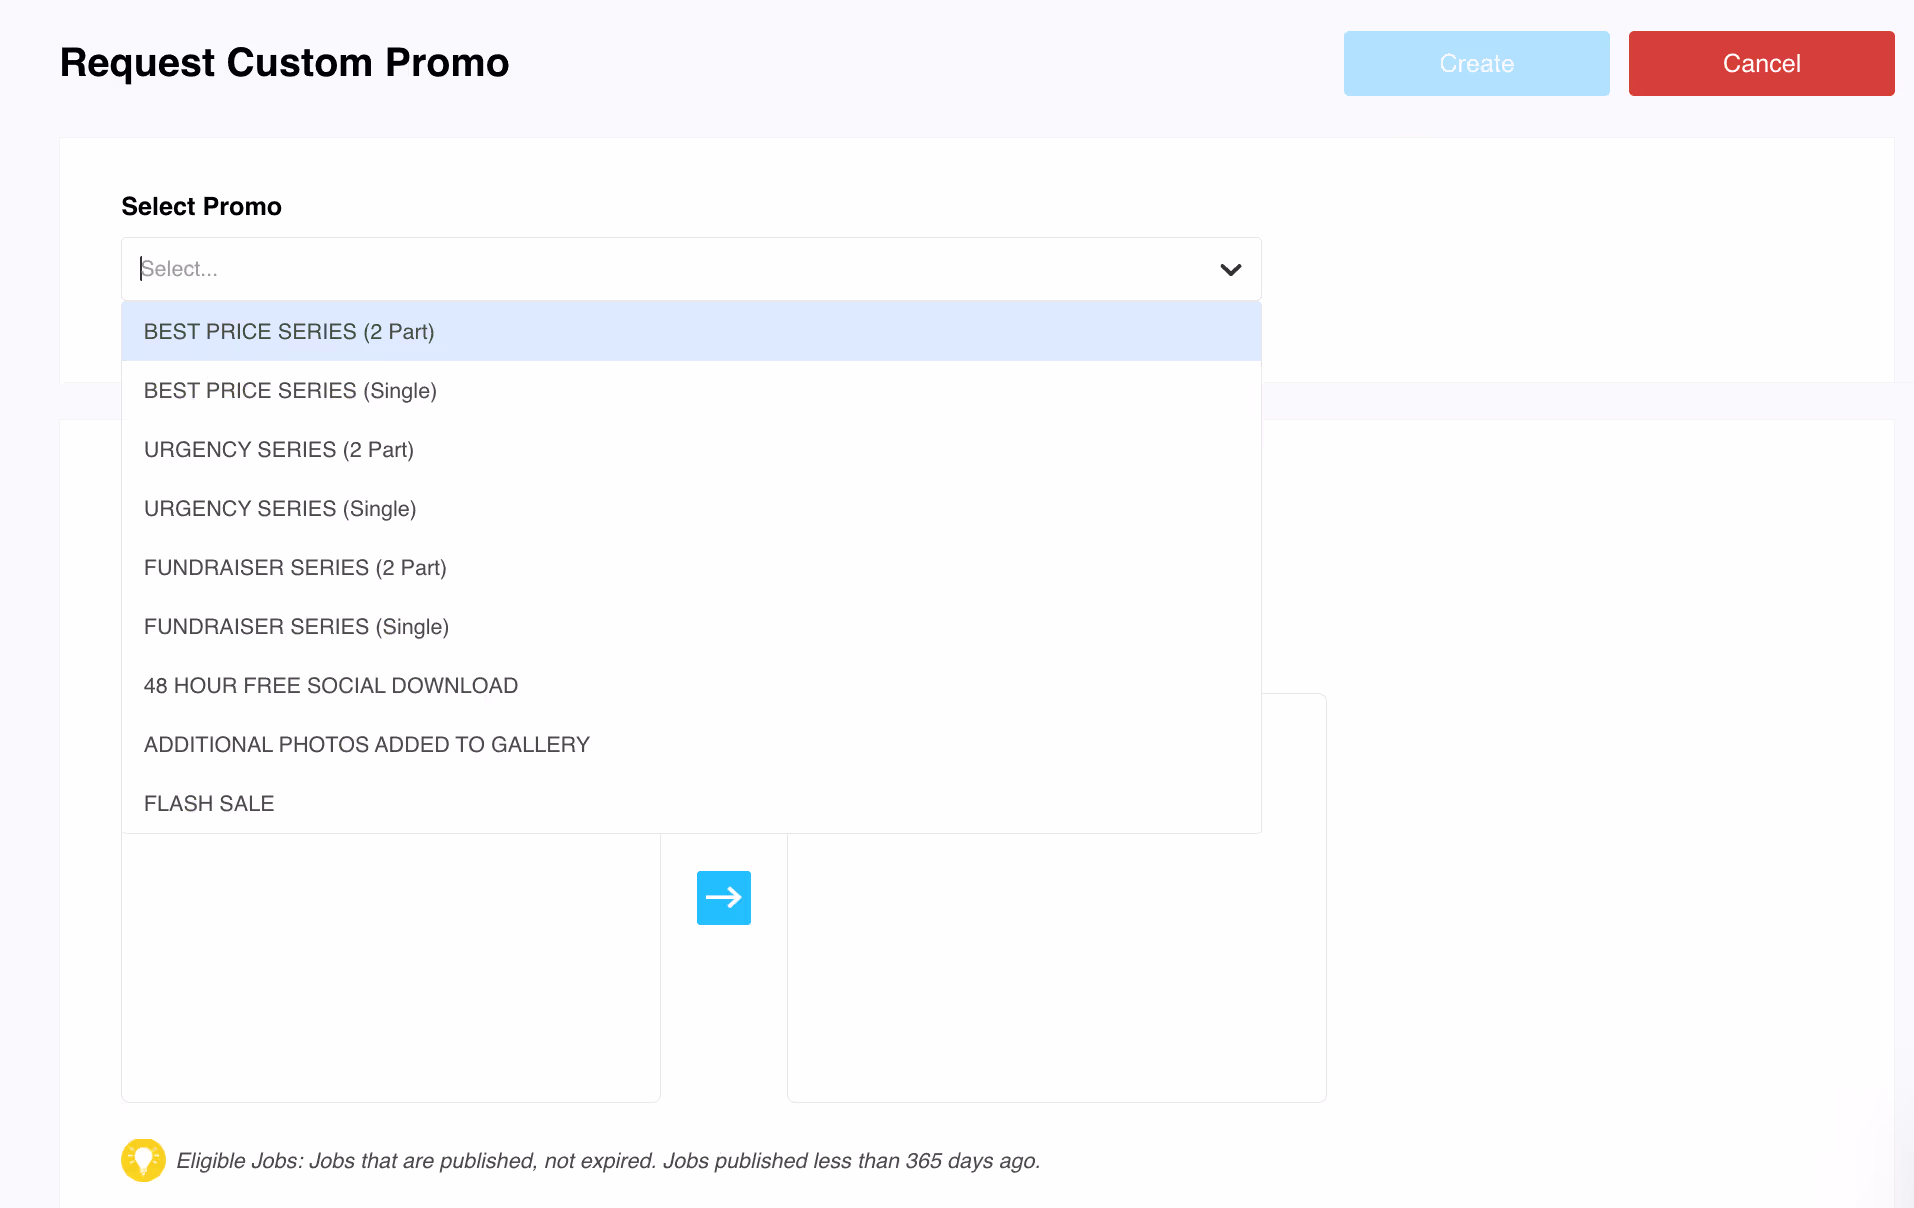
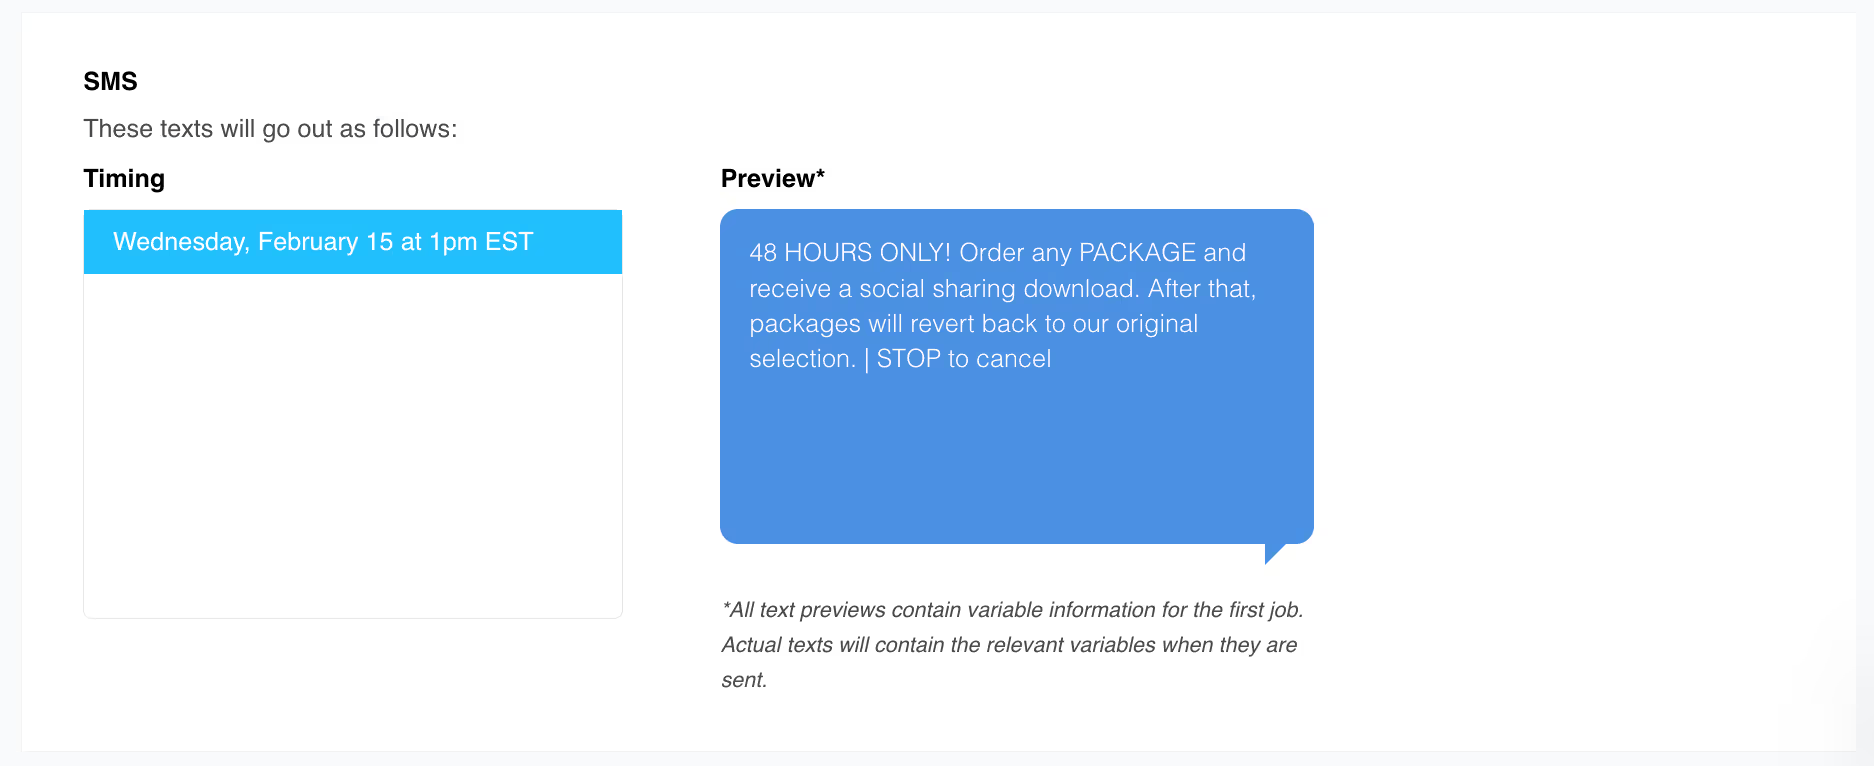
Select a promo series from the drop-down menu. You can review the different series here.
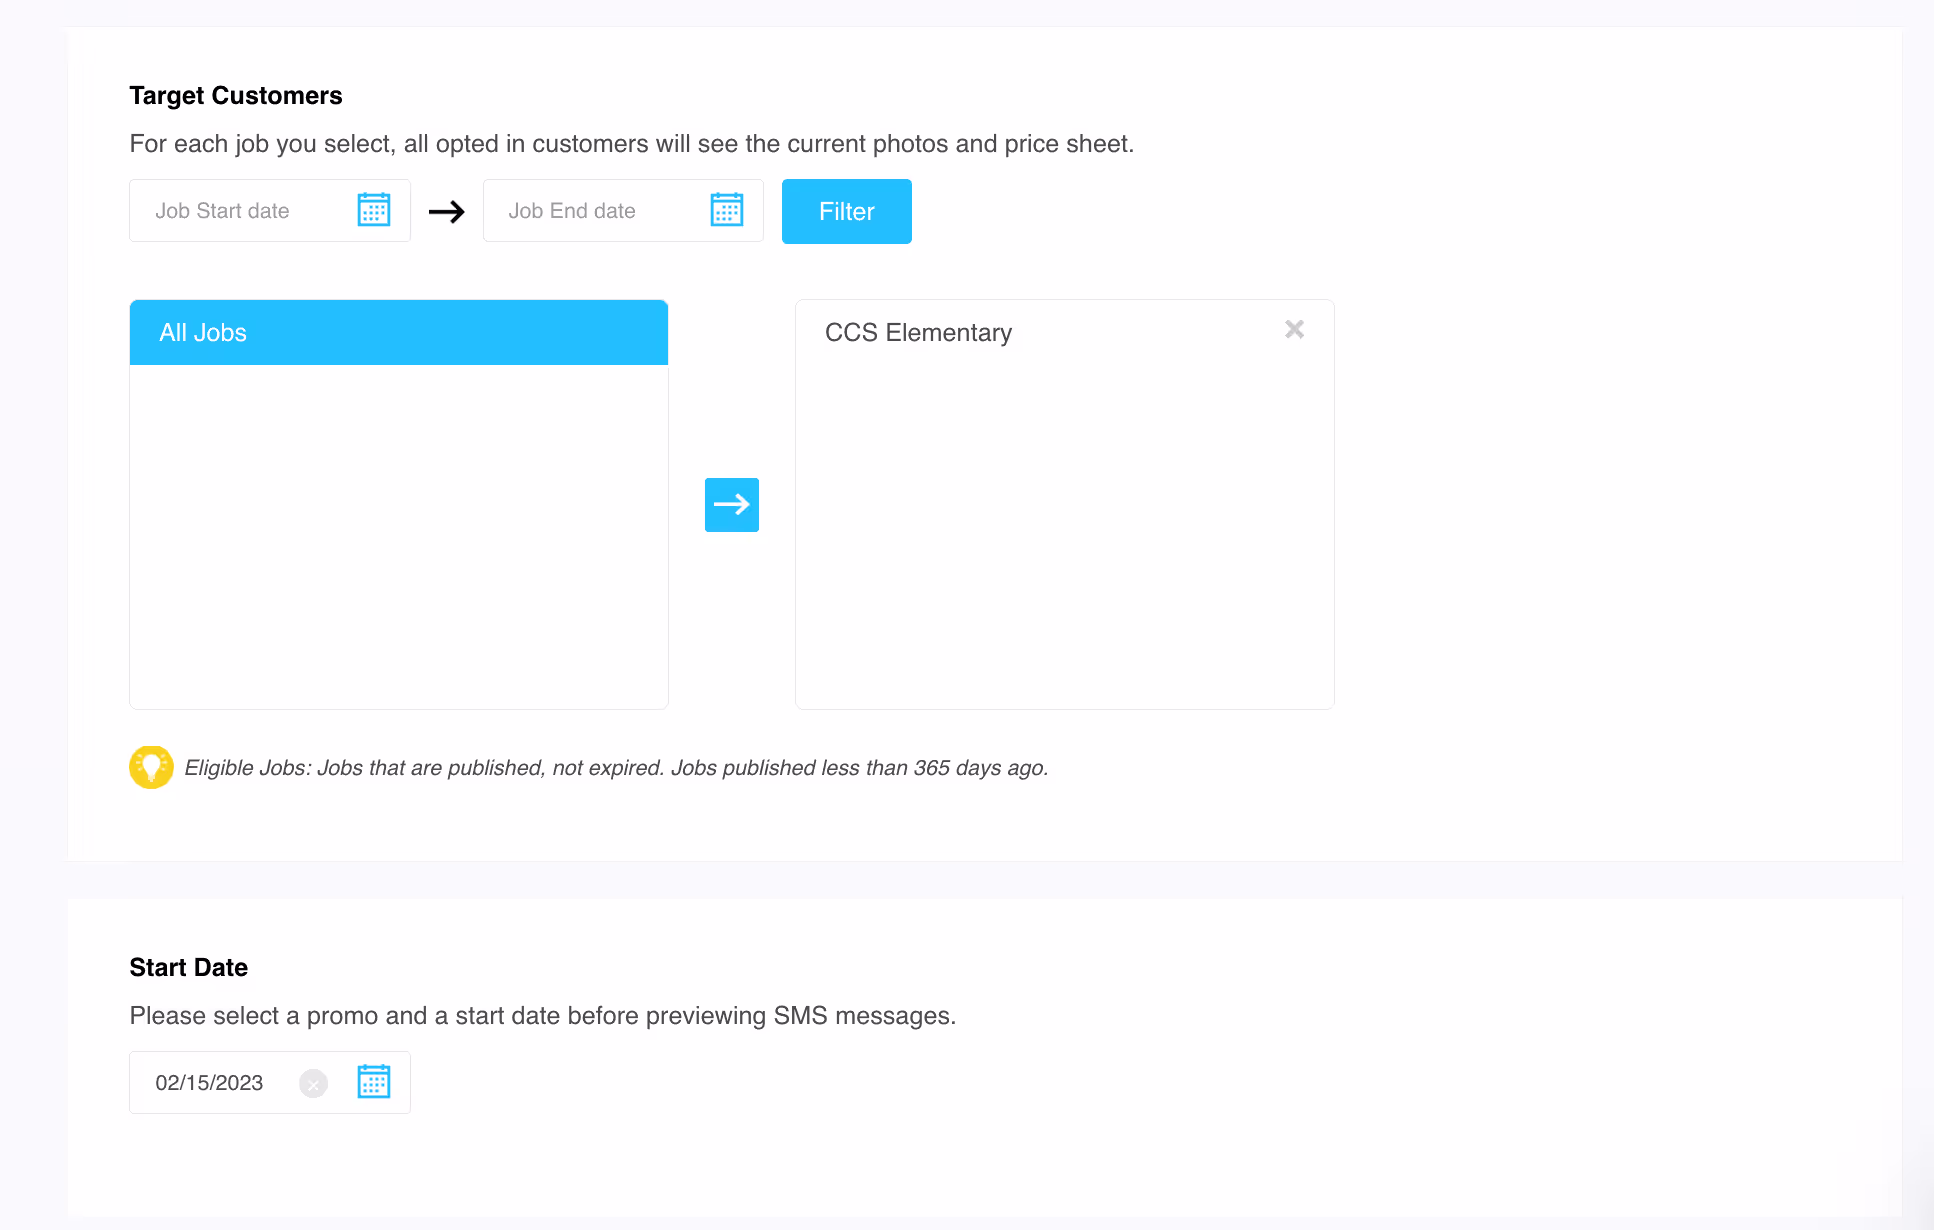
Next, target your customers by selecting the jobs you'd like to receive this custom promo. You can sort through jobs using the Job Start and End date filters. Jobs must be published less than 365 days ago and not expired or archived.
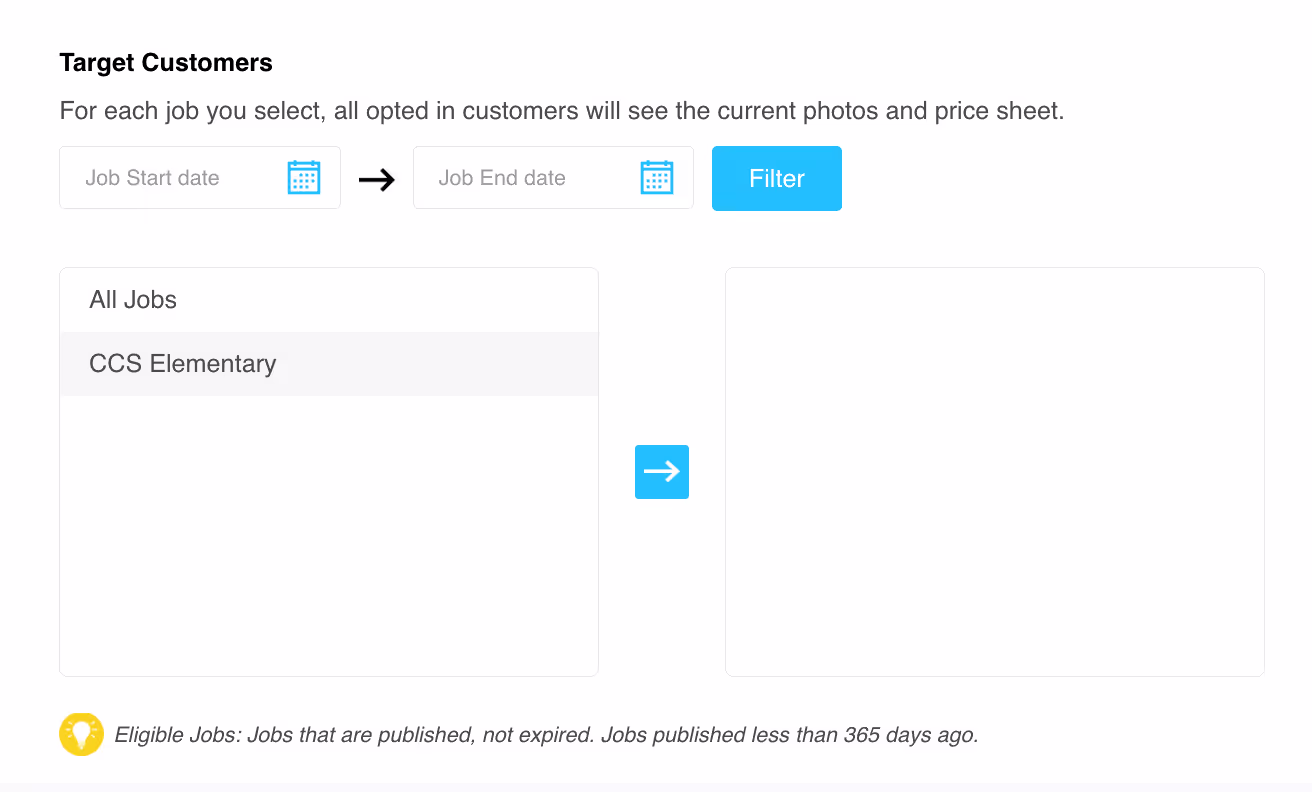
Select the job(s) and click the blue arrow to move them from the box on the left to the box on the right.
Next, Select a Start Date.
After selecting a promo and start date, a new section will populate below for you to preview the text messages.
The final step is to click the blue Create button at the top right of the page.
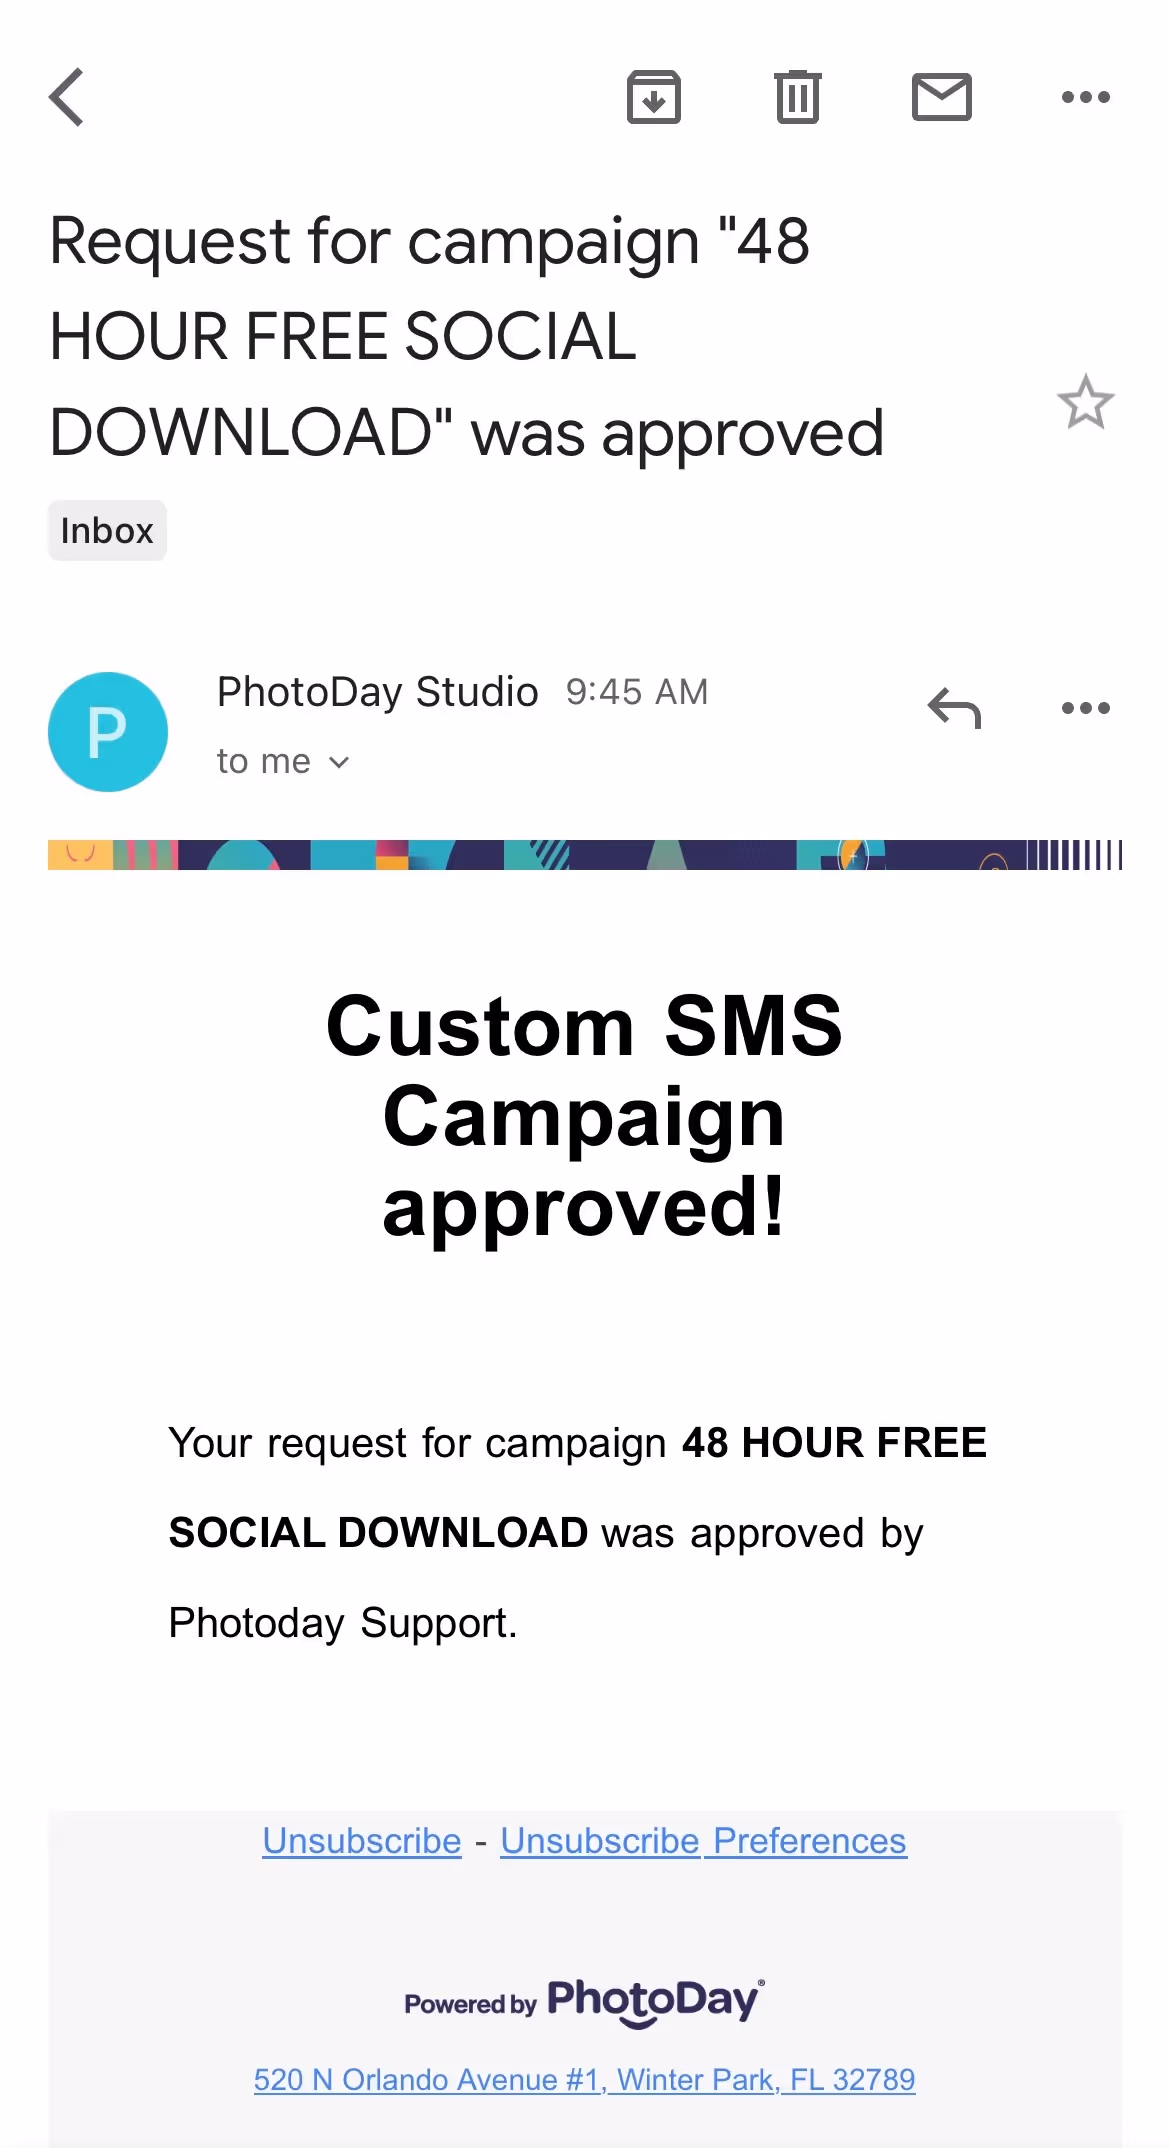
The Customer Success team will review your request and reach out if there are any concerns. Once approved, you will receive email confirmation.