Exports
One of the more helpful features associated with private galleries and their subject data is the ability to export your gallery's data in a variety of formats. There are five different types of exports.
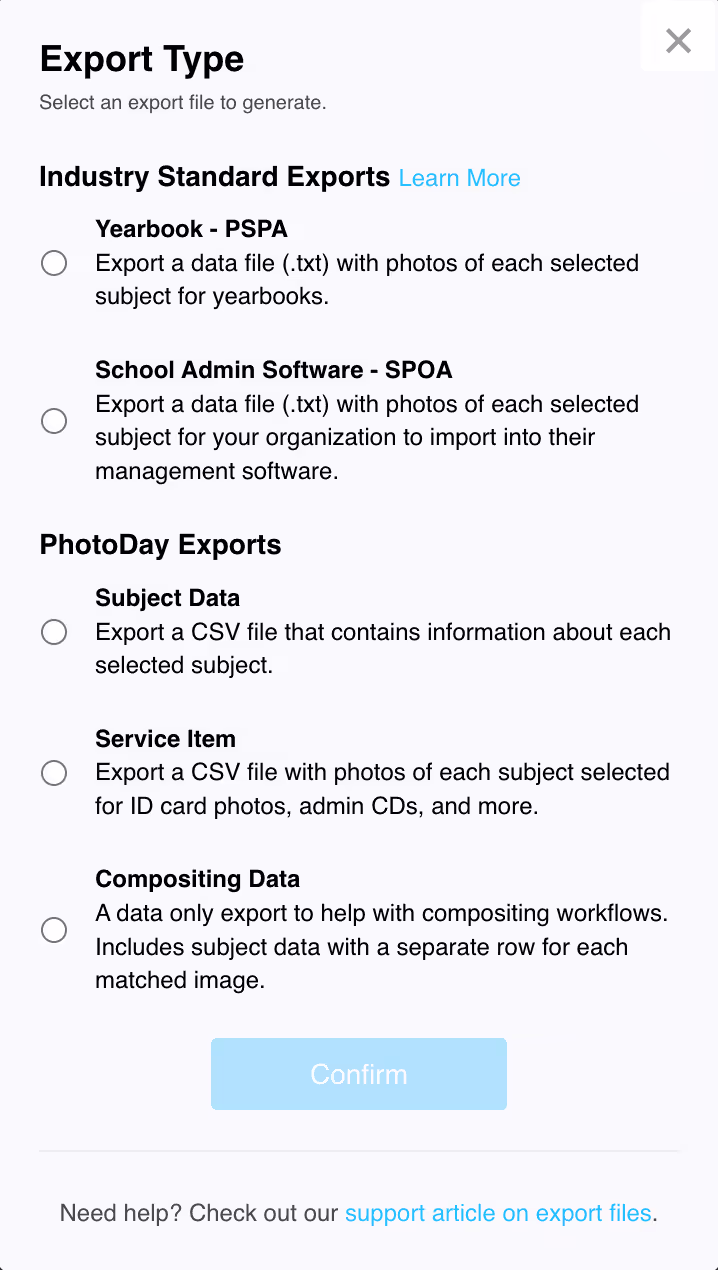
Yearbook (PSPA):
This will export your subject data (.txt) file, along with the resized primary photo associated with each subject into a formatted PSPA archive.
School Admin Software (SPOA) - This will export a data (.txt) file with photos of each selected subject for your organization to import into their management software.
Subject Data:
This will export your subject data as a standard CSV file that can be imported into any spreadsheet software.
Service Item:
This will export your subject data (.csv file), along with a primary photo associated with each subject. You can select from a list of crop templates or customize the crop.
Compositing Data:
This will export a pre-formatted data-only CSV file that works with common automated compositing workflows. It includes subject data with a separate row for each matched image.
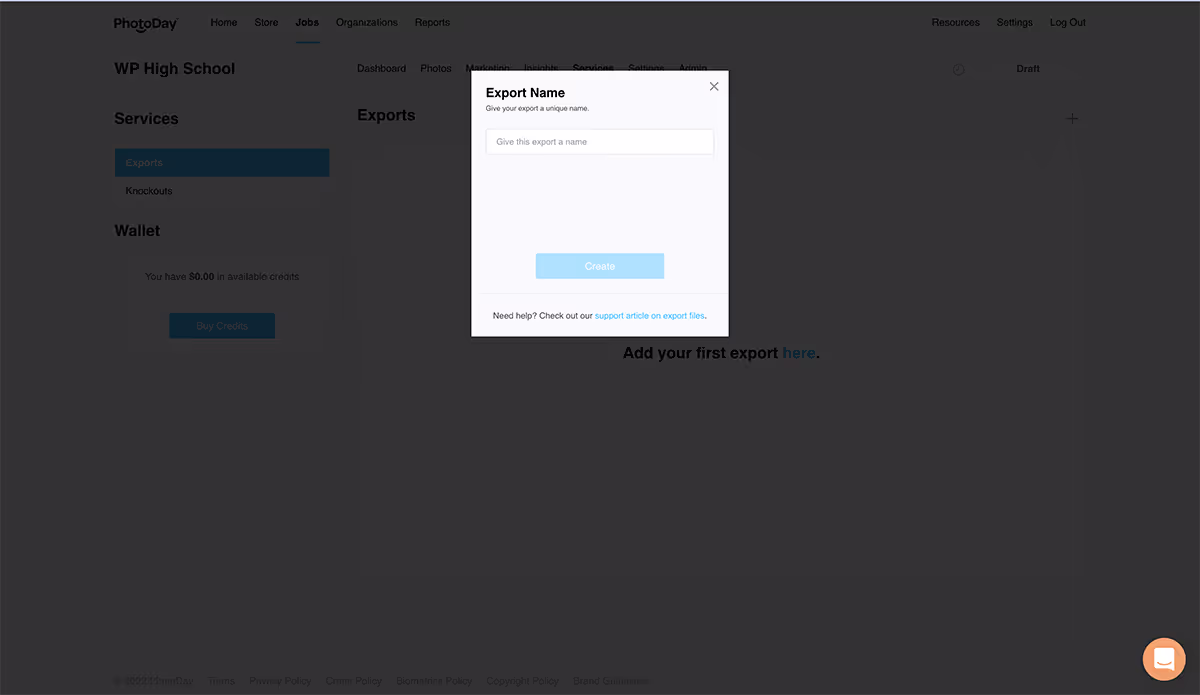
Ready to create your first export file? Head to the Services section from your job's sub-navigation menu.

Click the + sign or "here" to get started. Name your export and click Create.
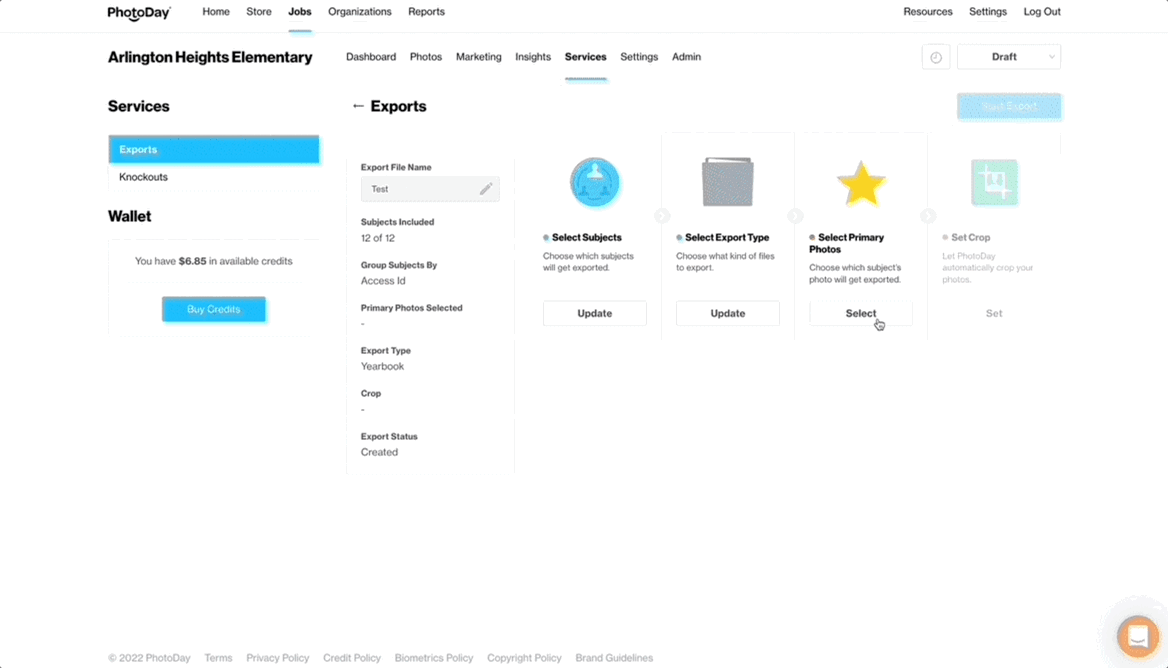
Now you'll be taken to a page that will walk you through getting the right files and data for your export.
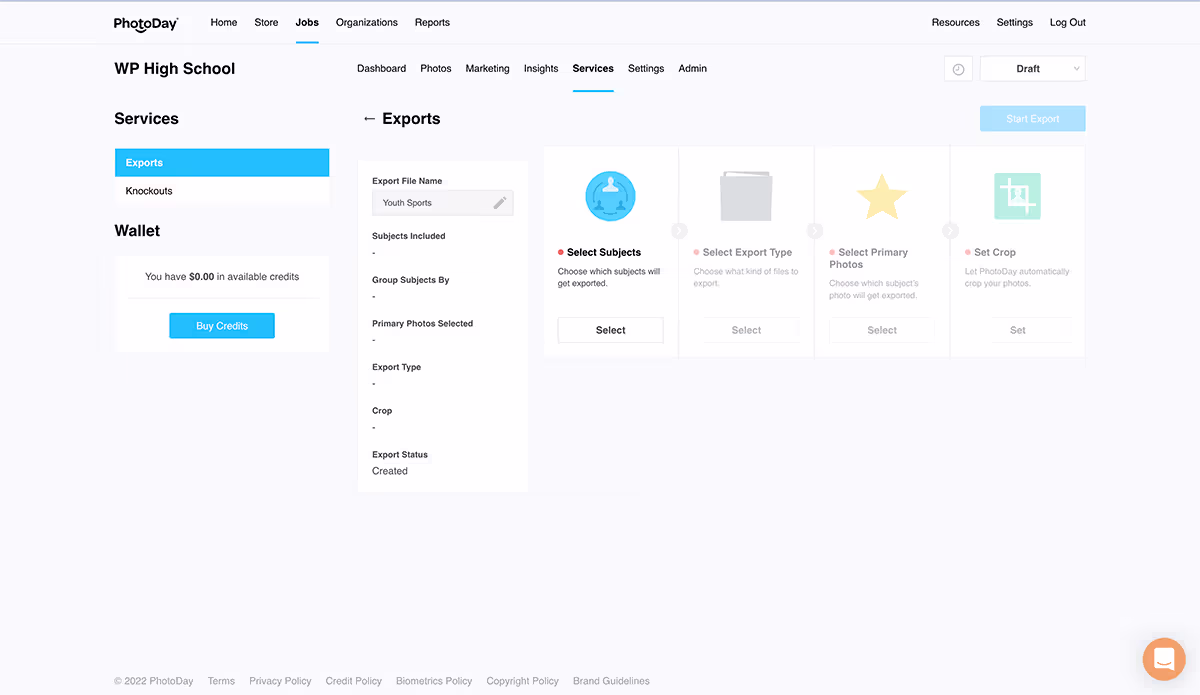
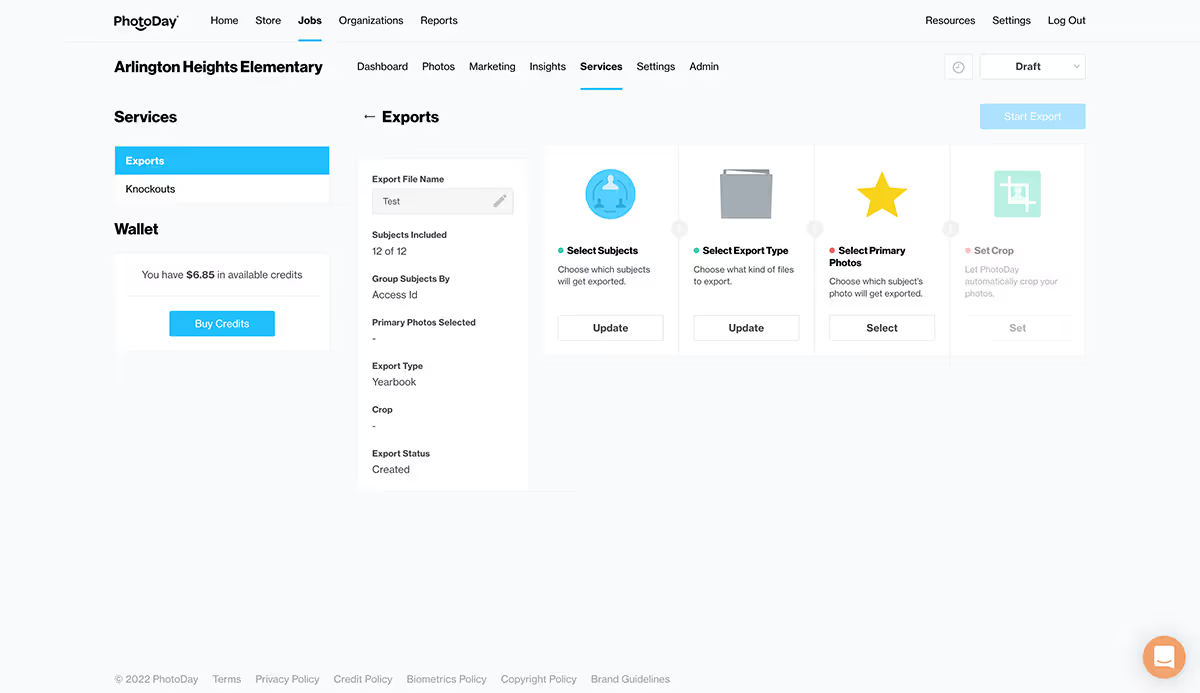
Start by clicking Select under Select Subjects, which will open a window for you to choose your specifications. Here you can choose via the drop-down menus which subjects to include and how to group them.

Once you click Confirm, you can select your export type.
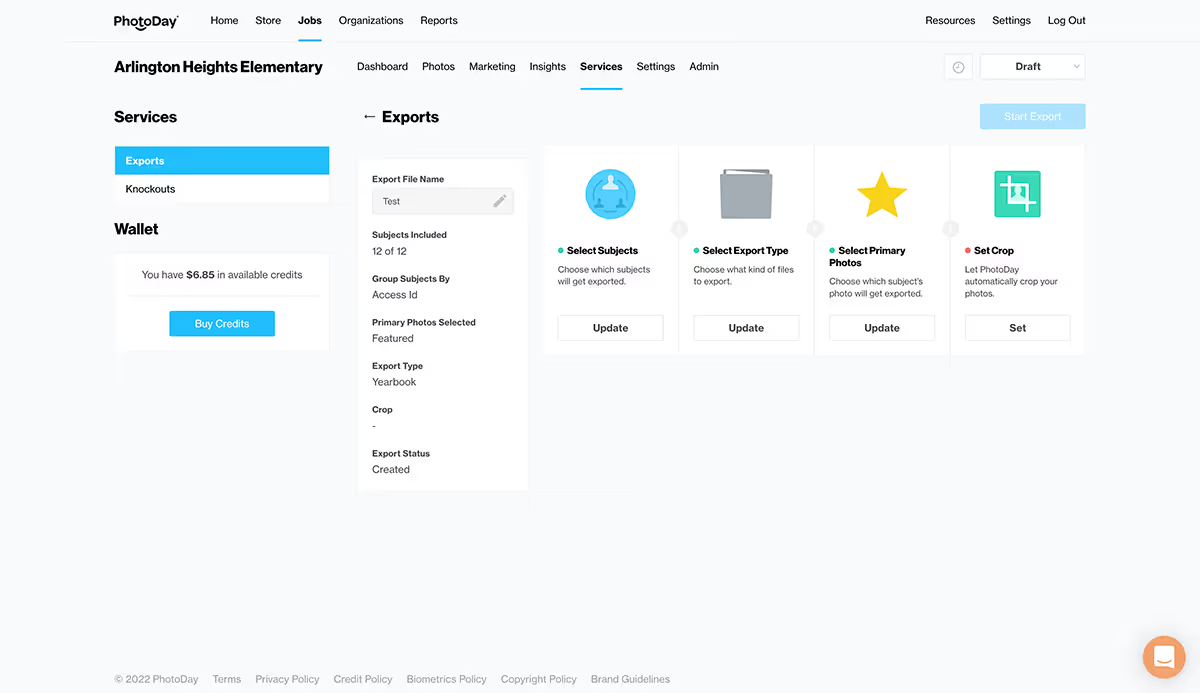
If you select Yearbook or Service Item, you'll next need to select your Primary Photos next.
If you've featured photos, they'll be set as primary photos for this export—or you can override this by selecting a different option from the drop-down menu. Head to the Featuring Photos section for more details.
In this window, you can also customize the filename by selecting up to three available values below. Please select values that will result in unique filenames.
Finally, the last step is to set your crop.
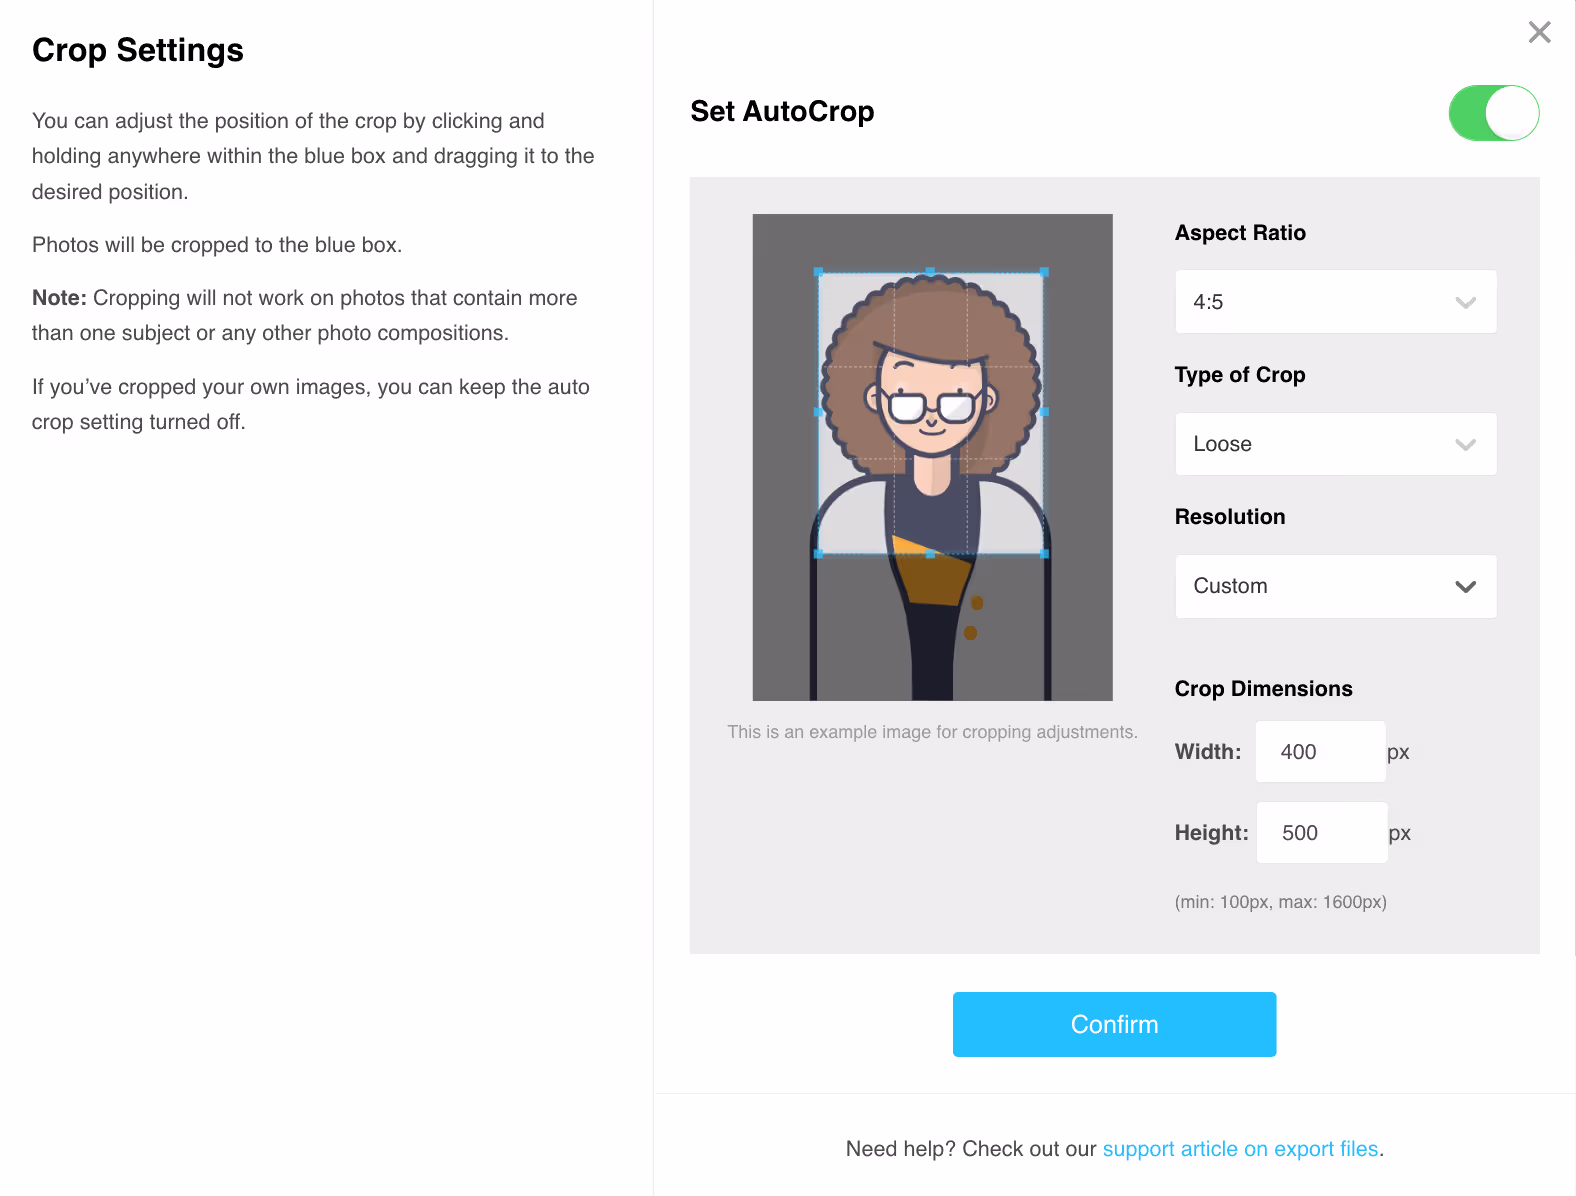
Auto-crop will be toggled off by default. If you've cropped your own images, you can keep auto-crop turned off.
If you turn on auto-crop, photos will be cropped to the blue box which is automatically centered in the sample. You can adjust the position of the crop by clicking and holding anywhere within the blue box and dragging it to the desired position. If you want to re-generate the automatically centered blue box after moving it, just close and reopen the crop settings window.
Please note: Cropping will not work on photos that contain more than one subject or any other photo compositions.
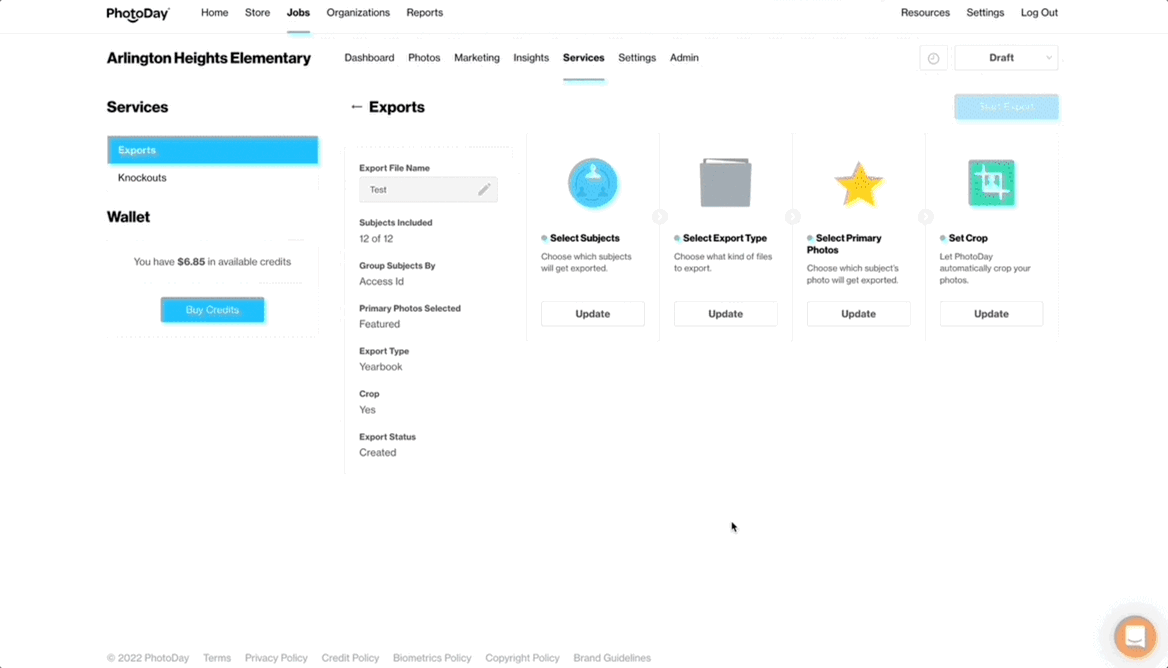
—— For Service Item Exports, you will see additional customization options. Use the drop-down menus to choose your AutoCrop settings.
Once you click Confirm, you can now click the blue Start Export button. A confirmation window will appear.
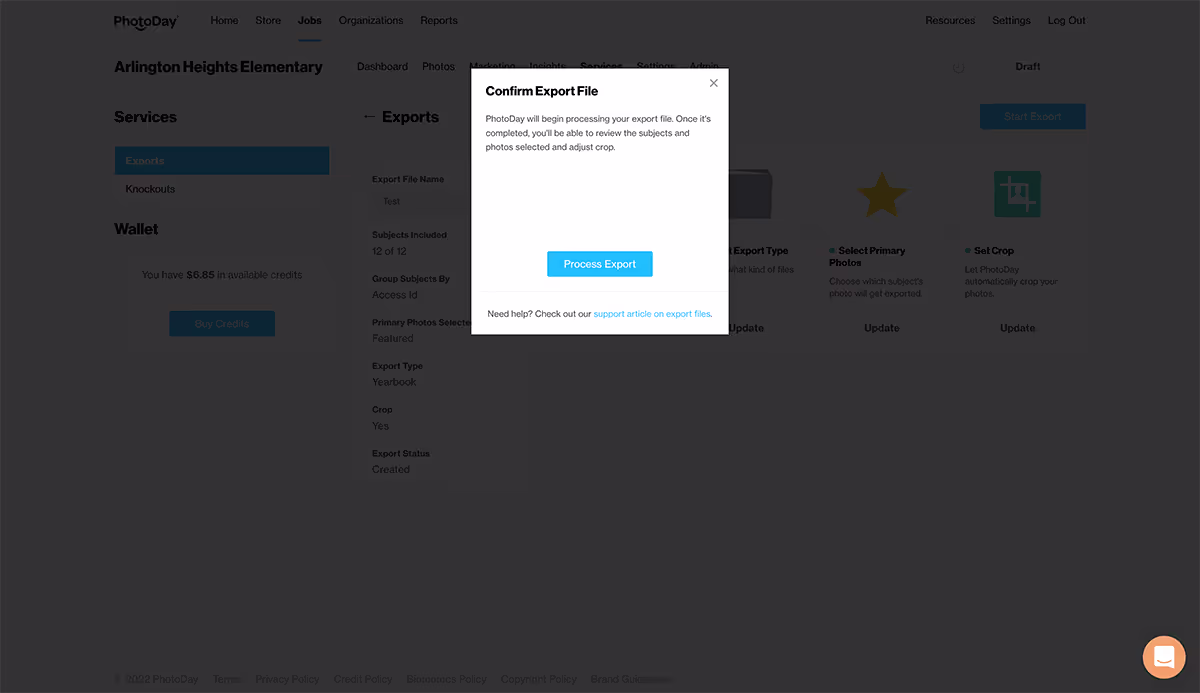
When you click Process Export, PhotoDay will begin processing your export file. Once it's completed, you'll have the opportunity to review the subjects and photos selected and adjust the crop.
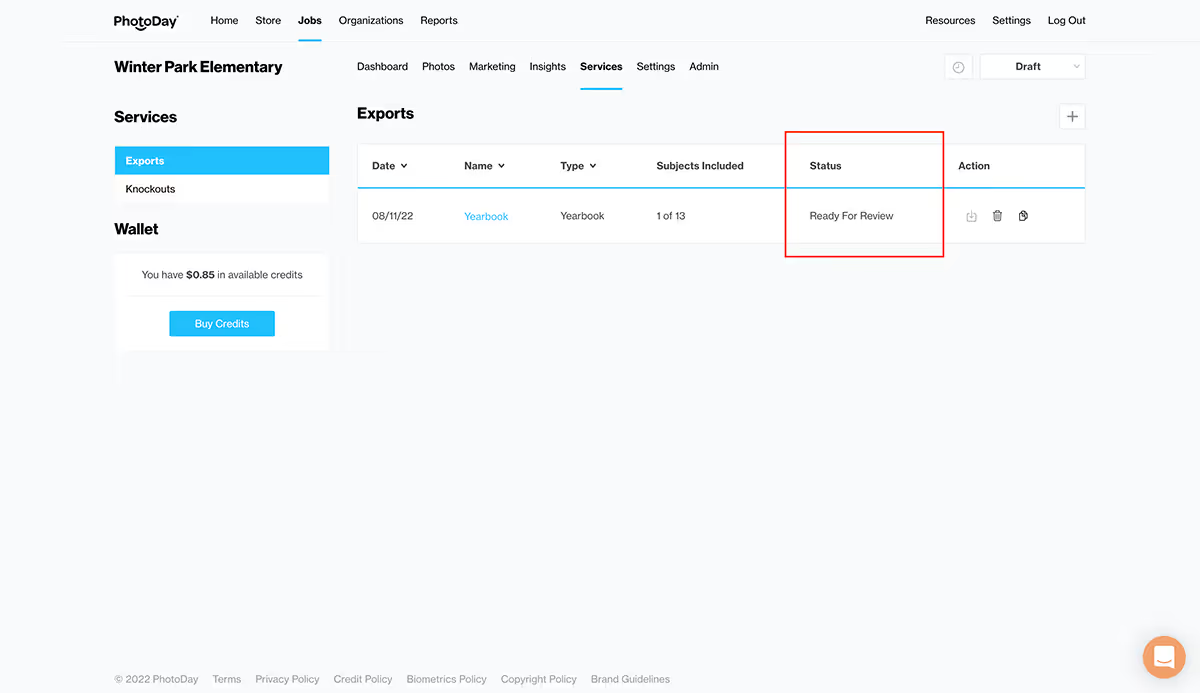
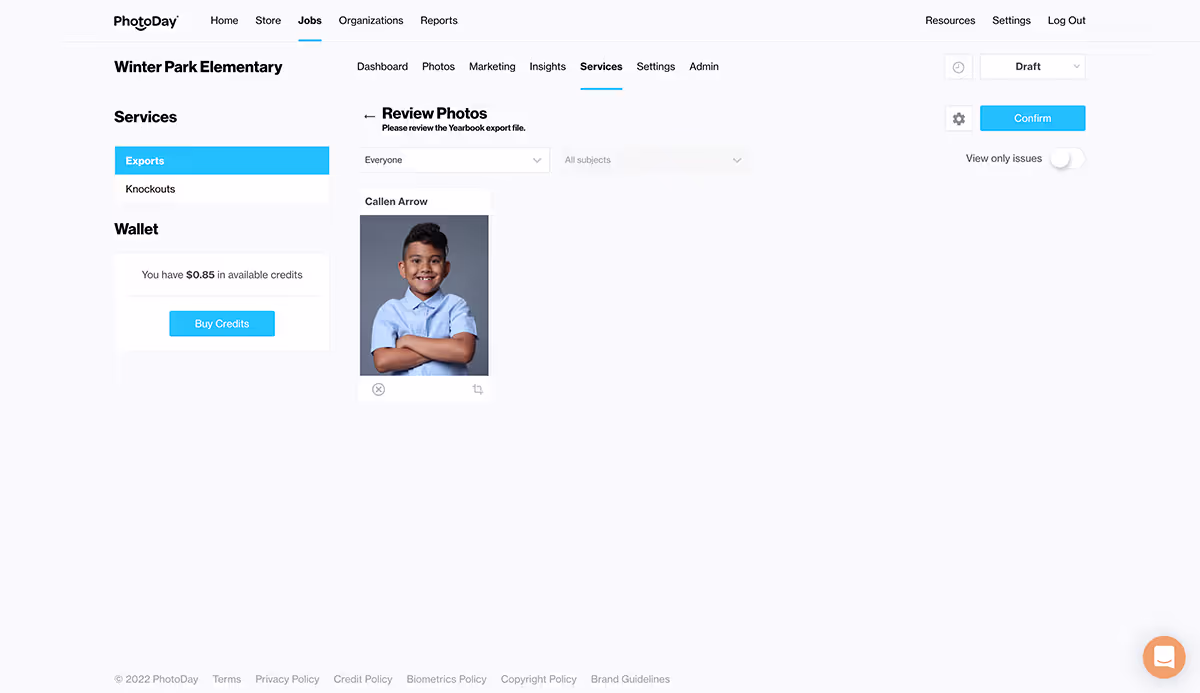
Once the status has updated to Ready for Review, you can click on the name of your export to review.
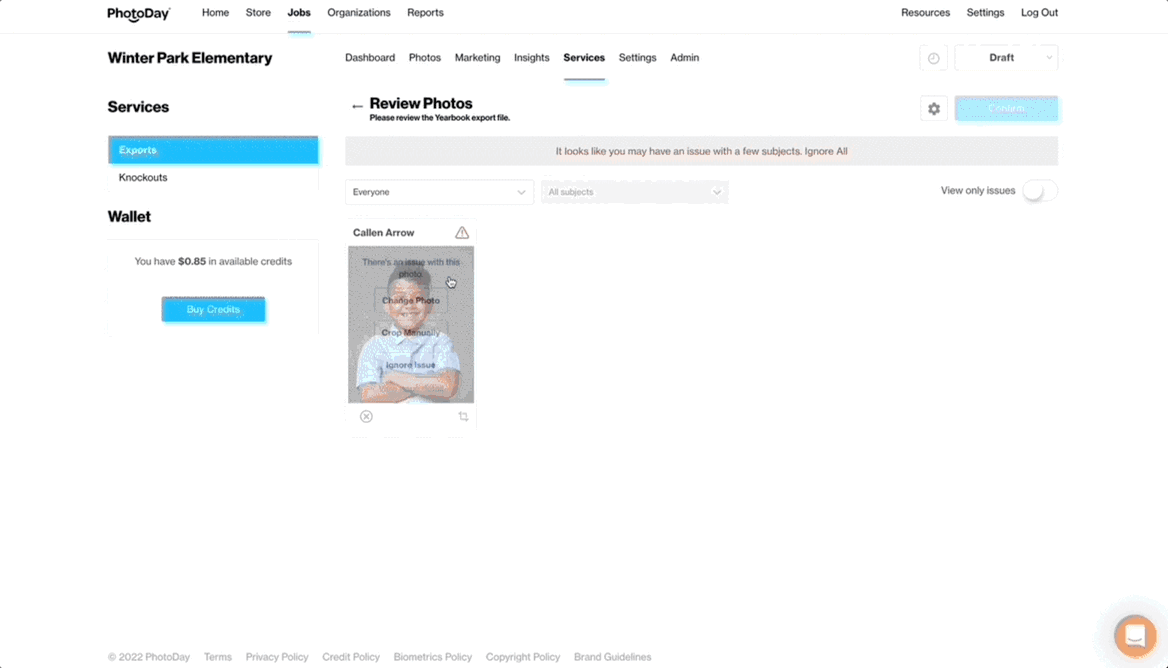
On the Review Photos screen, you can change a subject's photo, adjust crops, and address any issues.
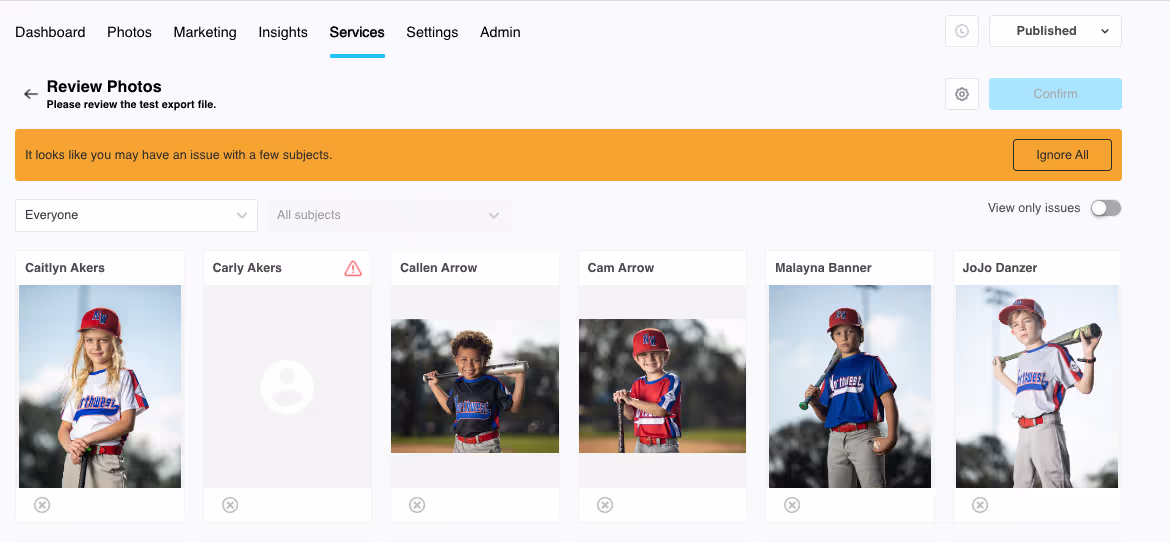
These sample photos triggered a warning because there isn't enough margin for a proper crop. PhotoDay will do its best to crop these photos, but will issue a warning that you can either tweak or choose to ignore.
Once you're happy with your cropping and the photos selected, you can click Confirm…
…and Export File.
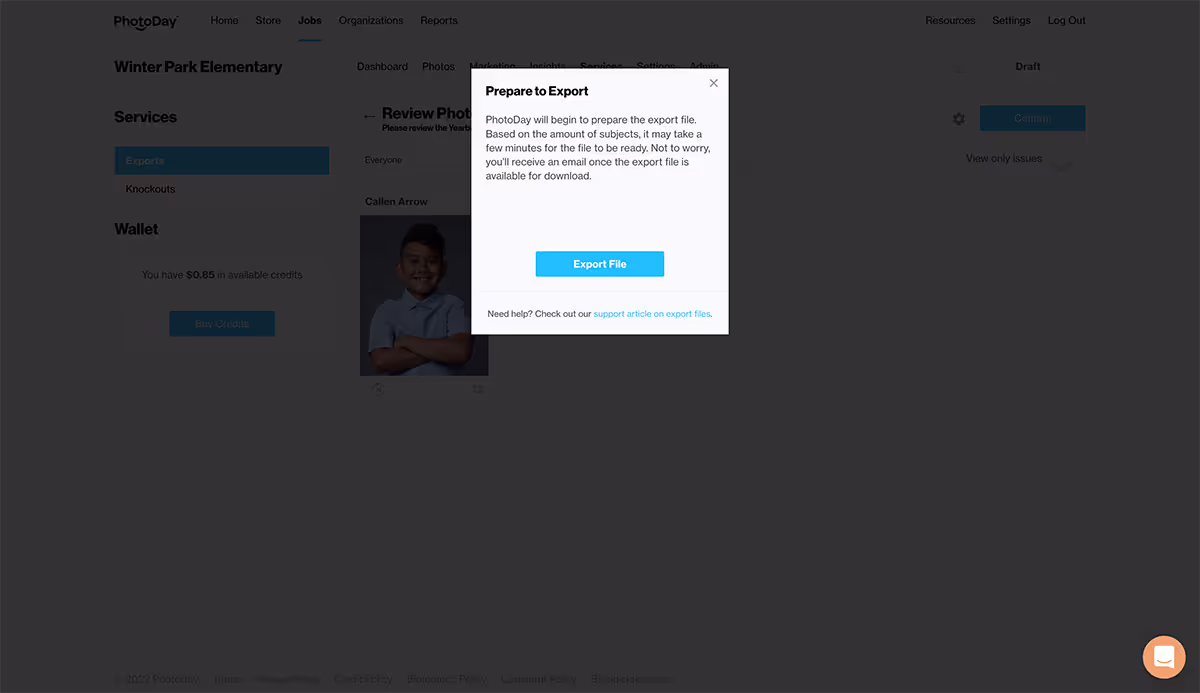
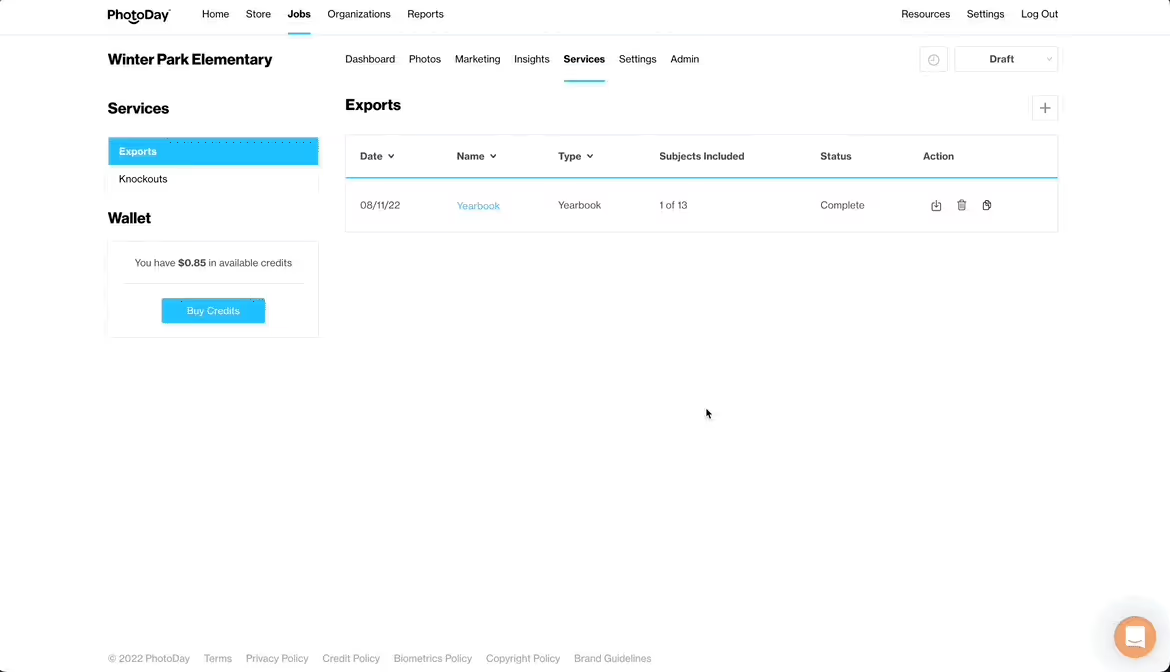
Depending on the size of the export, it might take a few minutes for the file to be ready—but don't worry! You'll receive an email once the export file is available for download. You can also track the progress on the exports page. When the status says Complete, you can click the download icon to save to your computer.
This concludes our Private Gallery mini guide, but be sure to head back to the Main Guide to learn more about promoting your gallery, our Post-Processing services, using the Dashboard App and more!