PhotoDay Capture is a mobile app that enables photographers to create private galleries of individuals by automatically matching people data with professional photos using FaceFind, PhotoDay's face clustering technology.
Capture also drastically simplifies digital data collection and requires no additional equipment—just download the app to your phone or tablet from the Apple or Google Play stores.
Downloading Capture
Start by downloading PhotoDay - Capture (iOS or Android) onto your mobile phone or tablet.
To use Capture for an upcoming job, first you'll need to create a Private Gallery job and upload a CSV file that contains your subject data. Jump back to the last section to learn how to do this.
The data you upload in the job will also appear in the Capture app so that on picture day you can “check in” each subject by capturing their reference photo. This reference photo is used to match the data with your professional images.
Helpful Tip: If you don't have subject data in advance, you can always set up the job with just one "filler name,” then add individual names on site as you check them in on the Capture app.
Now that you have your private gallery created and your subject data uploaded, it’s time to open the Capture app.
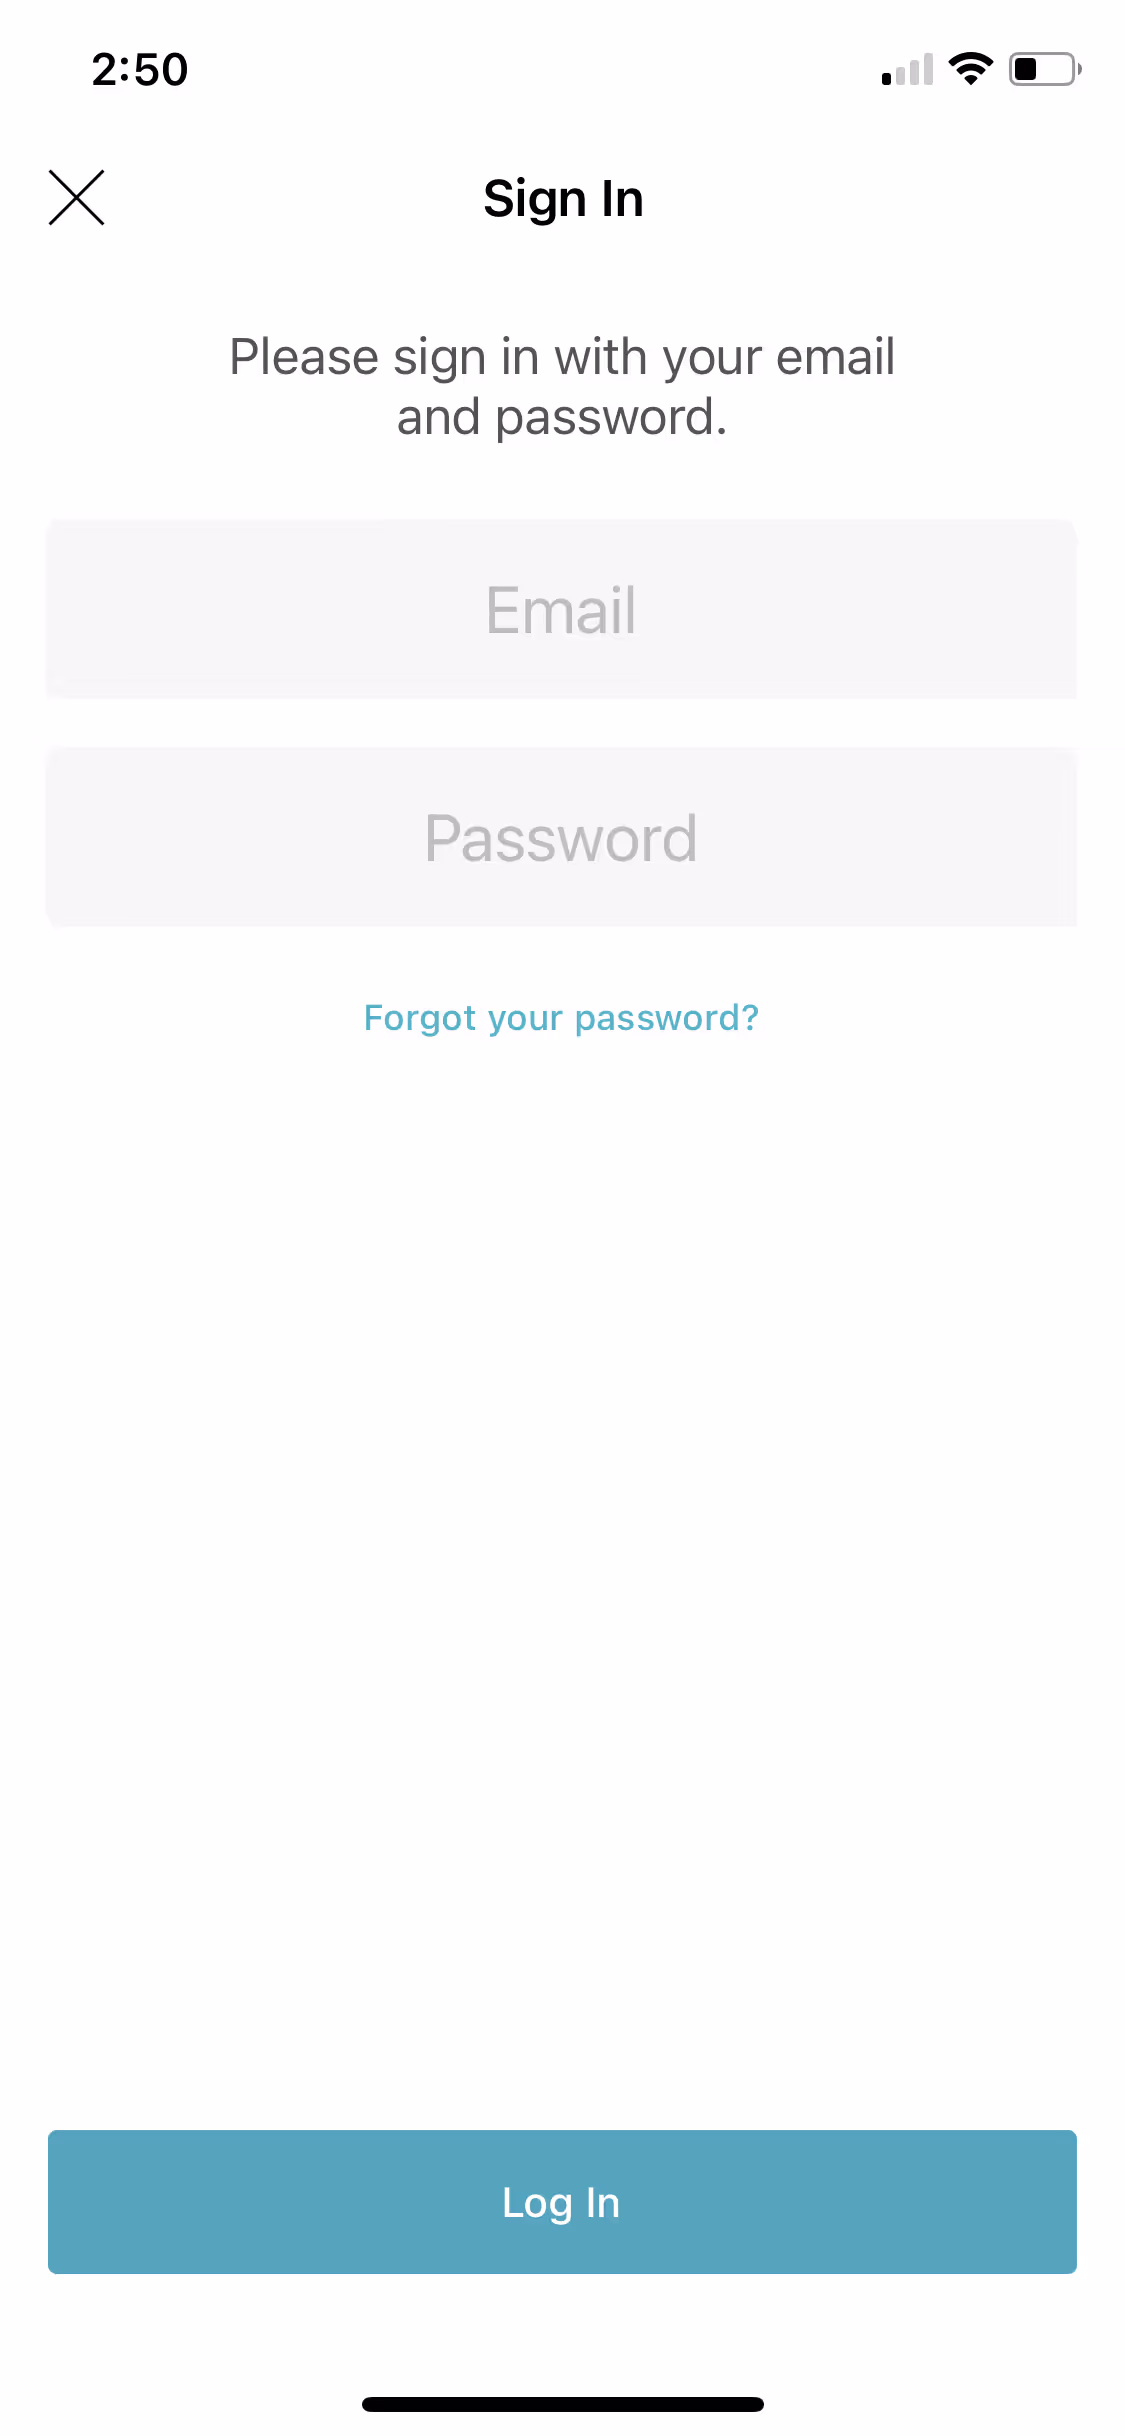
As a PhotoDay user, you automatically have access to the app and can login with the same email address and password you use to access your Studio Panel.
However, if you want other photographers on your staff to take reference photos and check in students, you can add them as users. We do not recommend sharing your login, but rather creating user accounts for them. Find out how to do that below.
Adding Additional Users
If you want other photographers or assistants to take reference photos and check in students, you can add them as users. We do not recommend sharing your login, but rather creating user accounts for them.
Simply invite them to use PhotoDay Capture by going to the Settings tab in the upper right hand corner of your Studio Panel, clicking on My Studio and selecting Users on the lefthand side of the page.
To avoid any issues, we advise you not to share logins for Capture. If you’d like someone else to use the app—or even if you want to use Capture on multiple devices—be sure to invite another user with a different email.
After clicking Invite, you will have the options to remove the user or update their permissions.
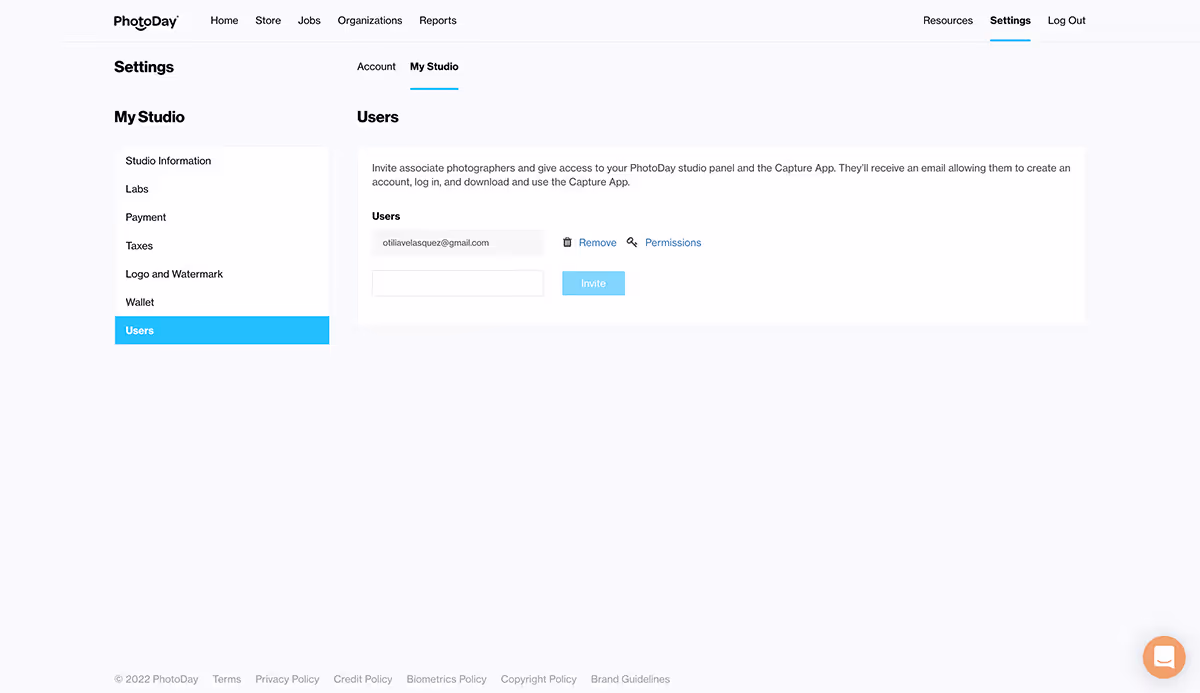
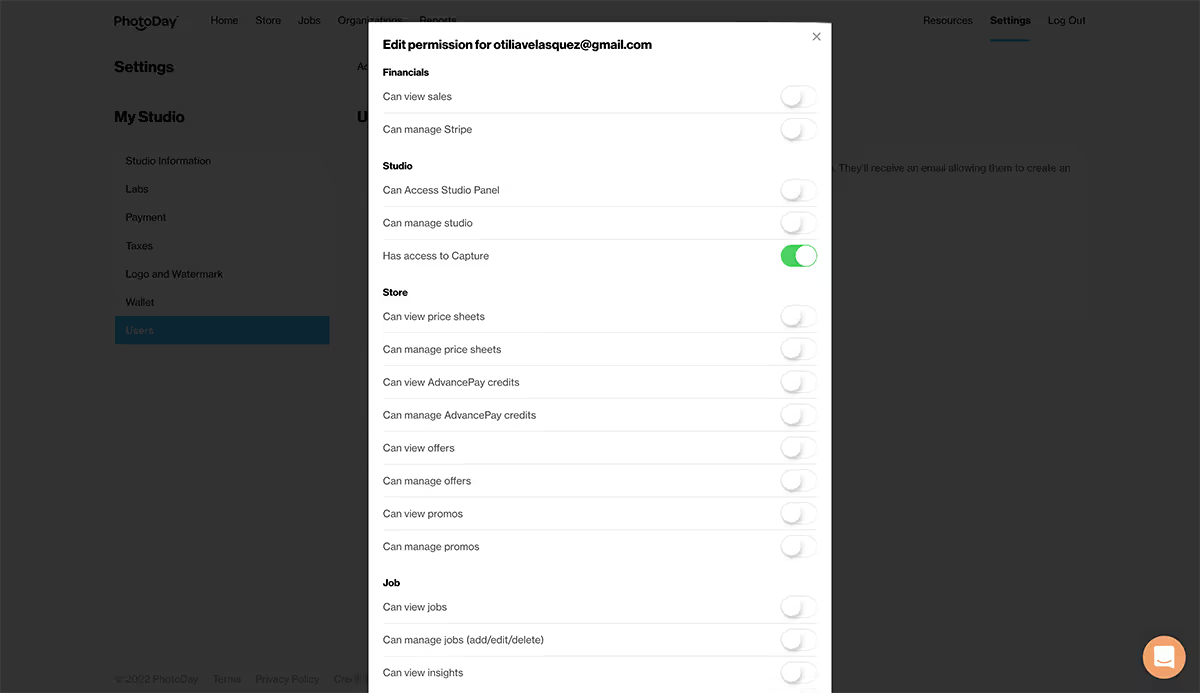
By clicking Permissions, you will see many options that you can toggle on or off.
Anyone you invite via email will receive an invitation in their inbox to download and log into Capture.
Signing In, Syncing, Sorting
Before you get to the picture day, be sure to connect to WiFi and open the Capture app on any and all devices with which you will checking in subjects. While Capture doesn’t need WiFi or cell service when you’re using it at the session, it is necessary to open the app and load your jobs before arriving at the shoot.
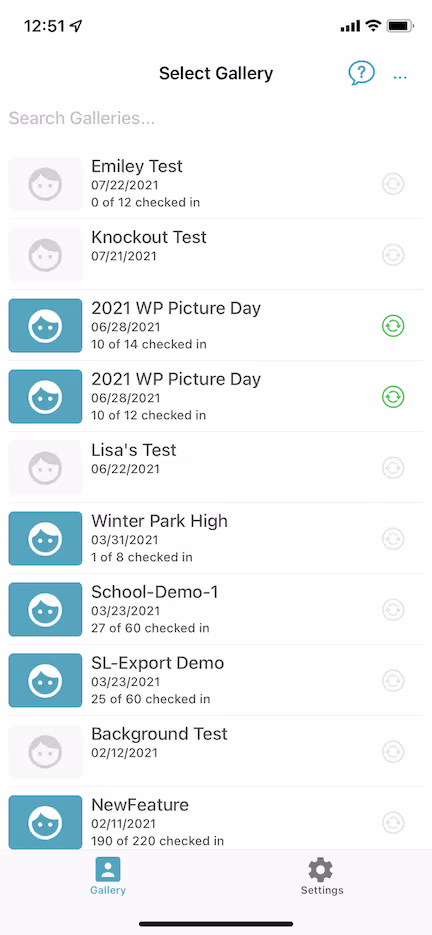
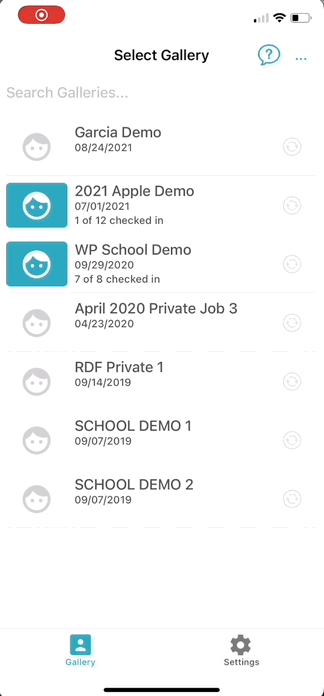
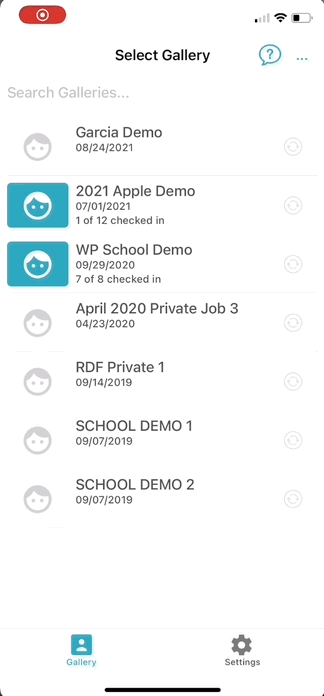
Once logged in, you will see all of your private gallery jobs. It is sorted with the most current gallery at the top (based on the picture day date that's been set for the job). Go ahead and select the job you want by scrolling or using the search bar.
Syncing
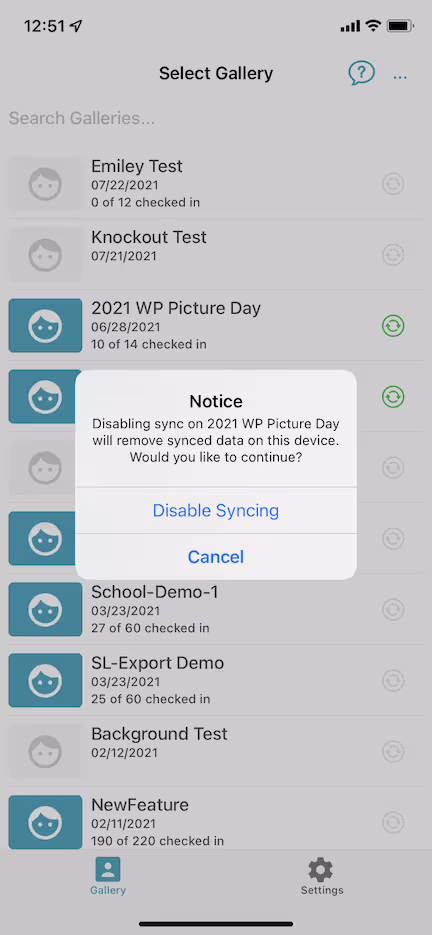
To make a job available offline (which is recommended before every picture day), click the sync 🔄 button to enable syncing. If it’s your first time accessing a gallery on the Capture App, you’ll be greeted with a popup asking if you’d like to enable syncing.

If you’d like to disable syncing, click the sync button again. Disabling syncing on a gallery will clear the cached data for that gallery and free up space on the device. Un-synced subjects will not be cleared.
When the sync icon is green, it means the gallery is synced and available offline. When the icon is gray, it means the gallery is not synced and not available offline.
Only 5 galleries can be synced on a device at a time.
Please note: If you delete the app from your device, all local data will be lost and syncing will be disabled for all galleries. If you're going to delete the app from your device, make sure all of your reference images/data have successfully synced to the studio panel first.
Filtering
You can also sort your jobs within Capture, allowing you to display either your published or synced jobs. You may also choose to leave all of your jobs visible.
Sorting
The sort function allows you to view jobs sorted alphabetically or chronologically.
Searching
The search feature allows you to do a “fuzzy search,” which will look for jobs whose name contains the string of characters you enter in the search bar.

Checking in Subjects and Taking Reference Photos
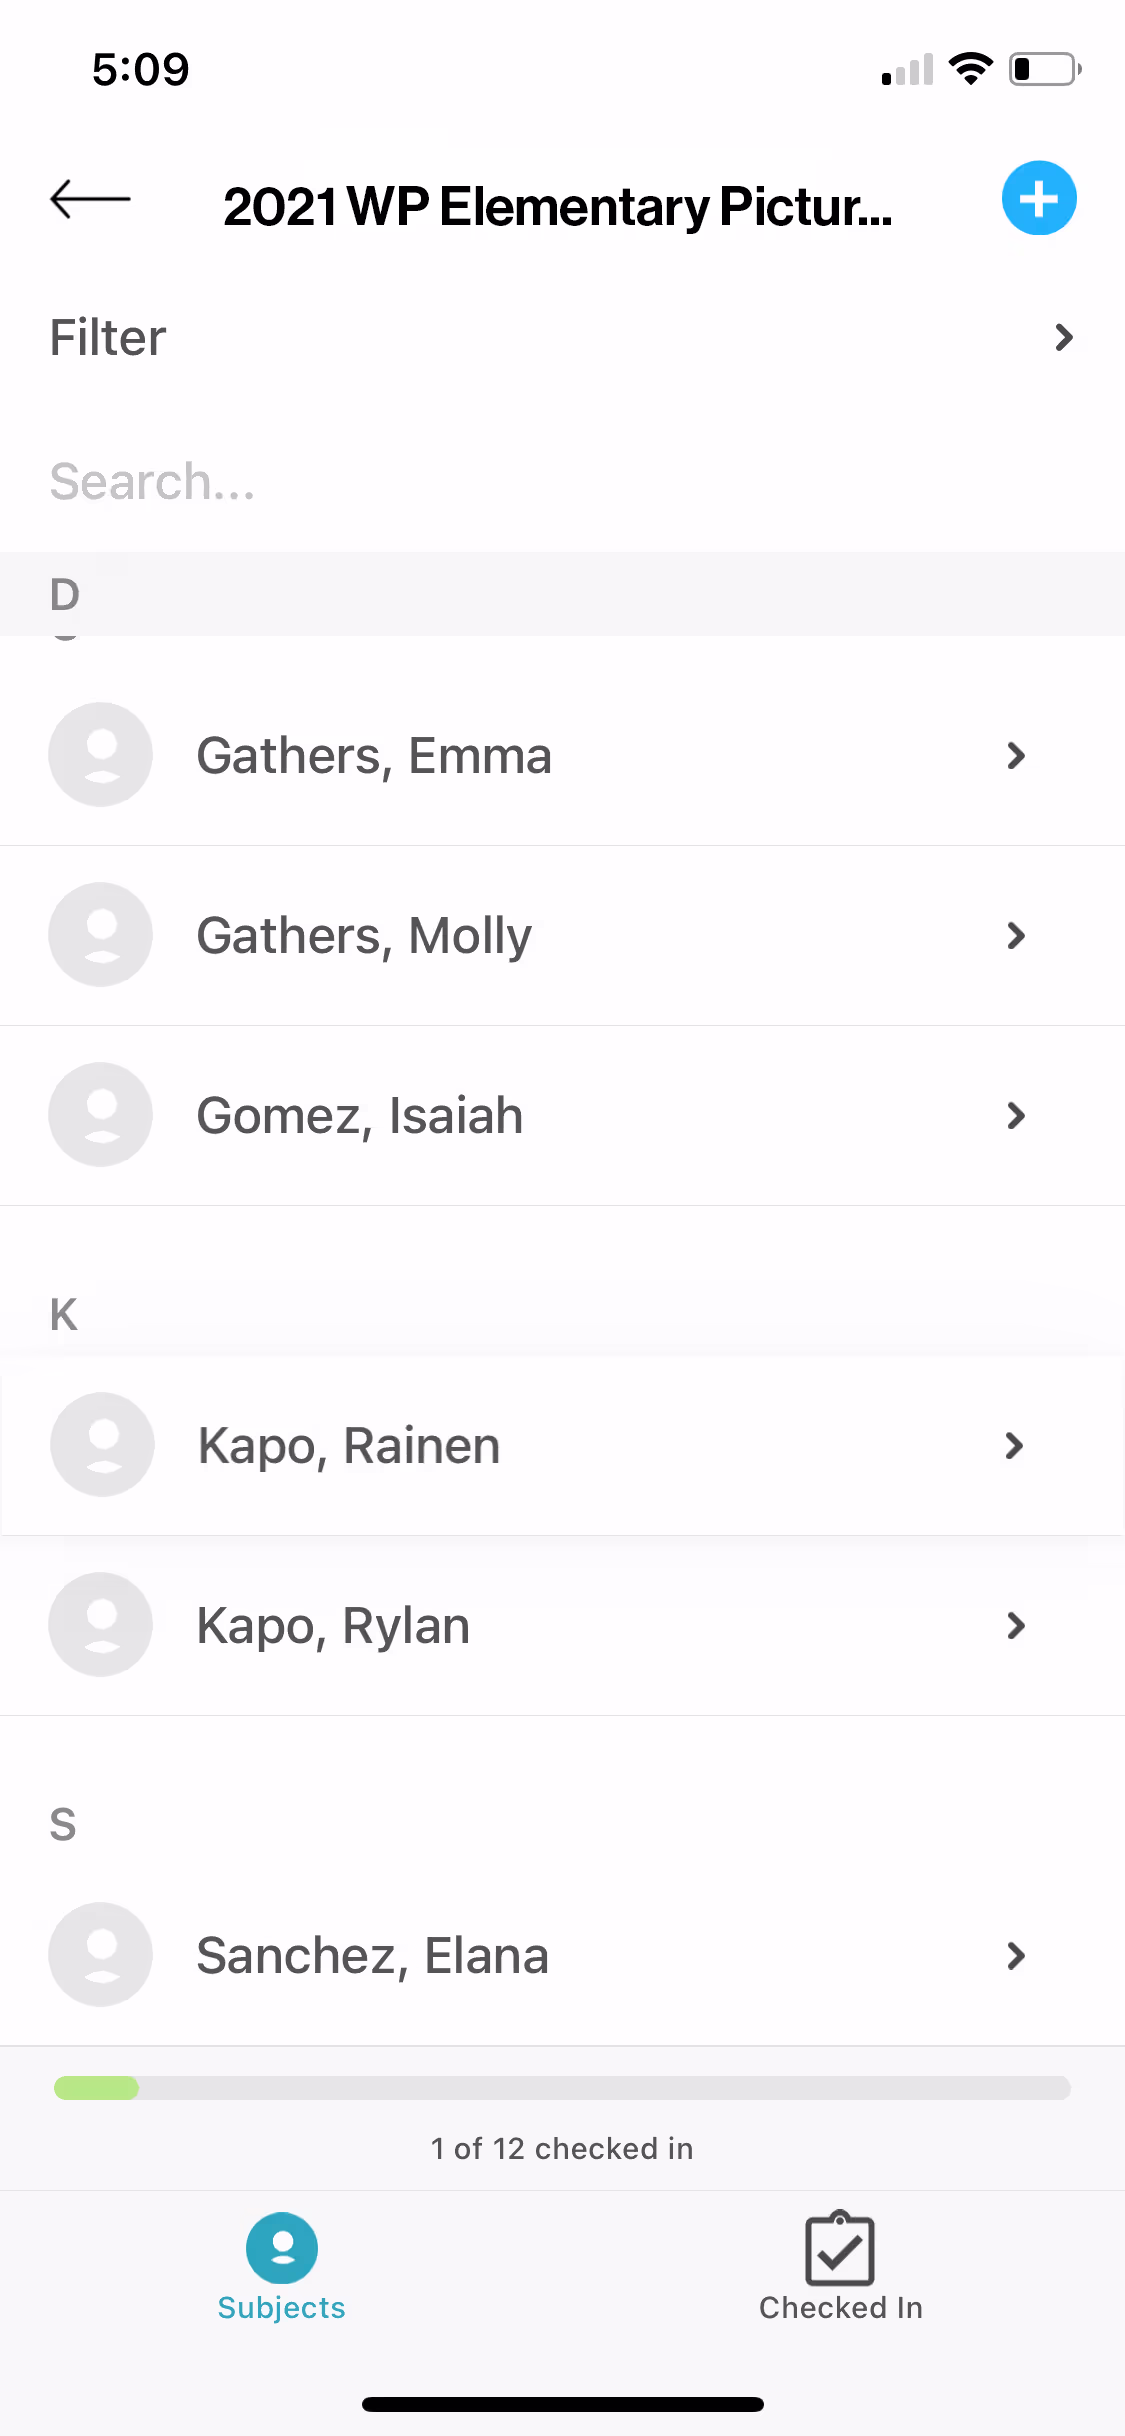
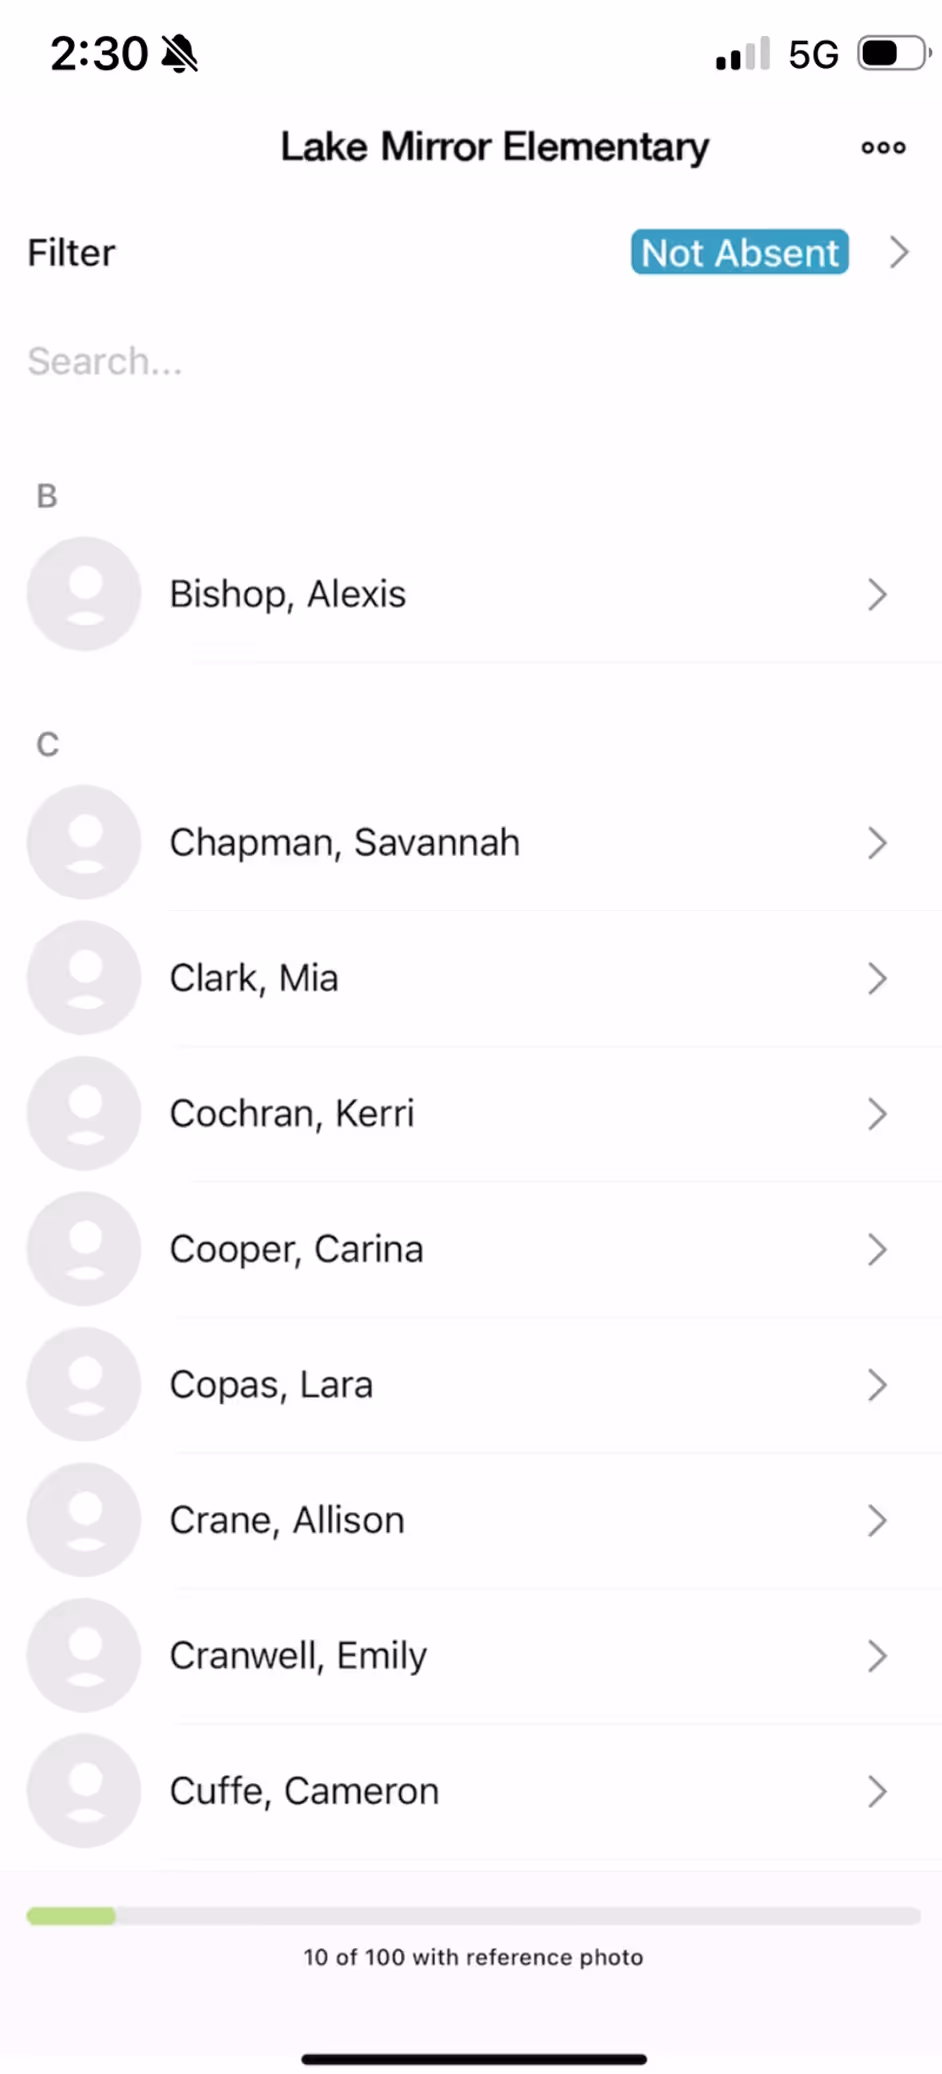
Click on the job you'd like to work on. Capture will populate a list of names gathered from the subject data associated with that job in the studio panel.
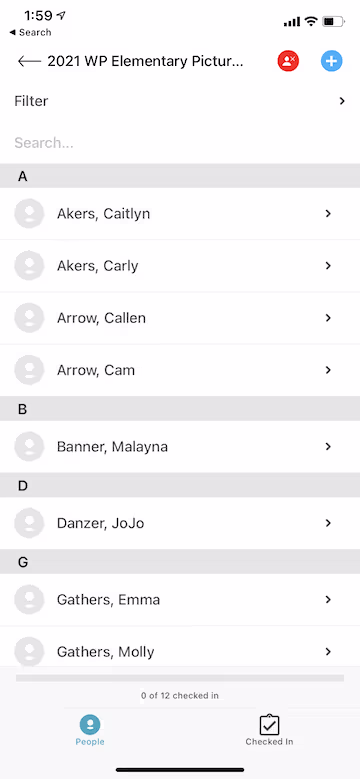
Now it’s time to check in each subject. You (or an assistant) can do this while they’re waiting in line, as they sit down to be photographed, or even after being photographed. Simply ask for their name and select it from the list of people, search for it using the search function in the check-in list, or add a new subject by clicking the + sign.
When you select a name from the list, the camera function of Capture will open. Snap a reference photo of the subject you just selected. This reference photo will be associated with that subject’s data and will be used to match them with your professional images via FaceFind later on. Go ahead and snap a reference photo using the camera button at the bottom of the screen.
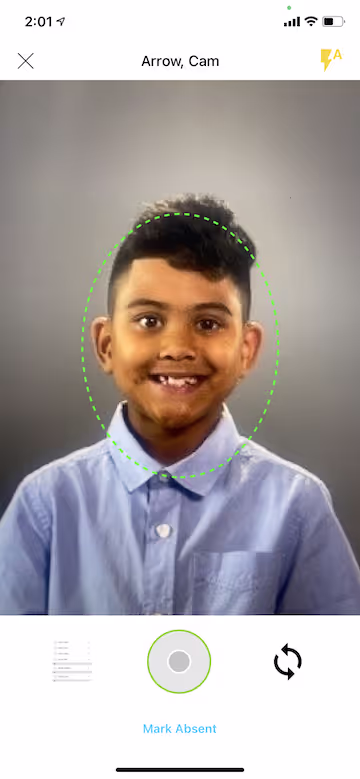
Once the reference photo is captured, the subject is considered checked in. Repeat this process for all of your subjects. As you check in each subject, they will move from the People tab on the bottom left of the screen to the Checked In tab on the bottom right of the screen.
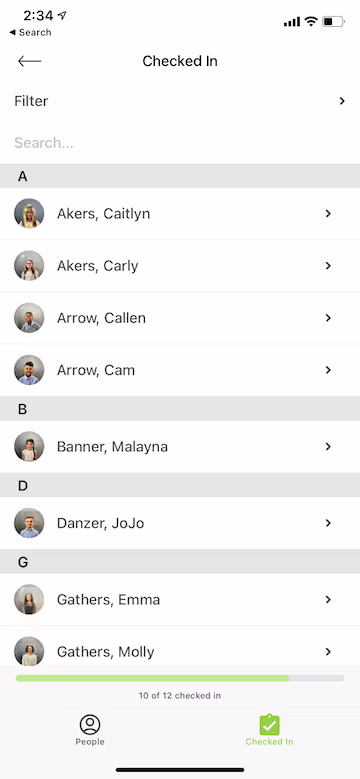
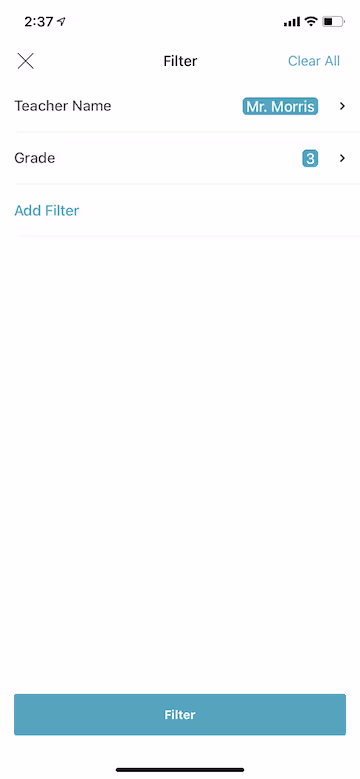
Both the People and Checked In tabs show a Filter option on the top left that allows you to stack filters, giving you more control over the group of subjects you want to check in.
Helpful Tip: Capture saves every reference photo you take right within your device’s camera roll. It also creates an album with your job’s name in your Photos app.
If you ever have a question or are experiencing an issue, just click the icon in the top right to reach our customer success team in the Bubble.

Kiosk Mode
With Kiosk Mode, you have the option to “lock” the app into a streamlined workflow perfect for a self-check-in process.
Kiosk Mode creates a minimal, simplified view for anyone checking in subjects (your employees, volunteers, or subjects themselves), so they can’t accidentally access other jobs, change settings, etc. in Capture.
Here's how to use it:
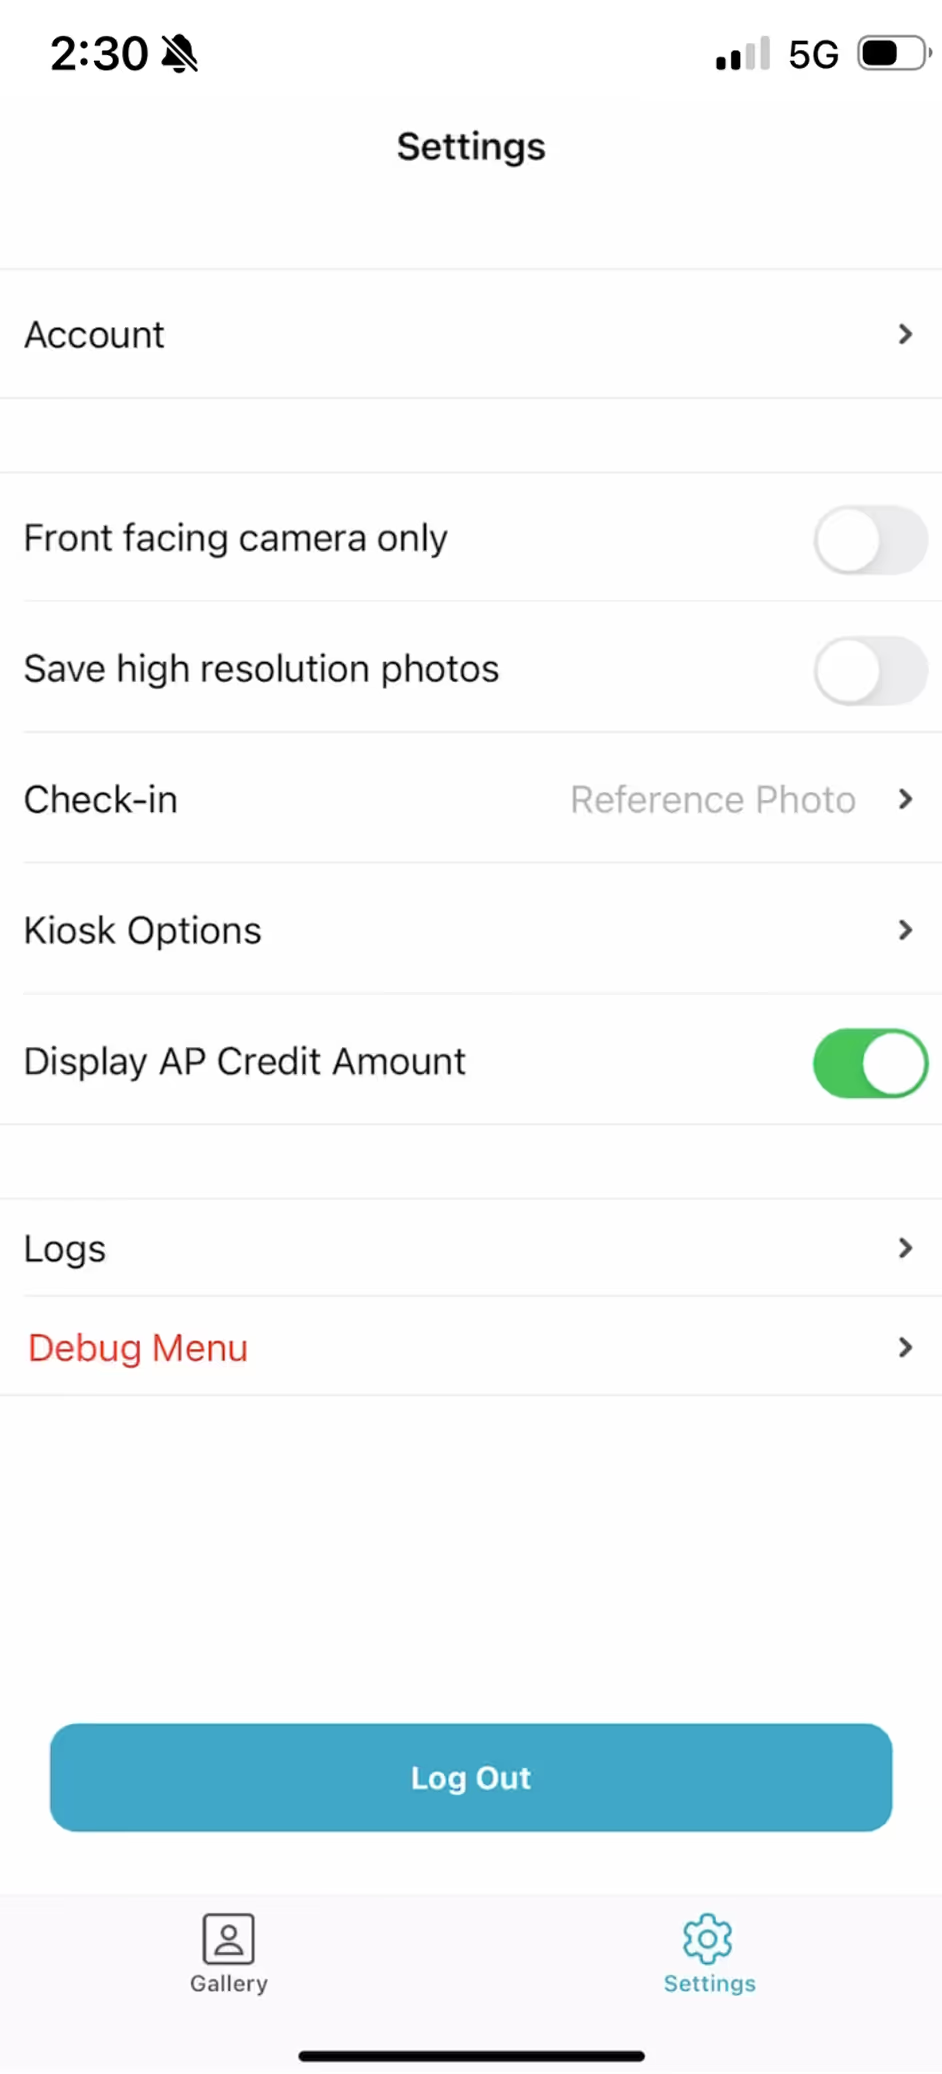
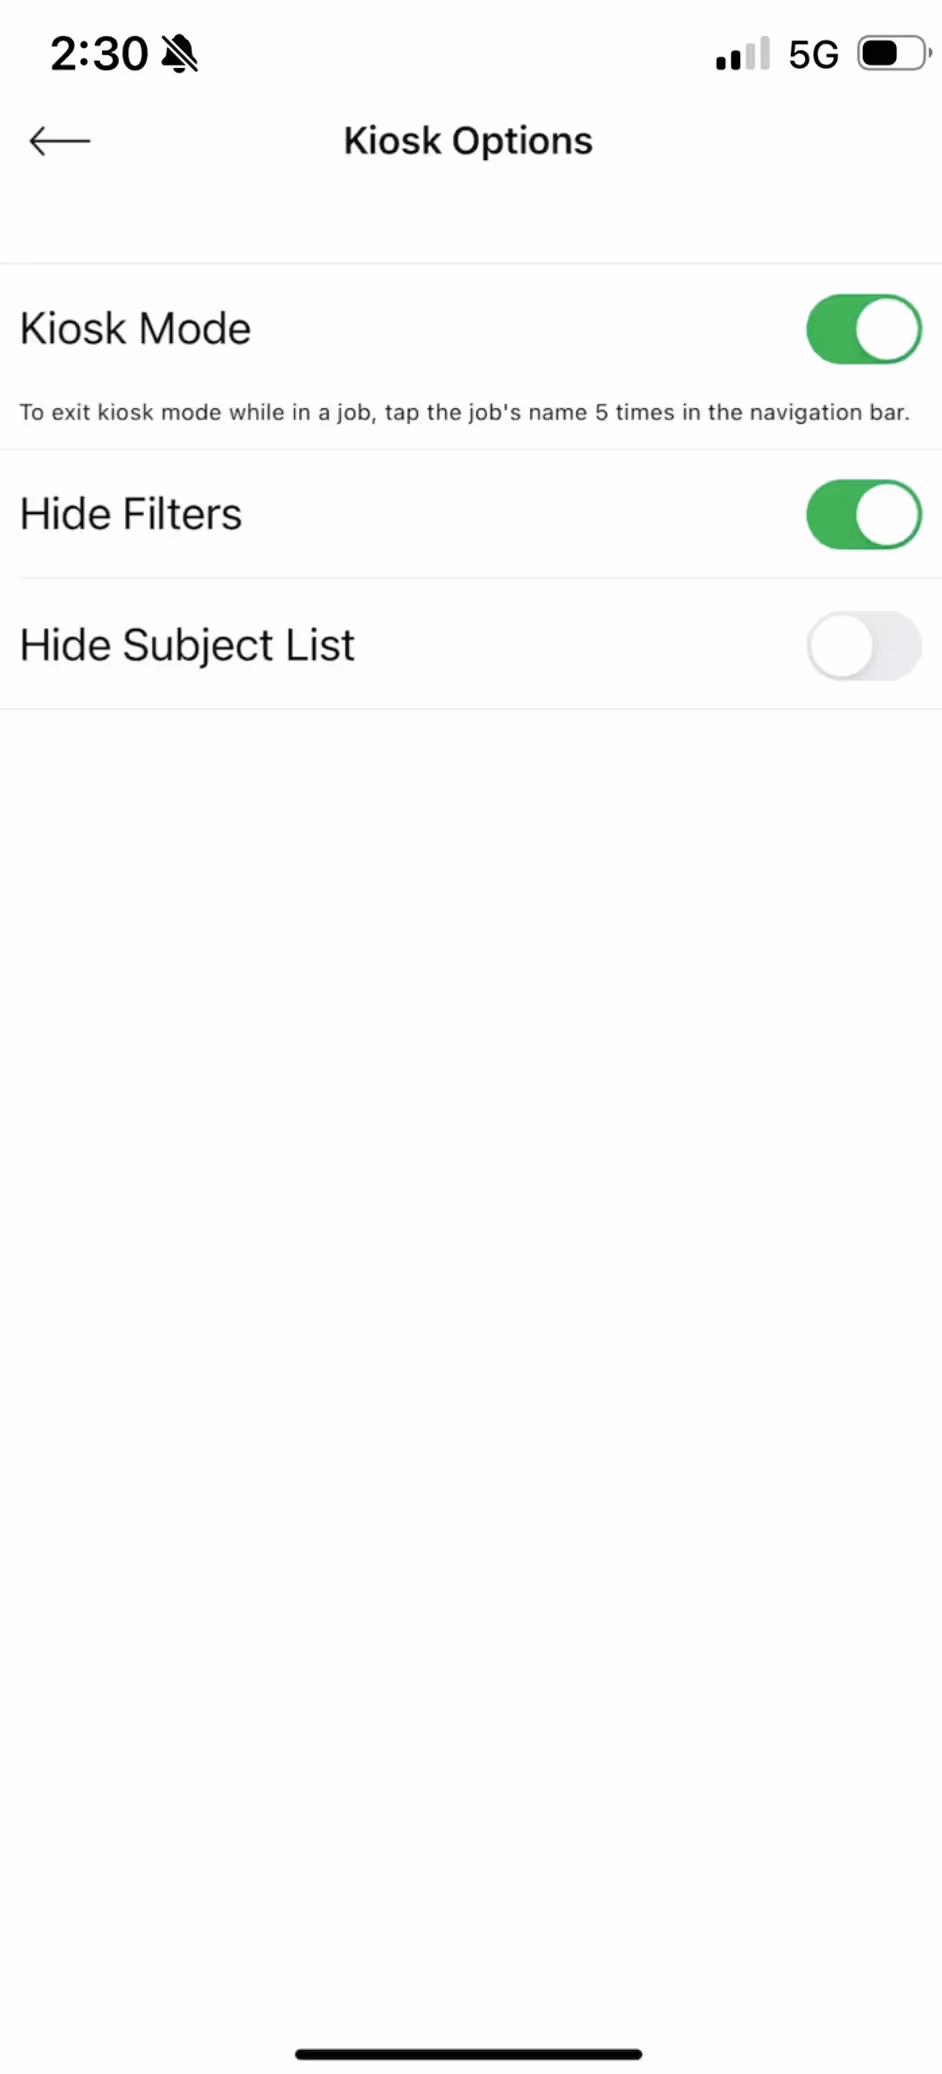
In Capture, go to Settings > Kiosk Options:
Toggle on Kiosk Mode. You'll also see the optional Hide Filters and Hide Subject List toggles.
Now open a gallery, and you’ll see a simplified version of the job thanks to Kiosk Mode.
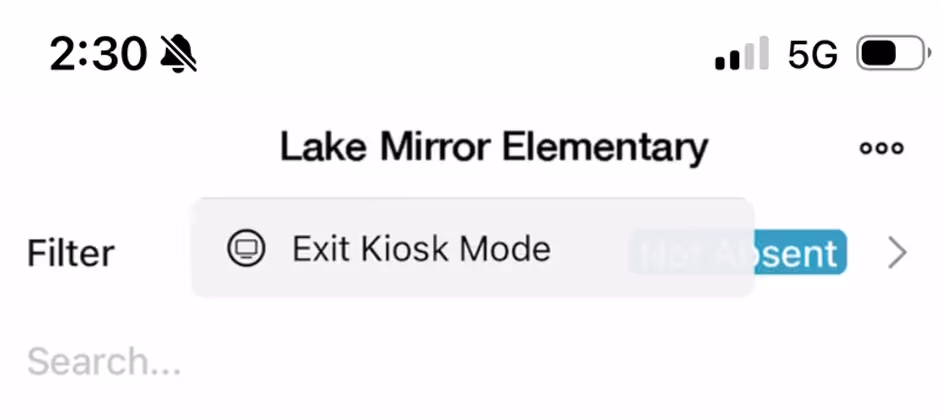
To exit, tap the gallery name 5 times, then tap "Exit Kiosk Mode"
Syncing to Studio Panel
Capture internally matches the reference photo and the CSV data of each person with your professional images. When the mobile device you’re using detects a cellular or WiFi signal, the app will automatically synchronize its data with your Studio Panel. The folders in your subject data list will now contain the correct reference photo for each person.
Next up: adding photos!