


Latest articles
Your guide to the PhotoDay world. Tips, tricks, industry news, and more can all be found right here.
Celebrating Our Users: Highlights from PDA Week
Spring season is officially here, and Team PhotoDay wanted to kick things off with a celebration like no other!
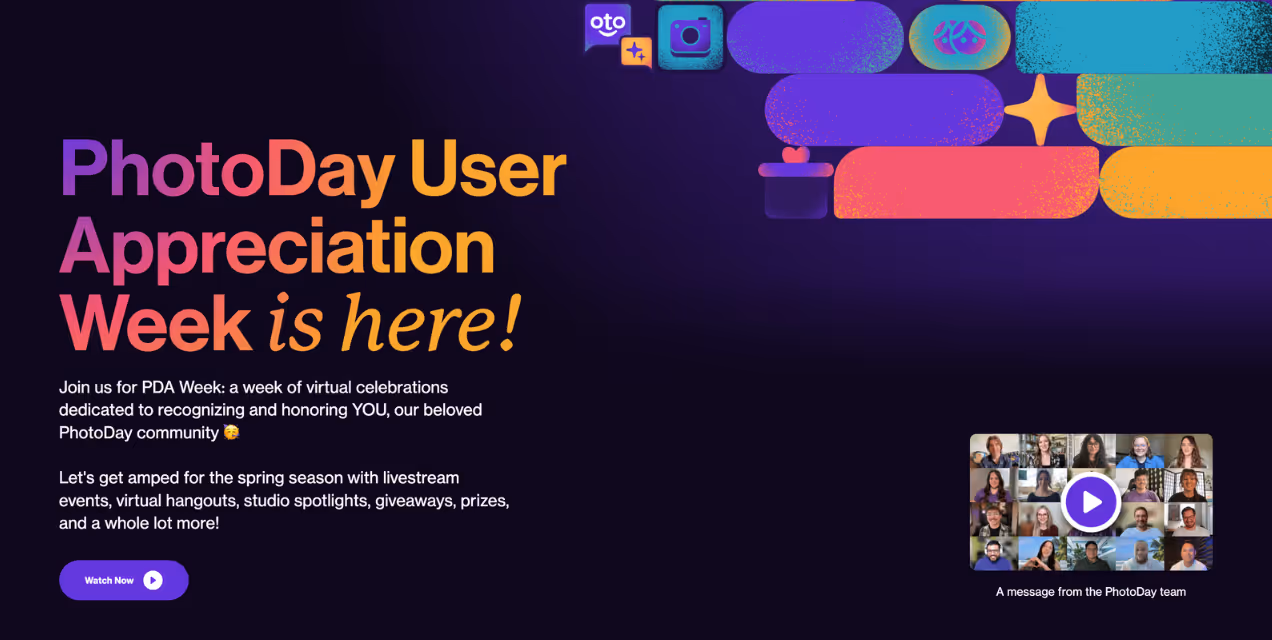
Meet PDA Week: our first annual PhotoDay User Appreciation Week—a 5-day celebration dedicated to recognizing and honoring our beloved PhotoDay community.
In the spirit of collaboration, we wanted to enter the spring season with a strong spirit of community, appreciation, and encouragement. So we planned and prepped—fueled by plenty of caffeine—to pull off a packed virtual party schedule from March 31 through April 4.
We hosted livestream events, studio spotlights, giveaways, a scavenger hunt for grand prizes, a glimpse into the day-to-day of Team PhotoDay, and more. Keep reading to see how it went and watch the replays!
A New Resource for PhotoDay Users
When planning PDA Week, we quickly realized the need for a new gathering place for our users. While our PhotoDay Users Group on Facebook (lovingly called the PUG) is an active community of almost 3k members, we wanted something a little different to host the week’s events.
We created a new Community page on the PhotoDay website. Here, visitors could watch the livestreams, view a schedule of events, find scavenger hunt clues (more on that below), and more.
Now that the week is over, we’ll continue growing it into a handy page with links to relevant resources, studio stories, upcoming events, and more. Take a look around.
PDA Week Events
Our schedule was filled to the brim with celebrations and giveaways!
Dive into our week recap below:

PDA Week Kickoff
Our party’s kickoff event! In this livestream, we shared the week’s schedule of events, introduced the Community page, and announced the fantastic prizes up for grabs through our virtual scavenger hunt. Watch the Kickoff replay.
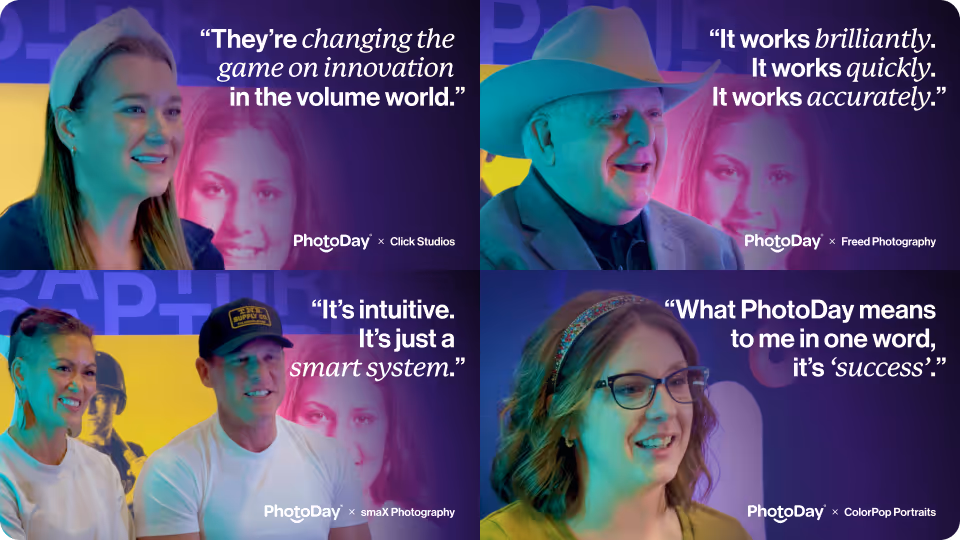
Studio Spotlight Interviews
Earlier this year at SPAC, we sat down with some wonderful PhotoDay Users to chat about how they use the platform. Throughout the morning, we livestreamed video interviews with Emily Davis, Jay & Carinna Boatwright, Neal Freed, and Aimee Juarez. Watch the interviews.

Live Webinar: The Secrets to Selling Online
Prepare for a successful spring season with expert tips for increased online sales, streamlined workflows, and more with a special edition of our Secrets to Selling Online webinar! Stevie Williams (Customer Success Manager) was joined by special guests Jay Boatwright, Rocky Thompson, Kallie Dyer, and Kristen Martz, who shared valuable, practical insights into their businesses. The replay also includes a few more tips from our wonderful PhotoDay Community. Watch the replay.

Giveaway Day
While our scavenger hunt ran all week, today was all about prizes! Throughout the morning, we dropped timed giveaways of gear, Miller’s gift cards, and PhotoDay swag. We’re still amazed by how fast everyone could type, because prizes were claimed within seconds of each drop.
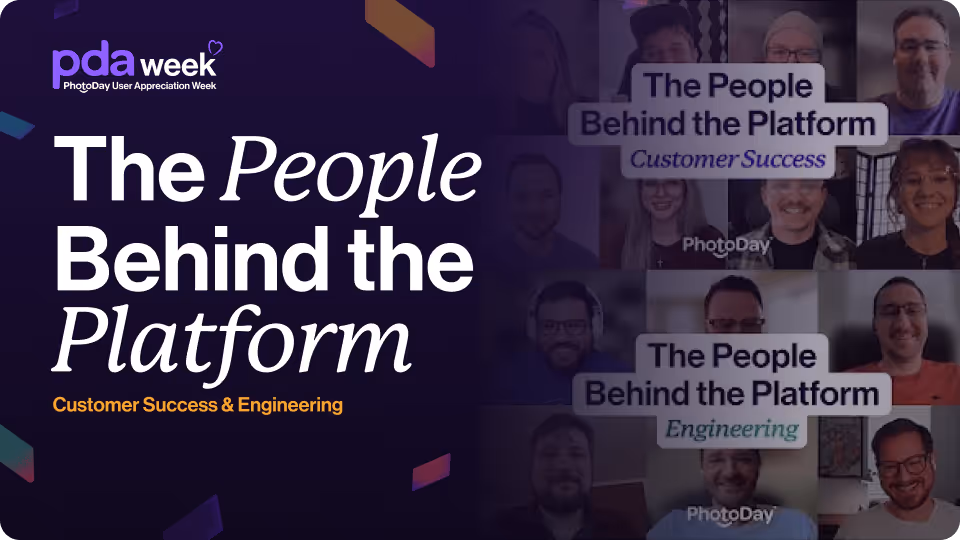
The People Behind the Platform
Ever wonder who's running this thing? Get a glimpse behind the scenes and meet the people who make up Team PhotoDay. 💜 Watch the interviews with our Customer Success Team and Engineering Team…and stay tuned to meet more departments like The Bubble, Marketing & Creative, and Product!
The Future of PhotoDay
In this live event, attendees got to hang out with PhotoDay’s Rainer Flor (Co-Founder, CPO) and Wayne Thompson (Senior Product Manager) to see what's new and hear what's on the horizon for the platform! Watch the replay.

Brunchin’ with the 'Ustins
Our closing ceremony for PDA Week was a fun-filled brunch livestream with the ‘Ustins—Austin (Studio Success Manager) and Justin (Studio Success & Community Manager). They flexed their bartender skills, had a hot ones contest (there may have been tears), and announced the grand prize winners of our scavenger hunt! Watch the replay.
Meet the Prizes
Throughout the week, studios embarked on a virtual scavenger hunt across the PhotoDay website. Daily hints led to hidden forms where they could test their trivia knowledge. At the end of the week, the players with the most points won the grand prizes!
LVL Up System
Thank you to Mario Muñoz and the LVL Up team for sponsoring our grand prize of a LVL Up Studio System—a revolutionary lighting setup that will streamline your next picture day. With it, you can guarantee consistently perfect lighting with every picture you take while significantly reducing your set-up and breakdown time. Learn more about LVL Up.
Roberts Camera Gift Card
Our runner-up grand prize was a $500 gift card to Roberts Camera! We’re so grateful to John Scott and the Roberts Camera and UsedPhotoPro teams for sponsoring this generous prize. If you’re looking for gear or guidance on what to buy, don’t hesitate to reach out to the Roberts team!
Daily Coffee
Each morning during PDA Week, we shared a code for our users to enjoy a cup of coffee (or tea or hot chocolate) on us! We loved seeing everyone’s photos with their cups, and it warmed our hearts knowing we were all sipping together.
Keeping the Love Flowing
PDA Week might only happen once a year, but our love for the PhotoDay community never stops. We appreciate every one of our users—whether you’ve been using PhotoDay since the beginning or you just signed up, we’re here to help you succeed!
TLDR: We love our users and are here for you every step of the way.
Check out this message from our team to you 💜
So what are you waiting for?
If you’re looking for a new online sales solution, finally ditching paper order forms, looking to scale your business rapidly, or anywhere in between, we know how to help.
Book a 1:1 demo call to see how PhotoDay can be your best business partner. Our support is always complimentary, quick, and tailored to your needs.
Create a free account to jump right into streamlining and simplifying your picture days from beginning to end!
P.S. Did you hear that PhotoDay Knockouts are now only 10¢? We cut the price of Knockouts in half so you can extract even more images for less!

Introducing the PD ONE Award
Meet the new volume photography award that celebrates capturing greatness.
From the beginning, PhotoDay’s founders have had a simple mission: to propel the volume photography industry forward into higher-quality photography, enhanced customer experiences, and improved quality of life for photographers.
Now, over seven years into this journey, we’re incredibly proud of how much our users have accomplished with the help of our workflows, platform, and features. With precious new free time, a quickly scaling business, and the courage to try something new, the opportunities are endless.
As a community-focused company, celebrating the unique achievements of photographers using PhotoDay is essential to our identity…but it’s also downright fun. Blog posts, video interviews, and live webinars are great, but we wanted to try something a little more tangible and flashy.
At this year’s SPAC awards ceremony, we introduced a brand new accolade for success and innovation called the PD ONE Award.
Keep reading to learn more about the award and meet the 2025 winner!
What is the PD ONE Award?
The PD ONE Award is a public acknowledgment of exemplary innovation and success in the volume photography industry by a photographer using PhotoDay. This public celebration is a way for us to say thank you and well done to a notable studio with substantial results facilitated through our platform.

Crafted with both style and significance in mind, the PD ONE Award is a sleek and timeless trophy with a dash of PhotoDay personality. Designed to be something that could be held and handled while still looking pretty stellar on your office shelf, it's a symbol of shaping a brighter future in volume photography and achieving new heights while finding joy in the process.
And the winner is…
We’re excited to announce that the winner of the 2025 PD ONE Award is none other than Jay & Carinna Boatwright—owners of smaX Photography, creators of Boatwright Bootcamp, and some of PhotoDay’s earliest adopters.

We chose the Boatwrights not only for their extraordinary impact on the volume photography industry as a whole, but for their monumental, verifiable success in switching from paper order forms to online selling with PhotoDay.
Collaboration in Action at SPAC 2025
Trade show and conference season is upon us! Annual events—like SPAC, Imaging USA, SYNC, and so many others—are excellent opportunities to immerse yourself in all things volume photography while being surrounded by like-minded industry leaders and peers.
In January, PhotoDay headed to Las Vegas, NV, for our seventh year at SPAC (School & Sports Photographers Annual Conference), the world's largest annual high-volume school and sports photographer conference. Every year without fail, SPAC brings together social events, education, and networking all under one roof, but 2025 was an extra special occasion to celebrate its 70th anniversary.

Typically, trade shows are the prime time to put your business in the spotlight. Sure, we can tell you how life-changing, time-saving, and money-making our features are until we’re out of breath…but what really makes PhotoDay stand out? The people.
But not just the people who dreamed of, built, and continue developing PhotoDay…the incredible photographers using it, too! We decided to use our booth to highlight them alongside the platform, features, and workflows they love.
Our team is endlessly thankful for the PhotoDay community coming together to truly make this SPAC a special, collaborative experience. Keep reading to see how it went!
VIP Guests in the Booth
During trade show hours, the PhotoDay booth was the place to be! SPAC attendees got to meet the team, chat with PhotoDay experts, and connect with our many special guests sharing about how they use PhotoDay to get life-changing results!
Finding Success with PhotoDay: An Interview with Emily Davis
At PhotoDay, we believe that investing in continuing education is essential for expanding your volume photography business. And we’re not alone in that conviction! Many well-known educators and thought leaders in the industry consider PhotoDay their best business partner.
With our platform and solutions helping streamline workflows and increase sales, photographers have new, valuable free time to focus on other ventures, like teaching others how to scale their businesses.
PhotoDay proudly sponsors and attends numerous events throughout each year, including Boatwright Bootcamp by Jay & Carinna Boatwright, Sports Photography Intensive by Brad Deel & Dani Mack, Do It Different Workshop by Rose Coleman & Emily Davis…who we’re interviewing today!
Owner of Click Studios and Kiddi Clicks in Dallas, Texas, Emily Davis is a photographer by trade and entrepreneur by heart. As a highly successful business owner and industry leader, she’s passionate about sharing her tips for scaling fast and having a plan for where your business is going so you'll know when you've arrived.
Keep reading to hear Emily’s story of how she broke into the volume photography business, where she’s headed with her new coaching program, and how PhotoDay has helped her along the way.
The Starting Point
PhotoDay: Start from the beginning! Tell us about your journey and how you ended up doing photography.
Emily Davis:
In 2010, I was at Texas Tech University doing music education. I thought I wanted to be a choir director or a music teacher—in high school, I was a choir kid, theater kid, did a little bit of dance, and I thought that I wanted to be in the arts that way. But the more we were going into the schools and kind of seeing how all that worked. I was like, “I don't really know if teaching is for me.” I didn’t connect with being under administration or following rules...I’m not a big rule follower.
Next, I thought that maybe I wanted to be a wedding planner. I was about to get engaged to my high school sweetheart (and now husband), so I was already looking up stuff for our wedding.
I sent out all of these emails to all of the wedding planners in town saying, “I just want to come work for you for free. I'm moving to Dallas afterwards, so I'm not going to be competition. I just want to see if this is the route that I want to go down.”
No one got back to me. After that, I realized that I was obsessing over wedding photographers’ blogs to get ideas for my wedding (this was before Pinterest), so I thought, “Maybe I could be a wedding photographer.”
So the summer between my junior and senior year of college, I bought a camera off Craigslist in a Walmart parking lot, taught myself photography, and launched a wedding career from 2010 to 2017.
The Pivot to Volume
Emily Davis:
I did that till the end of 2017, when I was pregnant with my daughter. With two babies, not wanting to work weekends anymore, and wanting to have a more flexible schedule…I moved to photographing preschools.
Back in 2014, my own church had asked me, "Hey, we have a little preschool. Do you want to shoot the pictures?” And I was like, “Sure, I'll shoot the pictures.” Do I know how to do that? No. But I can figure it out.
So I did that, loved it, and realized that it was good, easy money doing volume. Over those years, I started really growing that side hustle and got to where I was capturing 60 preschools a year as Kiddi Clicks.
But then COVID obviously tanked the preschool business, so I was making zero dollars in March 2020. Then in May in Texas, we started playing baseball. So, I just decided, “I'm gonna have to learn sports.” I was never a sports girl in high school, so I just kind of got on the internet and said, let me figure out how to shoot baseball…and here we are.
It was kind of a forced pivot, but oh my gosh, it was the best thing that ever could have happened. We still do preschools, but now schools and sports are our main focus.
PhotoDay: What did your workflow and sales solution look like at the time? Were you doing traditional paper order forms or online sales?
Emily Davis:
I did paper order forms one time. For that first preschool job in 2014, I edited the photos, sent them to the lab, they sent me 3.5x5 prints, and I stuffed all the bags individually then handed them out to the parents. I came back to the school and was there morning and afternoon four days in a row, trying to get all the order forms turned in. And then I was getting late order forms, but I had already ordered pictures, but you have to have a $15 minimum…After that, I said, I'm never doing these paper order forms again.
I was using Pixieset for my weddings, so I tried putting preschool photos on there and only sold prints and digitals. It was very clunky and not set up for that at all, and I couldn’t offer any specialty products. I used Pixieset like that up until 2023, when we finally moved fully to PhotoDay, which we’d been using since 2020 for anything that required private galleries.
Scaling & Streamlining with PhotoDay
PhotoDay: Having a full lineup of products can do wonders for sales and customer satisfaction! So how did you come across PhotoDay, and what convinced you to slowly adopt it for all of your different markets?
Emily Davis:
I went to Boatwright Bootcamp in the summer of 2020. At that point, I knew that PhotoDay was the best solution for private galleries because we’d tried another company for the preschools three or four times, and it was always a nightmare with the QR codes, manually matching them up, etc.
Once I saw the Capture App and how easy it was to take the reference picture on your phone, it would just match it all up in the system, and I didn't even have to do anything with it—then, every time we had to do private galleries, we went with PhotoDay.
What originated the discussion about switching over to PhotoDay for all of our jobs was we had a baseball league that said, "Hey, if we can't do memory mates, we got to go somewhere else,” and they still wanted to use public galleries. We couldn’t do memory mates in Pixieset, but we said, "Okay, we're going to figure something out."
With PhotoDay, we didn't have to put in anything or do anything—we just clicked the sport, and it would just have memory mates for whatever sport it was. We got such good sales from that league, and customers were buying all of the other novelty sports products.
We like processes and workflows at Click Studios. To keep it all on one platform was important to us, and publishing jobs on two platforms just got to be too much. So we started using PhotoDay for every single thing.
PhotoDay: We’re all about simplifying your life in every way possible. How did it go once made the full switch? Did you see an increase in overall sales, AOV, etc.?
Emily Davis:
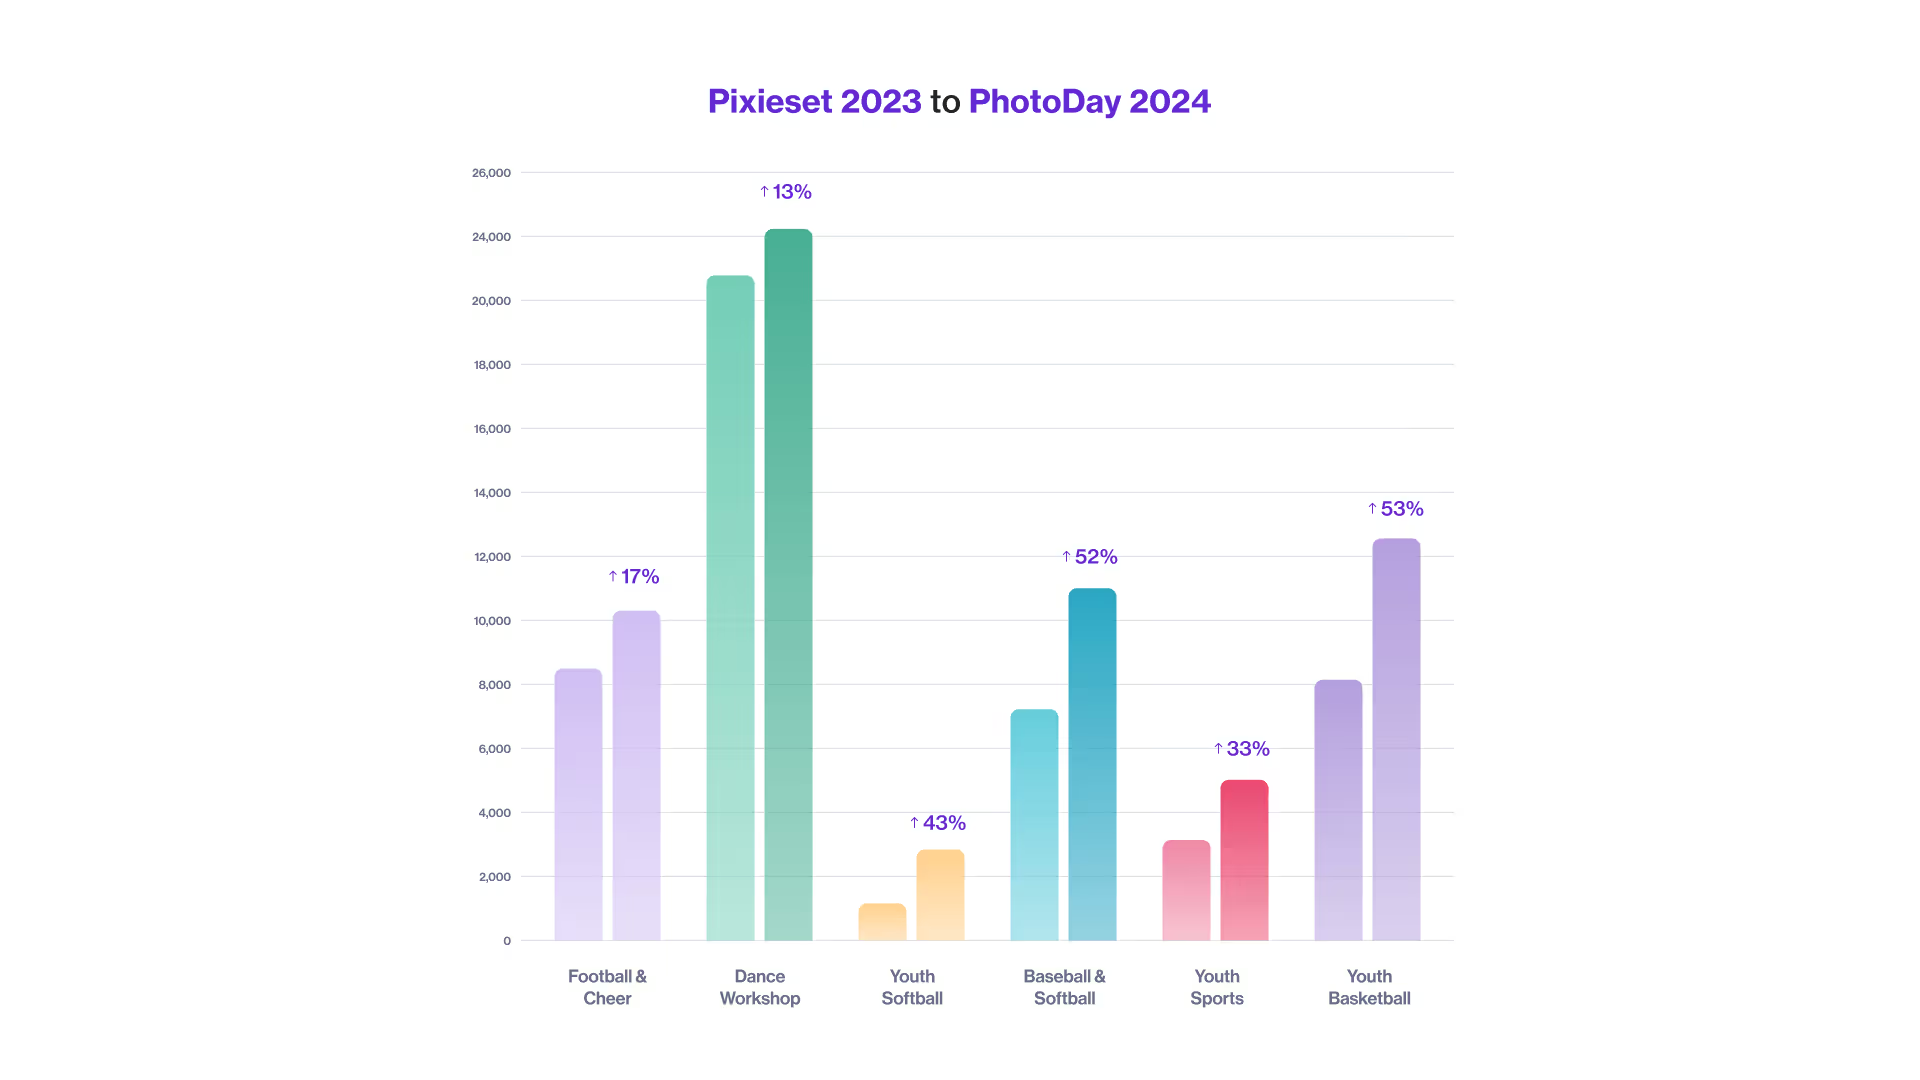
At the beginning of 2024, I thought, “Well, maybe this is costing too much money,” so we went back and looked at 2023 sales since we’d just hit one full year with PhotoDay. Looking back at those same accounts in 2022, the sales were up 12-15%. So, it wasn't even a question. it was worth staying with y'all.
Once we actually did the math and had the data on it, it was obvious: PhotoDay is making us more money than had we stayed with the other solution.
PhotoDay: We hear that story a lot! It's one of those things where once you run the numbers, the minor fees are more than worth it. After switching, PhotoDay Users see an increase in sales, higher AOVs, and priceless time saved.
Empowering with Education
PhotoDay: Let’s dive into the education side of things. You may not have become a music teacher, but you have found yourself helping others feel empowered with their volume photography businesses.
Emily Davis:
A lot of the education that I do is on scaling.
It lights me up when people come to me with problems—especially the burned-out photographers who are doing everything by themselves. They don’t know if they want to deal with an employee, they’re wondering if it’s really going to be worth it to scale their revenue up and if their net is going to come up with it…I’m here to tell you it does.
When you scale your revenue up, your net goes up, and your amount of working goes down.
PhotoDay: What education opportunities do you offer?
Emily Davis:
Rose Coleman and I have an education brand called Do it Different. In the fall of 2023, we did a workshop and a 12-week mastermind class where we talked about shooting, business, pricing…a true inside look at Click Studios and Center Stage Photos.
I also have my own venture called The Volume Vault that’s focused more on the business side. I’m currently running an evergreen coaching program that’s very personalized—one-on-one calls and emails with me, as well as group calls to focus on goals and how I can help each individual make them happen.
My coaching program is for anybody who is looking to get into the volume space all the way up to somebody who’s been in the volume space for years and years and wants to improve and streamline their processes and efficiency.
I also have some online courses coming out. That’s how I first got into photography education—I was in a couple of Facebook Groups where people were asking a whole bunch of questions about preschool, but nobody was out there educating about it. So I made a preschool photography online course, which I’m in the process of revamping and rerecording right now.
I have another course coming soon called “Book by Email,” which is all about prospect marketing via email. I’m really passionate about prospect marketing. When we’re targeting leagues, schools, preschools, dance studios, and all of the clients we want, we reach out to them to sell that “doing pictures with us will improve your life, because we’re going to make this so easy for you.”
I’m working on getting all of that business stuff out there—I feel like we get so much education on how to shoot and not a whole lot of education on how to get the jobs.
PhotoDay: That’s so important! We always say picture day is just one tiny (but important) facet of running a volume photography business. It sounds like you’re staying pretty busy. How does work-life balance fit into business goals like scaling and growing?
Emily Davis:
I’ve found that what a lot of people are looking for is just exponential growth. They want to quit their full-time job, but they need to scale. Or what I feel like is mostly happening in the volume industry is people are trying to run it all on their own, and then they're just so busy they don't have time for a personal life. They don't have anyone helping them, or they're trying to do virtual assistants, or they're trying to do “my cousin who's in college has a girlfriend who helps me on Tuesdays and Thursdays for four hours.”
I feel like I did the opposite of that. We've got four full-time adult employees, plus me, who work in-office 40 hours a week. We’ve got a real thing going, and I go to jiu jitsu at 4:30 every day, then we have basketball at 6:00, and I'm at their games on Saturdays—this volume business doesn't run my life because I have other people who can help me.
But to be able to do that, we had to scale really quickly from a revenue that could support just me to a revenue that could support all five of us.
Emily’s Favorite PhotoDay Features
PhotoDay: It's amazing that you're able to do that! We love hearing about photographers achieving that sacred balance between work, family, and fun. How has PhotoDay helped free up your time? Do you have any favorite features?
Emily Davis:
How are people still using paper forms? I did paper order forms that one time and said, “I'm never doing this again." With PhotoDay, we load everything in, set it to sell... and let it start making us money.
We also love the automated text marketing built into PhotoDay. We are able to send out messages any time. In one day, we sent a follow-up text to every gallery from this year, and ended up having a $10,000 day just from remarketing older jobs!
I think that's really important to be able to capitalize on those old jobs. Whereas if you did paper order forms, you can't remarket to those people.

We use public galleries for everything that we can, and private for what we have to, which includes a couple of our preschools and when we need yearbook selection. But other than that, we're public galleries all the way, and we try to steer accounts in that direction.

PhotoDay’s Landmark Features: New Additions & Classics
“The best way to predict the future is to create it” (Peter Drucker), and that’s precisely why PhotoDay exists—to create and shape the future of volume photography. Our technology was never meant to merely “keep up with the times” but to propel the industry forward into higher quality photography, enhanced customer experiences, and improved quality of life for photographers.
In 2021, we wrote our first Landmark Features blog about our biggest and best features at the time. We’re excited to reflect on how our classics have developed while introducing you to our newest features!
Even if you’ve been using PhotoDay for a while, you’re sure to learn something new about our revolutionary workflows and how to implement them for your spring sports season, next school picture day, and beyond.
The New Releases

Organization Pages
Set up and share a single link that contains all of an organization’s galleries.
If you’re photographing multiple jobs for one organization, an Organization Page acts as one central place for them to find all of the jobs that you’ve done with them (such as multiple sports for one high school, a league’s photos season over season, etc.).
It’s an excellent way for the organization to reference, find, and share relevant galleries with parents. Sharing one link with everyone is easier than sharing multiple galleries—add it to your website, ask the league or school to send an email, add a QR code to printed posters and flyers…the options are endless!
Plus, the Organization Page link stays the same over time, so it’s an evergreen resource! If you keep your galleries open, it also presents an opportunity for new or second sales from past galleries.
Learn more about Organization Pages.
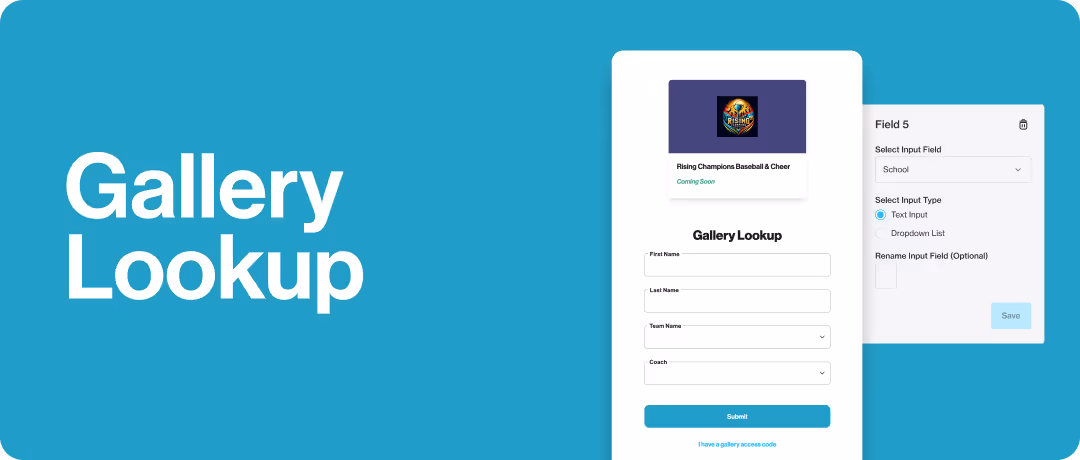
Gallery Lookup
Allow customers to find their private galleries without an access code and without sacrificing security.
Say goodbye to “I lost my access code” messages and get ready to lighten your customer service workload with Gallery Lookup. Give customers a way to search for their private access code by entering qualifying information to find their private access code.
Organization Pages are a total game-changer if you don’t have parent emails, but still incredibly useful even if you do receive parent emails in your subject data, since you can market more easily and lessen your customer service emails.
Customer Success Manager Stevie Williams says, “I think every single person using private galleries should use Gallery Lookup.” Simply set up Gallery Lookup > Share the Organization Page link or Job URL > Let PhotoDay do the rest.
Learn more about Gallery Lookup.

Yearbook Selection
Simplifying the photo selection workflow for photographers, organizations, and customers alike.
Have you ever wished your customers could pick their yearbook photos without leaving the gallery? With Yearbook Selection, you can easily set up, communicate, review, and export customer selections all within PhotoDay.
You’re in control—allow customers to select up to two poses and adjust the instructions and pose titles to fit the needs of each job (e.g., formal/informal or color/black and white or smiling/game face). You can also use it to gather customer selections for other use cases, like custom banners.
As the selection deadline approaches, our automatic email and text reminders establish a helpful sense of urgency. Simply put, more galleries accessed means more photos viewed and more orders placed. Then, when the selections are made, it’s easy to edit, export, and share with your organization.
Learn more about Yearbook Selection.

Digital Download Bundles
Sell multiple download products together to give your customers enticing deals.
PhotoDay users can always sell High-Res and Social Sharing downloads a la carte with a set retail price, as part of a package, or both. But with digital download bundles, you can price High-Res Downloads based on the number of downloads they are purchasing using Tiered or Max pricing options.
Additionally, we’ve designed these Digital Download Bundles to create unique upselling opportunities in both the customer storefront and cart.
Digital downloads are popular, high-profit products, and our data shows that download sales are drastically on the rise!
Learn more how to sell more with Digital Download Bundles.
The Classics

AdvancePay
PhotoDay’s game-changing answer to traditional pre-pay.
One of our most popular features, AdvancePay, allows you to sell credit amounts to your customers in advance that they can apply towards their order when pictures are ready. In other words, it encourages your customers to commit to ordering without capping your potential sales.
When the gallery is published, having a prepaid credit to use gives customers the ability to purchase as many photos and products as they want without being tied to a predetermined package or price point.
Incentivize early spending while spreading the word about the gallery by creating an accompanying AdvancePay Offer available only to customers purchasing AdvancePay credits.
Learn all about AdvancePay and how it can grow your AOV.
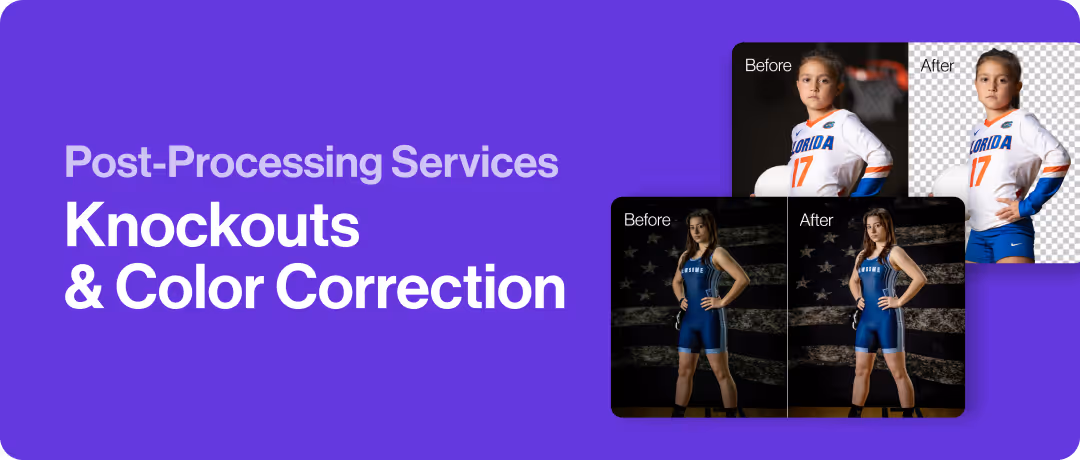
Post-Processing Services
Save time and money with Knockouts and Color Correction.
PhotoDay’s powerful post-processing features will streamline your after-picture-day workflow so you can post galleries (and start selling) faster than ever.
Knockouts intuitively extract the subject from a solid background (both traditional backdrops and natural outdoor settings) for the purpose of adding a custom background behind the subject. You have the option to download for composites or transfer them to a gallery with digital backgrounds enabled.
Color Correction goes beyond the basics by intelligently adjusting exposure, contrast, white balance, saturation, and even gamma to deliver a professional look for every image.
Keep things easy by post-processing your photos in the same place that you’re selling, and with prompt turnaround times, your images will be polished and ready to publish in mere minutes!
Learn more about Knockouts and Color Correction in PhotoDay.
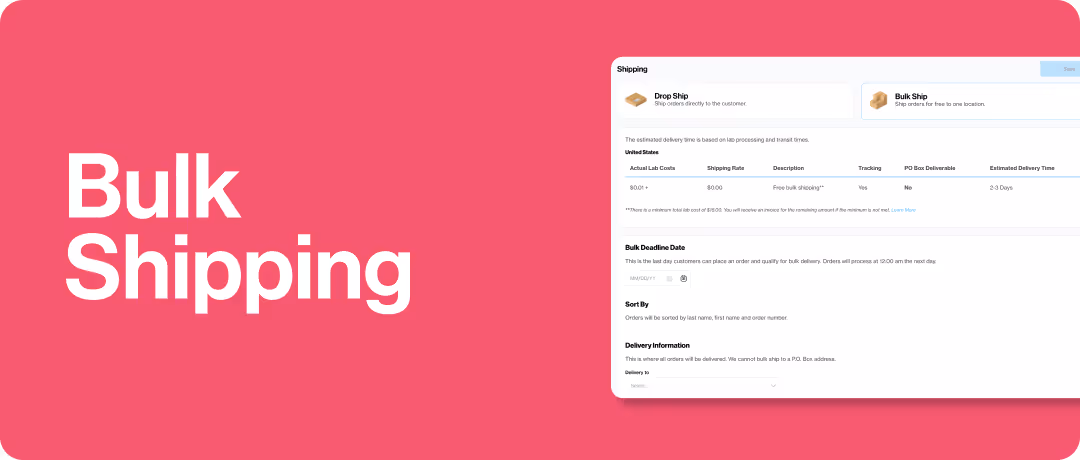
Bulk Shipping
Specify one location for all orders placed in a job to be shipped together.
While PhotoDay’s default shipping option is direct-to-consumer drop shipping for all gallery types, you may not always want orders arriving at your customers’ doorsteps. That’s where Bulk Shipping comes in.
Photographers using Miller’s Professional Imaging and PhotoDay private galleries can also offer free Bulk Shipping to their customers. Bulk Shipping allows studios to specify one shipping destination for all orders tied to a job to be shipped together—completely free and overnight.
Offering free Bulk Shipping to your customers creates order urgency as they are conveniently reminded to order before the shipping deadline, while helping you save on lab costs.
Learn more about Bulk Shipping.

PhotoDay Capture App & FaceFind
FaceFind is PhotoDay’s facial clustering technology that makes it beyond easy to find, match, and group photos together.
It’s a “mind-blowing” tool* that will save you countless hours of paperwork and keeping track of who’s who. *Don’t just take our word for it!
FaceFind for Group & Public Galleries is an optional customer-facing search feature that filters the gallery photos based on a matched reference image and displays any and all photos containing that subject’s face.
In Private Galleries, FaceFind works behind the scenes with the PhotoDay Capture App by recording reference photos and matching the finished professional photos to the correct subjects.
We love sharing how the magic of FaceFind and PhotoDay Capture can transform your business and help you leave manual data matching in the past. Learn more about: FaceFind, PhotoDay Capture, and how to use PhotoDay Capture for composites.
The ones you know and love

Backgrounds
Give customers the choice of swapping backgrounds for different poses and products.
It’s as simple as creating collections of backgrounds (school, sports, holiday, etc.), attaching them to a job, and publishing the gallery. Extract and upload your own PNGs to the job or use our Knockouts service for an easy button solution.
Offering backgrounds broadens your digital inventory, which in turn encourages multi-pose purchases, higher AOVs, and overall happy, creative customers.

Retouching
Give customers the option to retouch the photos they want.
Retouching is a customer-facing add-on feature that magically softens and smooths skin, removes acne blemishes, and evens skin tone without affecting permanent scars, freckles, etc.
You can add retouching to any price sheet, and it will show up during the checkout process for customers to apply to any or all of the photos in their cart. With the click of a button, you can offer this popular add-on to your customers to increase your revenue without any extra work. A true win-win.
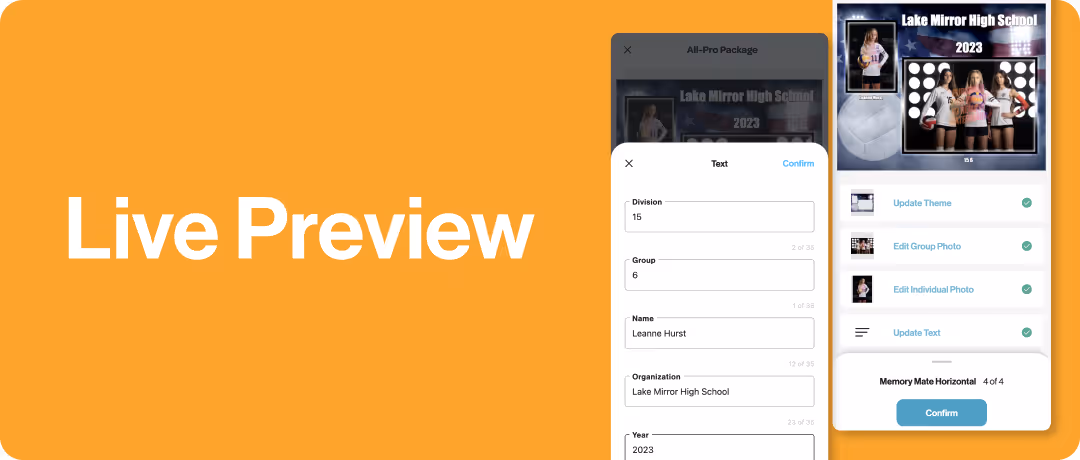
Live Preview
Offer peace of mind for customers and fewer reprints for labs and your studio.
Customers expect to see a preview of their products before purchasing, especially for specialty items like memory mates, buttons, magnets, statuettes, etc.
These live previews display any theming options, background choices, photos, text, and crops selected during the customer’s customization process.

Custom Themes
Get creative with custom memory mate themes
Why not go above and beyond by offering memory mates exclusively designed for the organization you’re photographing?
While PhotoDay and our lab partners provide a collection of beautiful theme options, you’re also able to create and upload your own memory mate designs. This is a great way to impress both customers and organizations alike.
But that’s not all!
There’s so much more to PhotoDay than a single blog post can contain. Our mission to transform your business for the better has resulted in the development of countless helpful features and tools, including:
- The PhotoDay Dashboard App. Step away from your computer without disconnecting from your studio—let us tell you when you’ve made a new sale!
- Modern, mobile-friendly online galleries your customers will love.
- Effective, money-making tools and strategies for offers and promotions.
- Stunning theme collection in collaboration with Don Ward (3rd Creative) and Miller’s.
- Marketing & Sales Kit with downloadable, customizable templates.
So what are you waiting for? If you’re interested in having your most successful season yet, create a free PhotoDay account and get started!
If you’re still thinking it over, check out these motivating stories of real PhotoDay users who have found jaw-dropping business success and transformed their lives with the help of our platform.
Want to talk to a PhotoDay expert? Book a 1:1 demo call with our outstanding customer success team. Our support is always complimentary, quick, and tailored to your needs.

Why PhotoDay? Hear from Real Photographers | Part 2
We’re back with Part Two of Why PhotoDay? If you’re curious how PhotoDay’s innovative features and time-saving workflows can transform your volume photography business, you’re in the right place.
Real-life testimonials from the photographers using us are the best way to share what PhotoDay can do for you.
In Part One, we heard three motivating business success stories that changed lives. In the new video interviews below, you’ll meet three more volume photography studios and hear why they choose PhotoDay to improve and grow their businesses.
Jake Carr - J7 Images
Meet Jake Carr of J7 Images. Located in the small town of Dwight, Illinois, Jake specializes in sports volume photography—high schools, little leagues, youth football, youth wrestling—and has started branching into schools, as well, with the help of PhotoDay.
Having grown up in a “photography home,” Jake shares how he went from Parks and Rec to football referee to stepping in as an impromptu photographer one day and “never looking back.”
An opportunity to double sales
Jake: It's really a transition to understand and have a little bit of faith that your pictures would sell online…But it's just really opened up an opportunity for us to sell a lot more.
It's not us choosing one image and then a parent going, well, what about that serious one? Or what about that goofy one that you did? It's an opportunity for us to show everything that we've done in a shoot and allow parents to buy it.
Jake: It's literally doubled our sales from paper order forms.
It allows us to do flash sales. We can go back and catch people from galleries who maybe they didn't have the money to buy at that particular time, or they forgot about it.
PhotoDay just keeps everything in front of [customers] through the text apps. It keeps everything top of mind so that we can make more sales. And it's literally doubled our revenue.
Growing alongside you
Jake: The core reason that PhotoDay works is the team behind it…They are photographers. They are people who have worked in the industry, and they are thinking about things from our point of view…and making it so that we can do what we do best, which is create…It’s a stress reliever. It gives you your life back.
Jake: The people behind [PhotoDay] just keep innovating. They keep creating things, and that's why we partner with PhotoDay.
If you're doing volume and you're not using PhotoDay, you are missing out on the opportunity…to get some of your time back for your family, to grow your business…to take that trip that you wanted to go on.
They can do a lot of the heavy lifting and hard work for you. So if you're not using PhotoDay, I highly recommend—give it a try.
Learn more about Jake and his journey with PhotoDay in Embracing Technology: An Interview with Jake Carr.
Connect with Jake Carr: Instagram, Facebook, Website. Be sure to watch PhotoDay Presents: Portrait Mode, Jake’s motivational webinar series about how having your own portrait captured and displayed can unlock your true potential.
Rocky Thompson - SplitRock Photography
Based out of northwest Iowa, Rocky Thompson of SplitRock Photography specializes in volume sports photography and Pre-K-12 school photos. He always had an interest in photography, but when a non-photo-related job morphed into doing photography, Rocky discovered that those were his “best days.”
Hear how Rocky found PhotoDay (thanks to his wonderful wife) and how it’s completely changed his business by saving time and eliminating those pesky paper order forms.
A helpful community
Rocky: You learn as you go, and you find people that help you along the way...I just had so many people [in the photography community] for no reason, just reach out with help. And, you know, a lot of those people—if not all of them—are PhotoDay people.
Rocky: You will not find any customer service that is any better in the industry, period.
They understand. The customer service is impeccable. I would recommend PhotoDay, and I probably do, 3 or 4 times a day, if not more than that.
More time = priceless
Rocky: All of a sudden, I had extra time—and that’s the one thing we don’t get more of, is time. And I was blown away.
Rocky: You can’t get that time back that you sit at your desk fulfilling orders. It’s a thing of the past…I’ve never done another paper order form since…and I never will again!
Rocky: I never thought I would have a career in photography….never in my wildest dreams thought that this would be possible. And it would not be possible without PhotoDay, and the people behind PhotoDay.
Connect with Rocky Thompson: Instagram, Facebook, Website. Learn more about the PhotoDay Capture app and our engaging, helpful community in the PhotoDay Users Group on Facebook.
Jason Marino - Strada Studios
Jason and his wife, Joanne, own Strada Studios in northwestern Arizona, just outside of Las Vegas. They got their start as luxe wedding and portrait photographers but now focus on capturing schools and sports creatively in a volume setting.
Jason shares how their quality of life has improved and why he recommends PhotoDay to every volume photographer. Plus, discover what his favorite “behind-the-scenes” PhotoDay feature is that he wishes more people knew about!
A favorite “lifesaver” feature
Jason: One of the big things that PhotoDay has done to really make our lives easier…is the ability to export the previous year's picture and student data and use those as the check-in photos in a new season for that same job.
We're able to go on-site and not actually have to spend a lot of time checking any kids in…This saves us countless, countless, countless labor hours and just eliminates mistakes, and makes the entire day run a lot smoother.
And that's really probably my favorite kind of behind-the-scenes feature that I wish more people would know about because it really is a game-changer and a lifesaver for your business.
Get your life back with PhotoDay
Jason: [PhotoDay is] really such an important part of our business and has really changed everything for us…from our time management to our free time to the ability to travel and really enjoy our life.
I want that for my friends…and for the other people in this business. And so when I think about how the quality of life has improved for us and our autonomy has improved, I recommend PhotoDay to everybody and literally tell them that exact thing: ‘Hey, if you want your life back, get PhotoDay.’
Check out our first interview together, Shifting Focus and Saving Time with Jason and Jo Marino, and our one-year-later follow-up interview to hear more about how the Marinos have been able to scale their business, grow their sales, and work more efficiently.
Connect with Jason Marino: Instagram, Facebook, Website. Learn more about PhotoDay’s private gallery workflow and how to use a previous year’s data/pictures.*
*Please sign in to your PhotoDay account to view this support article.
Whether you’re already well-established in the volume industry or just getting started, we hope you find these stories both inspiring and motivating! As each user continues to grow their studios, we’re honored that PhotoDay has played a significant role in their successes.
If you’re a photographer looking to streamline your workflow, increase your revenue, and improve your quality of life…what are you waiting for?
Create a free account to jump in and see what PhotoDay can do for your business! Or book a complimentary demo call to get started—our customer success team is excited to help you every step of the way.

Why PhotoDay? Hear from Real Photographers | Part 1
Wondering exactly how PhotoDay’s workflows and features can improve your business? There’s no one better to hear from than the actual photographers using us! We're excited to share the motivating stories of real PhotoDay users who have found business success and transformed their lives with the help of our platform.
In these brief video interviews, you’ll meet three accomplished volume photography studios and hear how PhotoDay has saved them time and helped them grow their businesses.
Get ready to be inspired!
Rose and Tim Coleman - Center Stage Photos
With over 20 years of industry experience, Rose and Tim Coleman of Center Stage Photos are known for their all-star cheerleading and dance portraits. The Colemans are based out of Oklahoma City, OK, and travel around the country photographing, speaking, and educating.
In this video, you’ll hear about why they chose PhotoDay and some of their favorite features.
Buddy Photos Made Easy with PhotoDay Capture
Rose: We had tried out a bunch of different other options, and we finally landed with PhotoDay because of the Capture app. We are just a huge fan of the Capture app and being able to send private galleries.
Rose: We’re able to take more pictures and post all of them.
Rose: We take a lot of buddy photos. PhotoDay became the easiest solution of pairing those with FaceFind into their galleries. That technology blew our mind and made it so easy.
A Solution and Community that Fits
Tim: There are other solutions like PhotoDay, but…it just kind of had the best vibe for us. It fits more of what we wanted as a brand.
And the people involved just made it feel more like a community, rather than just a photo solutions company that we worked with or for.
Rose: You got a problem? Just talk to the people in The Bubble. There are only nice people in there, and they will help you solve any weird situation or problem.
Rose: I would recommend PhotoDay to people that want to sell their images online, that want to have the best tech out there, the best support with customer service, and to make their lives easier and get that little cha-ching on their phone every day.
Be sure to watch our previous interview, How to Balance Work, Life, & Everything In-Between, where Rose and Tim share how they balance running a successful studio, making time for family, traveling, and taking care of their growing farm.
Connect with Center Stage Photos: Instagram, Facebook, Website. Learn more about PhotoDay Capture and selling digital downloads.
Amy Minshull and Nikki Geertsema - Nebraska Portraits
Meet Amy Minshull and Nikki Geertsema of Nebraska Portraits. Based in North Platte, NE, Nebraska Portraits focuses on timeless school portraits and dynamic sports photography. With roots in fine art portrait photography, they jumped into volume to meet the needs of their community.
Amy and Nikki share how they transitioned from paper order forms to online selling with PhotoDay and how it’s had a positive impact on their lives and business.
Saving Precious Time and Resources
Nikki: PhotoDay has made my life so much easier. We can do so much more with the time we’ve gotten back from not having to manually do everything.
Amy: We lost some employees…and we didn't need to replace them. PhotoDay replaced three people in our office.
Amy: PhotoDay has given back so much time for our families and fast turnaround for our schools. There is no one else that I will run this company with.
Dependable, Functional Technology
Amy: Our [previous] software crashed for the umpteenth time…and we had a job coming in 20 minutes, and my office manager goes, ‘Well, we could try PhotoDay. They're not crashing.’ And I was like, ‘Fine, you have 20 minutes before this baseball team shows up, do your thing.’ And we never looked back.
Nikki: I love the text automation that goes out. I don't have to do it. That's amazing to me.
Amy: There's also been a sale uprise…Being able to have multi-pose really upped our game as far as our minimum order. We used to be like, ‘We just want $15 per player,’ but now, [an average order value of] $55 is where we live…That’s a game-changer.
Nikki: It's not just school and sports. We're actually running a rodeo clinic through it in a couple of weeks. You can do anything with [PhotoDay]. And all the pieces are there, it's not patched together. It's a great software.
Connect with Nebraska Portraits: Instagram, Website. Learn more about how PhotoDay modernizes the school picture day workflow and simplifies marketing online galleries.
Dani Mack - Dani Mack Photography
Dani Mack went from being “the girl with the camera” to “the mom on the sidelines with the camera,” which has led to a highly successful photography career that branched into volume sports photography.
Based in Long Island, NY, Dani Mack Photography enjoys capturing everything from the Little League World Series to commercial headshots.
Your Own Personal Team
Dani: I felt very confident going into my first job because I met with the team, had the onboarding call, and then was able to set up multiple [meetings] with the team leading up to it with any questions.
I would recommend [PhotoDay] just for the fact that you're never really alone—even though you could be a sole person in business, you have a whole team behind you.
Dani: Any questions that might have come my way from a parent through an email…I knew I had ‘my team’ ultimately working on it for me, so it always made me come across very professional, which is ultimately what you want when you have your own business. So I felt very confident in the fact that PhotoDay had my back.
Grow Your Business with PhotoDay
Dani: I went into this very new…dealing with one-on-one [clients] was very different than volume…creating packages and making profit and taking everything into account. And one thing that I liked about PhotoDay was that there were people running me through the whole process.
It never felt like I was alone. They helped me structure [my business] better.
Dani: PhotoDay helped my sales strategy in ultimately teaching me a sales strategy.
Connect with Dani: Instagram, Website. Plus, check out the Sports Photography Intensive Workshop she’s co-hosting with Brad Deel!
Stories like these are what keep the PhotoDay Team inspired to continue developing innovative, life-changing solutions for volume photographers like you. We’re so grateful for these wonderful studios who took the time to share their stories and for everyone who partners with PhotoDay every day!
Want to see what all of the hype is about? Book a 1:1 demo call with our outstanding customer success team. Our support is always complimentary, quick, and tailored to your needs.
If you’re ready to start your PhotoDay journey, create a free account to streamline and simplify your picture days from beginning to end!
Don't miss our follow up blog post: Why PhotoDay? Hear from Real Photographers | Part 2

PhotoDay’s Ultimate School Photography Guide
You may already know PhotoDay is an all-in-one marketplace for volume photographers—but what does that really mean? Our innovative platform and wide range of features and tools can help photographers thrive in any market.
We know it can feel overwhelming to dive in, especially for school photographers dealing with subject data, checking in students on-site, and ensuring privacy in an online world.
Let us show you how PhotoDay’s transformative solutions work together to cure all your school picture day headaches. Consider this ultimate school photography guide a quick rundown of what PhotoDay can do for you!
Private Galleries in PhotoDay
Private galleries are the backbone of photographing and delivering a school photo job in PhotoDay. Our modern online galleries are mobile-friendly, lightning-fast, and (most importantly) make picking and ordering products fun and easy for customers.
With the private gallery workflow, you can offer each subject an exclusive gallery showcasing only their photos. We’ll go into more detail about each step later, but here’s how it works:

Simplify School Picture Day with PhotoDay's 3 New Features
This summer, the PhotoDay Team has been busy rolling out brand-new, highly-requested features to ensure you have everything you need for the fall season, specifically for your school photography jobs.
In this blog, you’ll learn about the newest additions to your school photo toolbox: Gallery Lookup, Organization Pages, and Yearbook Selection. We’ll explore how these powerful features will benefit your school photography business for years to come!
Paving the way with innovative solutions
From the beginning, PhotoDay has been committed to the success of our users and the growth of the volume photography industry. That’s why we created a complete workflow and marketplace solution for photographers just like you—and the thousands of photographers already saving precious time and money with PhotoDay.
Some of our groundbreaking landmark features include PhotoDay Capture, FaceFind, private galleries, a responsive customer shopping experience, AdvancePay, smart text marketing, and more. We’re incredibly proud of how these features and tools continue improving the lives of photographers using PhotoDay.
But if you should know one thing about us, it’s that we never stop developing new features and solutions! We’ve researched, listened to our users, refined, and built fresh solutions for finding individual private galleries, sharing multiple galleries, and selecting yearbook photos. So, let’s dive in.

Gallery Lookup
When using PhotoDay’s private galleries, a studio’s most significant pain point is: “What if the school won’t share parent email addresses?” We created Gallery Lookup to solve this obstacle without sacrificing privacy.
Gallery Lookup allows customers to find their private galleries without an access code. Simply put, you can now create, market, and publish private gallery jobs much more quickly. All your customers need is a link to the Organization Page or the Job URL.
Missing email addresses
Private galleries in PhotoDay are safe and secure, but some subject data is required for them to work smoothly. So what happens if the school doesn’t want to provide parent email addresses? Now, you can give the school, parents, and subjects a single Organization Page link.
With Gallery Lookup enabled you can rest easy knowing every parent can find their child’s gallery—even if they never received a unique access code beforehand.
Reduce customer service emails
Say goodbye to “I can’t find my access code!” emails. With Gallery Lookup, you and the school can simply share the Organization Page link or Job URL so customers can use Gallery Lookup to find their photos without an access code.
Ideal for schools and beyond!
While perfect for school picture days, Gallery Lookup is also great for sports, dance, and more. Since you control the search field names, you can allow customers to look up by student ID, team name, grade, jersey number, and more.
How it works:
- Configure. Choose the fields customers will use to search for their private gallery.
- Share. Share the Organization Page link* or Job URL with the organization/customers.
- Search. Customers enter their info > PhotoDay matches it with your imported subject data > they enter the correct gallery.
Learn more and get started with Gallery Lookup.
*Speaking of Organization Pages…keep reading to see how these two features are the ultimate combo.

Organization Pages
Organization Pages allow you to set up and share a single link to all your galleries related to an organization. You’ll never have to worry about tracking down multiple access codes for your organizations again!
An organization in PhotoDay = the party for which you’re taking photos (e.g., school, league, dance studio, individual client, etc.). While this feature is an excellent way to share private galleries for school picture days, it’s also a great tool for group and public galleries and other markets—sports, dance, events, etc.
Easy access for organizations and parents
Organizations can use their page internally (admins rejoice!), but they can also share it with parents. This greatly simplifies the customer experience, so no one has to keep track of multiple access codes for different picture days within a single organization.
Streamlined settings for your studio
PhotoDay makes it easy to customize your Organization Page settings by default and for each individual job, streamlining the job creation process. Plus, this link can remain the same year after year, and galleries can be added to and removed from the Organization Page as needed.
Create your first Organization Page:
- Enable it for an Organization and customize your link.
- Choose from a range of visibility and security options to fine-tune your settings.
- Share the Organization Page link with your organization contact and/or customers!
Learn more and get started with Organization Pages.

Yearbook Selection
PhotoDay’s new Yearbook Selection feature simplifies the photo selection workflow for photographers, organizations, and customers alike. With it, you can easily set up, communicate, review, and export customer selections all within PhotoDay.
Let’s dive into how this feature will benefit your studio!
Give customers the power to choose
You’ll never have to collect photo selections with cumbersome paper forms or outside software solutions again. Instead of driving customers outside of the gallery or asking them to complete more steps, you can keep parents in their gallery every step of the way.
Not only will parents and students love having the power to choose their favorite poses, but it’s one less task for your photography studio to handle. Sounds like a win-win to us.
Review and export with ease
While customers do get to select their favorite photos, you’re still in complete control of the final selections via the PhotoDay Studio Panel.
Plus, we know photo selections are only helpful if shared with the organization, so we made it a seamless step in your workflow. Simply use the Yearbook Selections as primary photos for your Yearbook - PSPA exports, then share with the school like normal!
Effortless, automated communication
Everyone accessing their gallery will be greeted with the Yearbook Selection option, but we also created an intuitive, fully automated text and email series to ensure that everyone remembers to choose their yearbook photos before the deadline.
These gentle, effective reminders keep your customers informed and engaged—not only with the selection process but also with the gallery.
More gallery views = more sales
With online selling, driving customers to view their galleries is essential. Simply put, more galleries accessed means more photos viewed and more orders placed.
While “View your photos” is a compelling call to action, an additional “Last chance to select a yearbook photo!” is the perfect amount of urgency to nudge them into action.
Ready to get started? Here’s how it works:
- Enable Yearbook Selection for a private gallery job.
- PhotoDay guides customers through the simple selection process in their gallery.
- Automated email and text reminders are sent until your chosen deadline.
- Review, edit, and export the selections right from your PhotoDay Studio Panel.
Learn more and get started with Yearbook Selection.
An unmatched combination
Each of these new releases can be workflow-changing on their own, but when you implement them all with private galleries, PhotoDay Capture, Exports, and the rest of PhotoDay’s features, it becomes a truly unmatched combination.
Still trying to convince yourself that these features will greatly enhance your school photo workflow? Watch this webinar with Lisa Mallis (PhotoDay SVP & Co-Founder) and Mario Muñoz (LVL Up Imaging Co-Founder) to see everything in action.
Will you give PhotoDay a try?
Let PhotoDay take care of your workflows, marketing, e-commerce, post-processing, sales tax remittance, and much more—so you can focus on doing what you love most. 📸
Whether you’re ready to dive in with all of your jobs or just want to test things out, create a free account to get started. Our customer success team is here to help with live chat, 1:1 demo calls, and an endless supply of guides and resources.
Check out our additional publications
Get more info on PhotoDay and begin your picture day transformation!

