


Latest articles
Your guide to the PhotoDay world. Tips, tricks, industry news, and more can all be found right here.

Creating Powerful Composites with PhotoDay and Pixnub
Designing composites in volume photography opens a whole new world of creative possibilities to show off your craft and artistry. If your studio isn’t offering composites, you’re missing out on a huge opportunity to stand out from your competition! Learn how to elevate your images with custom graphics for more exciting photo galleries and enticing products.
As a studio, you can explore creating individual subject and team composites to save time during picture day, easily add absent subjects into a group photo, and ultimately deliver creative images that can’t be captured with a parent’s iPhone over your shoulder.
The PhotoDay tools you already know and love for school photography, like Private Galleries and the PhotoDay Capture app, can also be powerful components of a composite building workflow when combined with a third-party program like Pixnub Sport Photo Automation (SPA) or using a service like Rebooku.
In this blog, we’ll cover what a composite is, common challenges, and how to use software to automate workflows and save countless hours of post-processing time.
What is a Composite?
Simply put, a composite combines two or more images to create one new image. In the world of volume photography, one image would be a subject photographed against a green screen or similar background that can be easily removed digitally (PhotoDay Knockouts make this a breeze). The second image would be a specifically designed piece of artwork, usually with custom graphics and possibly text, on which you place your extracted subject. Some photographers refer to the second image as a backplate. You can place an individual image on the backplate or arrange multiple people to create a composite team or group photo.
The result is a flashy, eye-catching product that takes your original images to the next level. It’s exciting for your customers as they scroll through your galleries, encouraging them to order!
Composite Challenges
Historically, creating composites has been a complicated process. Developing the technical skills to utilize composites effectively can take time and practice. Your photography lighting must match the backplate design, as should the perspective and angles. You must also align your color balance so subjects look natural against the digital background. It’s best to consider your backplate before setting up on location to ensure smooth compatibility between your real subjects and the digital enhancement you will use in the finished product.
Post-processing images to prepare them for compositing is a time-consuming process. If done manually, it could require days of intricate background removal and design work to create images that work together to achieve your desired result. Slowing down your workflow to this degree will result in dissatisfied customers and lost sales.
Publishing your galleries quickly with consistent, high-quality photos available for purchase is critical. Heavily investing your time also decreases your profitability—never forget how valuable your time is! If you spend too much precious time creating sellable images, it’s virtually impossible to price them appropriately, considering both your margins and affordability for your customers. Thankfully, we have incredible time-saving solutions to share.
Composite Solutions
Third-party software has developed and evolved to be a photographer’s best friend in countless ways—especially when making composites. Using software to automate many of the most cumbersome steps of combining images is a huge win for studios. Minimizing the time commitments of composite photography creates an excellent customer experience, adds to your profitability, and saves your sanity. It also opens up a world of possibilities for photographers previously uninterested in the labor-intensive composite process.
Pixnub is the most comprehensive problem-solving platform on the market for photographers. It is a subscription-based series of plugins for Photoshop that perform many functions, including batch removal of green screens, cropping, and group photo building. Pixnub allows you to set specific parameters and then automates the most cumbersome portions of your workflow.
The best part: Pixnub and PhotoDay complement one another perfectly. Let us show you how.
Combining the Power of Pixnub and PhotoDay
Effectively utilizing Pixnub relies on leveraging PhotoDay’s Capture App, Private Galleries, and Exports features.
PhotoDay Capture is a free companion app for mobile devices that automatically matches and pairs photos based on the subject data you provide for each job. Capture works alongside Private Galleries to create a safe and secure private shopping experience for each individual subject (as opposed to Group or Public Gallery options).
PhotoDay’s Exports feature packages the Private Galleries data into a spreadsheet with customizable subject information, like names, team, jersey numbers, and corresponding file names that Pixnub then translates into your final composites.
If this sounds a little complicated, don’t worry! We’ve broken down the process into a few easy-to-follow steps.
Composite Workflow Utilizing PhotoDay and Pixnub
- Before any work begins, make sure you:
- Create a private gallery job
- Upload subject data
- Take reference photos in Capture
- Photograph the subjects on picture day
1. Upload, match, and feature photos in your private gallery job.
- Export your green screen photos from your photo editor as small JPG files, then upload them to your private gallery.
- Once PhotoDay’s FaceFind feature has matched those photos to the previously uploaded subject data, specify the image you want to composite for each subject by selecting them as featured photos.
2. Export from PhotoDay
- From within your private gallery job, create a new Compositing Data export—a specially formatted CSV file created by PhotoDay precisely for compositing automation.
- Download the completed export to your computer.
3. Create a SPA-Ready CSV
- Using Pixnub’s Sports Photo Automator (or SPA), you’ll need to create a CSV that’s specifically readable by the plugin.
- Within SPA, create a template CSV by specifying what text fields you wish to utilize, and then export that CSV.
- Next, use the data from the previously PhotoDay-exported CSV to copy and paste the relevant data into this new SPA-formatted file.
- Then, save and export as a whole new CSV!
4. Set up your Templates with the correct layer names for this data
- Create the template for your batch composite. Ensure all your layer names correspond to the newly exported CSV column headers.
- Import your newly exported CSV into the SPA Batch Panel in Sports Photo Automator and run a batch.
- From there, SPA will go through the batch of photos specified in that CSV, automatically load text and images into your templated layers, and export the finished composites to a new folder.
This combo workflow reduces your compositing timeline from hours upon hours to just a few minutes. The only limit is the processing power of your computer!
A More In-Depth Guide
- Visit this guide with helpful videos for a more detailed walkthrough of this process, hosted by PhotoDay’s very own Brian Derenski.
Since their first appearance decades ago, composite photos have grown in popularity, and many parents buying school, sports, and dance photos have begun to expect them. Integrating composites into your product lineup can rapidly boost your studio's sales. Due to time constraints and a steep learning curve, these images were formerly only offered by the biggest, most technologically advanced studios. Thanks to the evolution of user-friendly software and powerful tools, these limitations no longer restrict you!
It’s time to take your photos and customer experience to the next level by leveraging the power of PhotoDay and the intuition of Pixnub to create composite photographs your customers will be unable to resist. So what are you waiting for? The sooner you start, the sooner you can start growing your studio’s business.

How To Staff Your Growing Photography Studio
Your volume photography studio is thriving. That’s great news!
As you take on more photo sessions, you’ll inevitably have to take the big leap to expand your team to support your growing business. Maybe you have done everything yourself or had close friends who’ve been helping out, but now, it’s time to look beyond and bring in some fresh faces. That can be scary, but it’s a necessary step in taking your business to the next level.
We’re here to help! In this blog, we will cover the anatomy of a well-written job description, where and how to post it, and even share a few sample job descriptions that cover many studio roles.
Let’s get started!
Writing Compelling Job Descriptions
Sure, it's essential to include the nitty-gritty technical job requirements in your description, but remember to sprinkle in a bit of your studio's personality and culture. After all, skills can be learned, but you can't teach someone a whole new personality. Think about it: you're going to spend those long hours with these folks, so making sure they're a good fit from a cultural standpoint is key.
Here are some things to consider when writing your job descriptions.
- Start with a Compelling Job Title: This is the first thing potential candidates see, so ensure it is enticing and accurate. “Photographer” is a perfectly descriptive title, but doesn’t “School Photography Specialist” sound much more enticing? Make the title specific and creative to stand out.
- Define Clear Responsibilities and Expectations: Ensure applicants precisely understand the role. Describe the skills and qualifications you expect, such as experience, post-processing efficiency, style, knowledge, and customer service.
- Highlight Studio Culture and Values: Represent your studio’s culture and values to attract candidates that align with your vision. For example, if your studio focuses on being eco-friendly or active in the community, share that passion.
- Showcase Growth Opportunities: Advancement is a powerful incentive for top talent. Emphasize opportunities for personal and professional growth in your studio, including working on exciting projects, gaining exposure, or taking on leadership roles.
- Offer Competitive Compensation: You may not have to include salary details in your job description, but transparency could make a difference. Consult with your professional network and ensure you understand the cost of photography labor in your market. If you offer benefits like health insurance, bonuses, or PTO, ensure job-seekers know that.
- Highlight Technology and Equipment: If your studio utilizes specialized equipment or software, mention these tools in your job description. This will appeal to candidates with the experience you need and shorten the onboarding process.
- Be Transparent About Work Conditions: Be upfront about the unique requirements of working for your studio. Travel to photo sessions, long picture days, and managing equipment on location will all be required, so ensure a good fit by ensuring candidates know what they are signing up for.
- Encourage a Personal Touch: Ask candidates to include a brief introduction and a link to their portfolio (if it’s a photographer position) with their application. These elements will provide insight into essential photography traits like personality and creativity.
- Use an Engaging Tone: Treat applicants like customers. Write your job description conversationally and avoid a lot of jargon or terms that candidates may find intimidating. Sure, you're seeking skilled individuals for the role, but at the end of the day, you're essentially "selling" them on the idea of joining your team.
A well-crafted job description does more than just catch people's attention; it sets the stage for a great working partnership. Be transparent as possible, and don’t forget to add that personal touch.
Time to dig into the good stuff! Let’s jump into some sample job descriptions you can use as a base and add your own flare.
Sample Job Titles, Roles, and Descriptions
As your studio grows, you will uncover staffing needs that you must fill to streamline picture days, cover days with multiple shooting locations, process photos, or even manage the administrative tasks of your business. Typical studio roles include poser/assistant, check-in table associate, photographer, office manager, and production specialist.
For small studios, it’s pretty common for one person to wear multiple hats, which isn’t a bad thing. It allows individuals to broaden their skill sets and learn a ton in a short span. If this is the case for your studio, you can create hybrid positions. Just be super clear about what you expect from your team in the “responsibilities” section of your job description. That way, applicants know exactly what’s on their plate from the get-go, and you avoid any tough conversations post-hire.
Starting with a blank slate can be challenging. Here’s a tip: scout for similar job listings and then tweak your favorites to suit your studio’s vibe. You can also use AI tools like ChatGPT to whip up a draft and then add your own flare. Cheers to technology!
Before you try those options, take a look at our templated job descriptions. These are only suggestions. At a minimum, you will need to provide basic studio information and elaborate on some of the more general text, like the “Responsibilities” section. Some posting platforms may have fields others don’t that are required to fill in to post a job. Be sure to scope that out before writing.
We suggest a double-proofing process: review them yourself first, then have another team member review them for tone, accuracy, and grammar.
View Job Descriptions Here
Posting Your Jobs
Okay, so you’ve written your job description (virtual high-five) - time to make it public!
Indeed and LinkedIn are two of the most popular for their reach and relatively low costs. You also have no-cost options you should definitely take advantage of. Other platforms you may have heard of, like ZipRecruiter or Glassdoor, require monthly subscriptions that run hundreds of dollars to post jobs.
Here’s the rundown on Indeed and LinkedIn.
Indeed
Indeed is a big name in the world of job hunting. It’s one of the most widely recognized job search platforms with an extensive user base. Indeed casts a very wide net, which can have pros, like ensuring many people view your job, and cons, like receiving applications from unqualified candidates.
- Pricing: You can post for free or opt for paid options like “Sponsored Jobs” to increase visibility. Sponsored postings are priced on a pay-per-click basis and can vary from $0.10 per click to $5 depending on location and competition. View their Employer Guide to learn more.
- Tips: Use relevant keywords in your job title and description. Take advantage of Indeed’s screening questions to filter out unsuitable candidates faster, and utilize the resume database to search for potential hires proactively.
- Reviews: Scrolling through Trustpilot reviews will yield mostly positive feedback like, “Indeed was easy to use, and we had qualified applicants very quickly.” However, there are some negatives to consider as well. One review said, “The billing is hard to understand,” and another called the platform “good” but did state that “the functionality could be better.”
This is probably the first platform that’s crossed your mind. LinkedIn is a professional networking platform designed to connect employers with candidates possessing specific skills and industry experience. Just to give you an idea of the crowd, there are almost 200 million registered users in the United States alone. So, posting your job here means there's a solid chance the perfect candidates will spot it.
- Pricing: LinkedIn allows you to post a job for free and then charges if you post additional positions concurrently. The platform also provides paid promotional opportunities to increase the visibility of your posting. You can find further information here.
- Tips: Use LinkedIn’s powerful search filters to target candidates with the qualifications and connections you seek. Also, remember to leverage your network for referrals and encourage everyone to share your job posting with their network.
- Reviews: The reviews on posting jobs on LinkedIn are mixed. You hear about subpar customer service and unexpectedly high costs among the common gripes in the negative reviews. One thorough, positive review on GetApp stated that LinkedIn is “A place where you can get the best candidate without much effort” and “jobs are so easy to post.”
With so many employers posting jobs and employees seeking employment, it is no wonder there would be many varied experiences with each platform. Treat this process like any other major business decision if you are considering online job posting. Do your research, ask your colleagues where they have found success, give it a try, and don’t be afraid to pivot quickly if you are not receiving the results you expect. Adapt and thrive!
Free Resources
Don't forget there's a treasure trove of free resources at your disposal. Some of the tools you're already using to expand your business can also be handy for building your dream team. And who knows, there might be a few hidden gems in places you haven't explored yet.
Studio Website: You should always post job openings on your website. This helps candidates already interested in your studio’s work easily find opportunities.
Social Media: Share your job postings on your social media channels for the same reason. Followers can also share your job post to help you reach a broader audience. Tip: frequently make “culture” posts on your social platforms to help attract candidates. Did someone film a funny moment on picture day? Share it!
Local Educational Institutions: Reach out to the career services centers at local colleges and universities. They are a great resource to fill entry-level positions with talented people seeking experience.
Professional Network: Ask other photographers you know for referrals, join industry-specific forums and associations, and attend network events to connect with potential candidates.
Employee Referrals: If you have employees, see if they have any friends or associates who would be an excellent fit for your studio and offer some sort of incentive for successful hires.
We’re so excited that your studio is growing! It’s an amazing accomplishment that should be celebrated. Once you’ve popped the bubbly and you’re ready to roll up your sleeves, we hope this article helps kickstart your team expansion journey.
Spend some time thinking about the culture you want to foster at your studio - that’s the foundation for a happy boss and employee relationship. Then, take a pass at reworking one of our job descriptions to match your studio's personality.
Remember, your job description really counts. So does where you post your job and how you promote it. Make the most of all the resources available to you and lean on your professional network and your team for support.
Keep up the great work, and here’s to successfully growing your team!

CRM Software: The Next Step for Volume Photographers
You probably became a photographer because you’re passionate about capturing life’s most beautiful and memorable moments—not because you love the administrative work that comes with running your own business. Tracking marketing activities, appointments, sales, and scheduling picture days can be a chore. You need a powerful software tool that simplifies and organizes these tasks in one place.
That software is called a Customer Relationship Management (CRM) system.
What is a Customer Relationship Management (CRM) system?
A CRM is a comprehensive client management tool. It empowers you to effectively monitor vital details like client contact information, service history, associated costs, product preferences or wish lists, and a record of their latest interactions and current activities with your studio.
Simply put, it’s a powerful software designed to make your life easier by handling tedious admin work so you can focus on the aspect of your business you actually love: taking photos!
CRMs have been around for a long time, but photography studios haven’t used them heavily until recently. Initial CRMs were far too complicated to make sense for small businesses of any kind. Fortunately, today’s systems have become much more user-friendly and intuitive.
Several options are now available specifically for photography studios. Finding the perfect match can be overwhelming since every CRM for volume photographers is built with different features and volume levels in mind.
Even with a great CRM, running your business takes effort and dedication. You want to ensure the mix of software you use works together to make your processes as simple as possible. When researching providers, it’s important to choose which parts of your business you’d like to automate.
When deciding which platforms are right for you, here are some factors you should consider.
What Features Do I Need?
In the dynamic realm of volume photography, where capturing and managing a multitude of moments is the norm, finding the right tools to streamline your workflow is paramount.
As you navigate the diverse landscape of CRM options, you must identify the features that will truly make a difference in your photography business. From automated communication to intuitive order tracking, we'll explore the must-have features that define the best CRM solutions available to your studio.
Let’s delve into the essential functionalities that can elevate your volume photography business, ensuring a seamless experience for you and your clients.
Lead and Contact Management
Lead and contact management is the primary purpose of a CRM. You probably started searching for a solution because you are tired of all the sticky notes, text messages, phone memos, and buried emails you currently use to try and keep things organized.
Look for software that offers user-friendly tools to effortlessly create, import, and manage contact records. Additionally, features like contact tags, the ability to send emails to multiple contacts at once, and automated reminders prove invaluable in maintaining your studio’s organization and keeping client interactions well-managed.
Finding a CRM that streamlines capturing lead information is essential. Every CRM will allow you to input contact information for clients and leads manually, but having automated capture is valuable. Some software will create a contact record by simply scanning a business card.
Marketing Automation and Workflows
This may be one of the most valuable CRM features outside of contact management. Imagine the time you will save automating reminders for crucial marketing efforts like updating your social profiles and website, reminding your clients and customers that picture day is coming, and providing helpful marketing tips so the school or league can assist with your revenue-generating efforts.
Look for a CRM system that offers email templates for multiple use cases and an option to include them in automated workflows.
Workflows are designed to guide tasks and processes, ensuring no crucial steps are missed. From lead generation to post-picture day follow-ups, CRM workflows automate repetitive actions, sending reminders and triggering actions at specific points.
If you have an upcoming photo session at a school, you can set up a workflow to send reminder emails to your clients so they can prepare the students and their families.
Another great use for workflows is for lead capture and onboarding. When a new lead inquiry arrives through the website form, the CRM springs into action, sending a welcome email, letting them know someone is taking care of their request. Not only does this welcome email save you time, but it also ensures the client feels confident that you will address their request promptly.
The option to manage social media campaigns in the CRM platform is another great feature. Many CRM systems enable you to post on your social platforms automatically and even view reporting. Each platform has its quirks, so be sure to compare each feature.
If you want to learn more about how to market your volume photography business, check out our course here.
Invoice Management, Proposals, and Payments
Invoicing and payables can get highly complicated for volume photographers. CRMs play a pivotal role in streamlining invoice and payment management. Even though many of your sessions involve returning commissions to your client, there are specific cases where you would need to send an invoice. For example, you might photograph an event and provide all your images for a set fee, or you could handle the printing of banners, yard signs, window clings, and other materials for a league. Your CRM will let you record those costs and generate an invoice for the client.
Additionally, CRMs often allow for easy tracking of payment statuses, sending automated reminders for overdue payments, and even enabling secure online payment options. This ensures a smoother financial workflow and maintains a professional and organized approach to handling transactions.
Some systems even provide invoice templates for you to customize with your studio’s branding.
Having professional and itemized proposals can dramatically increase your close rate. These proposals ensure you and the client are communicating expectations clearly and can open important conversations early in the process. This may not be a make-or-break feature for you, but it’s something to consider.
Scheduling and Appointment Management
Calendar management is a vital component of CRM software. Top-notch solutions offer features like online booking, automatic appointment reminders, and adaptable scheduling choices.
Look for a CRM with calendar sync so that when you receive a booking, it automatically gets added to your Google or iCalendar. This helps prevent double booking and is very convenient when you’re on the go.
You should prioritize a CRM system equipped with robust reporting functions. By grasping the analytics, you can gain insights into time allocation and effectively monitor crucial client details, including appointment history, attendance trends, and payment records.
Contract and Questionnaire Templates
When you’re ready to scale your volume photography business, you may already have tried and true contract templates, but if you’re looking to switch things up or you’re just starting out, it is wise to find a CRM with templates. It will give you a solid place to start; just make sure they’re easily customizable.
When you’re ready to adjust the templates but lack confidence in term structuring and other contract-related language, check out our Foolproof Guide to Contracts and Commissions course.
Another feature to consider is questionnaire templates you can use to gather all the information you need from new clients during onboarding. You can refer to this information for marketing insights and opportunities throughout your relationship with the client.
Integrations
The best-case scenario is that your chosen CRM integrates with as many platforms as you are already using as possible. It’s unlikely that you’ll find a perfect match, so focus more on streamlining lead capture, contact management, invoicing, and other high-level business functions that would benefit you most if you automate them. Carefully review the capabilities of each CRM or contact their technical support to see if the system works with a tool you are already using or has the potential to replace it. This can simplify your business and save you money.
The Top CRM for Volume Photographers
We went through the top CRMs for volume photography and compiled their features and prices to give you a head start in your search. While this list may equip you with the information you need to create your shortlist of platforms, we recommend signing up for free trials and testing them yourself.
HoneyBook
HoneyBook ranges from $12.50-$52.80/mo and bills annually. They describe their platform as an “all-in-one clientflow platform.” The starter account offers unlimited clients and projects, invoices and payments, proposals and contacts, calendars, professional templates, a client portal, and basic reports. The upgraded accounts boast features like QuickBooks integrations and dedicated account managers. Regardless of your package, you’ll have access to support 7 days a week with a live chat feature on the site.
This platform is perfect for someone who wants a high level of organization and automation. With the ability to set up workflows that automatically update clients and triggers that remind you to complete tasks, it’s perfect for ensuring you don’t miss a beat. If you’re a sticky note and list creator, this might be the platform for you to keep all of your to-dos in line. If your whole day can be thrown off when someone turns on a fan and your notes go flying, it might be time for a CRM that handles task management, workflow automations, and calendar integrations.
What Others Are Saying
While HoneyBook has a lot to offer, current customers mention system blackouts, difficulty navigating the platform, and slow communication from support. Some reviews boast the ease of organizing contacts and contracts. With 43 reviews on Google, they rank at 3.8 out of 5 stars.
Dubsado
Dubsado packages start at $200/yr and go up to $400/yr with the premier subscription offering scheduling, automated workflows, and a Zapier integration to simplify all your automation needs. Billing can be done annually or monthly, with the annual option being the cheaper of the two. Dubsado claims to be a volume photography CRM that has everything in one place. Their main features include customizable client forms, simple online invoicing, personable automation, interactive client portals, and built-in scheduling. Like HoneyBook, Dubsado offers unlimited clients and projects in their basic package.
Dubsado is a great CRM for volume photographers who want to focus on their client experience. Every step of the process is customizable to make your client feel heard and long-term relationship-building with your customers much more effortless. If you connect with the phrase, “look good, feel good,” Dubsado might be the solution for you. Each customer will have a professional and personalized experience.
What Others Are Saying
Dubsado doesn’t have many Google reviews, but a quick search on G2 shows 4.3 out of 5 stars with 65 reviews. Reviewers are saying the platform is best for freelance-style businesses, with the flexibility of the auto-billing feature being particularly troublesome for recurring invoicing. Many reviews agree this platform is excellent for creatives working with project-based billing cycles.
Bloom
Bloom has a free and paid version of their platform. The paid version is $29/mo billed annually or $37/mo billed monthly. The free plan includes up to three active projects, proposals and invoices, lead capture and management, one workflow, client image galleries, contract templates, deposits and retainers, one instant booking, client portal, various platform integrations, one automation, 500GB of storage, and ACH and alternative payments. The paid version of the platform allows for unlimited projects, bookings, workflows, and automations. The paid version of Bloom’s CRM for volume photography also upgrades the storage to 1T. Both versions of this CRM allow you access to live chat on their website and email support.
Between the vast number of integrations and flexibility of the platform, you can easily make Bloom work for you. If you are not satisfied with the number of tools you have to use to get your work done, this is the CRM for you.
What Others Are Saying
Bloom doesn’t seem to have a Google profile set up, but we found reviews from a G2 profile. With 14 reviews, the company comes in at 4.7 out of 5 stars. One review that stood out was from a long-time customer who’s been with them from the beginning, saying they’ve worked diligently over the years to add features to the platform that have addressed all of their issues. The most common feature reviewers ask for is more templated website options and SMS messaging. Several reviews are asking for email marketing in the platform, but Bloom has responded to those reviews, saying they are focused on the CRM and make it easy to plug into other email marketing platforms.
PhotoDay includes a wealth of marketing automation tools and many other benefits, making it a perfect complement to Bloom if you like everything else about this particular CRM.
17 Hats
17 Hats has three package options, starting at $15/month. Their Essentials Package offers standard CRM functions like contact storage and project details, online invoices, quotes, contracts, questionaries, email and document templates, online payments, online scheduling, and more. That’s a pretty robust offering for $15/month. You must upgrade to the Standard Package for $30/month to use more advanced features like workflows and bookkeeping. The Premier Package offers a branded client portal, advanced workflows, recurring billing, and Zapier integrations.
If you want to give 17 Hats a try with no commitment, you can start a 7-day free trial for any of the three packages. They also offer multiple date options for live demos and workshops at no cost. This makes the research process very hands-on.
What Others Are Saying
17 Hats has 194 reviews on Google and a 5-star rating. Overwhelmingly, the reviews rave about their responsive and supportive customer service. Streamline client management is another frequent mention in their reviews. Some reviewers on G2 mention struggles with syncing email and bank accounts and the need for a more aesthetically pleasing dashboard design.
How Can I Get Started?
The best way to learn about CRM systems is by watching demos, signing up for free trials, and researching. Your professional network and the online forums you regularly visit are also powerful information sources. Deciding which platform is best for you is a significant choice you should make carefully. This guide and other resources will reduce your worry and help you navigate the key considerations efficiently and confidently.
Cancellation
Be sure to look into the cancellation policy. If you sign up for a platform, use it for a few months, and decide it isn’t for you, you want the ability to cancel with minimal to no penalty. Most options don’t lock you into yearly contracts and allow you to downgrade if you decide the platform isn’t right for you.
Support
Regardless of the CRM you choose, make sure you utilize their support. It’s easy to feel like sending in a support ticket means you’ll end up in a sea of emails the company will never respond to, but that’s typically not the case. Most CRM software platforms truly want their clients to be happy and have a great user experience. This means they’re open to feedback and willing to build highly requested features. Don’t overlook the live chat features and support ticket functions.
Take a look at the platform’s reviews before committing. You’ll typically see a lot of complaints if customer service isn’t up to par.
Juggling marketing efforts, appointment scheduling, sales tracking, and organizing picture days can quickly become overwhelming. By seamlessly consolidating and streamlining these essential tasks into a single, user-friendly platform, a CRM system empowers you to focus on what truly matters—taking amazing photos for your customers.
With the ability to efficiently manage client interactions, streamline processes, and enhance overall business organization, a CRM system becomes an indispensable tool for turning the passion for photography into a thriving and efficient business.

Sell More with New Digital Download Bundles
Summer PhotoDay Fest 2023 continues with our new Digital Download Bundles feature! SPF ‘23 is our series of summer feature releases and updates—we have so many that we created a whole fun-in-the-sun campaign to keep track of them.
As you know, the PhotoDay Team is always hard at work refining and expanding our platform’s features, and significant updates to price sheets are on the way! We’ll share more soon about everything this transition to Price Sheets 2.0 entails, but the first part of this rollout is Digital Download Bundles.
You already know that downloads are popular, high-profit products. In fact, our own data shows that download sales are on the rise - with 43% of studios' gross revenue coming from download sales alone this past spring.

And it's not just customers who are placing mixed orders of prints and downloads. The percentage of orders that are comprised only of download products is steadily increasing as well - meaning as you capture more photo variety and have more inventory to sell, these downloads will become one of your most profitable and desired products.

What does all this mean? Well now it’s even easier to sell more of them! Digital Download Bundles are a complete revamp of how volume photography studios can sell download products in PhotoDay by making it simpler to sell multiple downloads all while offering your customers better deals.
What’s New?
Currently, PhotoDay users can add a single download to a price sheet as an a la carte product with a set retail price, as a part of a package, or both. This process is the same for prints, specialty items, and other products in PhotoDay.
Now, in addition to the current process described above, you can also create bundle pricing for High-Res Downloads. This is a new way to sell multiple download products together to give your customers enticing deals. Additionally, we’ve designed these Digital Download Bundles to create unique upselling opportunities in both the storefront and in the cart.
Simply put: you can sell more, and your customers can still save money.
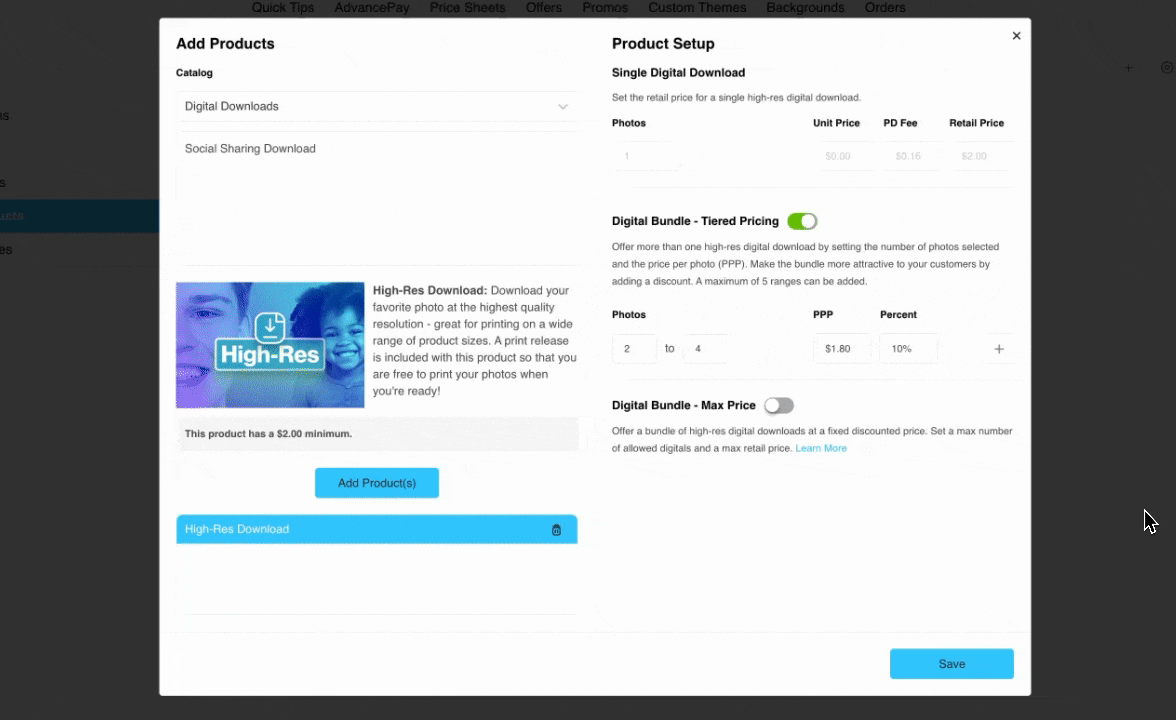
We’ve created two unique bundle structures so you can customize your price sheets and customer storefront: Tiered Pricing Bundles and Max Price Bundles.
Buy More, Save More with Tiered Pricing
Let’s start with Tiered Pricing for Digital Download Bundles which allow you to offer automatic discounts to customers based on the number of photos that they would like to purchase as High-Res Downloads. Tiered pricing bundles are ideal for upselling in the storefront and in the cart, promoting discounts based on a "Buy More, Save More" approach. If you currently offer multiple packages with varying quantities of High-Res Downloads, tiered pricing bundles can replace all of these!
Tiered pricing allows you to set up to 5 different tiers of photo counts with increasing discounts for each range—giving your customers plenty of options to save. The discounts can be based on setting a decreasing price per photo (PPP) or by an increasing percentage discount off the a la carte retail price. Manipulating one column will update the other automatically.
Here’s how it looks from the photographer’s perspective when setting it up in the studio panel:
Here’s how it looks from the customer’s perspective in the gallery storefront. When a customer buys more photos, the price-per-photo decreases, increasing total savings based on the tiers set by the studio.

You Set the Limit with Max Price
The second bundle structure is Max Price—you can define a maximum number of downloads that can be purchased for a fixed, discounted price. With this structure, customers will only pay the max retail price if (selected quantity of downloads) x (retail price per download) is greater than the max retail price. Up until they reach this breakpoint, they will pay the a la carte retail price per download. Once they reach the breakpoint, they will essentially get the extra downloads for “free.”
Here’s how it looks from the photographer’s perspective when setting it up in the studio panel:

In this example, the a la carte price per High-Res Download is $20, the Max Retail Price is set to $100, and the Max Allowed Digitals is set to 10. Customers purchasing 5-10 downloads will pay the bundled Max Retail Price because it’s the better deal—essentially, the 6th, 7th, 8th, 9th, and 10th downloads added to the bundle would be free! Customers purchasing only 1-4 downloads will still pay the retail price of $20 per download to not overcharge them.
From the customer’s perspective, in this example, they will see the option to need exact wording from the storefront window. Take a look at how Max Price bundles look in the storefront:

Easy and Responsive for Everyone
The best part? It’s totally automatic! You won’t have to make a custom download package ever again. We can hear the cheering from here!
You set up the bundles when you create your price sheets, and PhotoDay calculates the rest—both for you in the studio panel and for the customer in the storefront. And just like every other aspect of price sheets in PhotoDay, you can modify the bundles and pricing at any point, and the changes will automatically update live in the storefront.
You might be wondering: “How are Digital Download Bundles different from creating a download package?” We’re glad you asked. When shopping packages, contents and pricing are static and can’t be adjusted by the customer during the shopping experience. With these new Digital Download Bundles, you can now set up your own discount tiering to allow your customers to choose as many or as few downloads as they’d like. We’re all about making things simple—easy to set up, easy to maintain, and easy to sell more than ever.
Flexible Customer Shopping Experience
Once your Digital Download Bundles are set up, your customers can take control. Let’s walk through the customer experience:
- No matter which type of bundle you have selected (Tiered Pricing or Max Price), your customers will see a banner enticing them to buy more to save more.
- When they select a High-Res Download product, they will see the option to specify how many photos they want to purchase.
- Depending on how many photos they add, customers will see responsive pricing and discounts reflected.
- They can select their photos, choose more favorites, and even add more photos to their bundle all from right within the product customizer window.
- The Digital Download Bundle is then displayed in the customer’s cart with each product listed (similar to packages). Don’t worry, we made sure they can even add more photos to the bundle from here, too—just like grabbing a candy bar at the register.
We’re excited to have streamlined yet another facet of selling volume photography photos online. We heard your requests for a less manual way to sell downloads and hope you and your customers love these enhanced capabilities!
Want to see Digital Download Bundles in action? Get the full customer experience by checking out one of our sample galleries. Click this gallery link or text LMDEMO23 to 90738 to experience our text message marketing and receive a link.
Digital Download Bundles are live and available now! Sign up for a free PhotoDay account and create your first job today. Onboarding is always free and fast—our incredible Customer Success team will have you set up and selling in no time!
If you’re a current PhotoDay User, check out this support article with even more details to get started with Digital Download Bundles. Make sure you’re signed into your PhotoDay account to view the article.
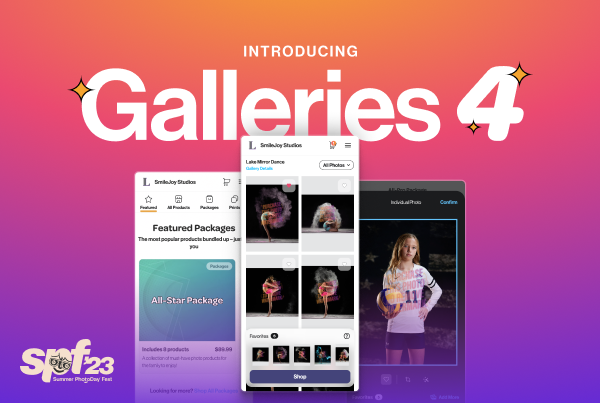
Summer PhotoDay Fest 23: Meet Galleries 4
Welcome to Summer PhotoDay Fest 2023—SPF 23, for short. The PhotoDay Team is releasing exciting developments over the next few months, so we wanted to create a new way to celebrate and share all of the summer fun. First up: our brand new customer gallery!
Introducing Galleries 4!
We are thrilled to announce the release of Galleries 4—our latest and greatest version of PhotoDay Galleries. The team has been working hard to research, implement, and innovate the entire Galleries experience while carefully listening to and incorporating feedback from volume photography studios using PhotoDay—and it’s now officially released into the wild!
After significant development efforts across all departments, we’re ready to share the exciting details about our new, innovative gallery and shopping experience. It’s now easier than ever for your customers to find, customize, and order their photos. But, the developments don’t stop there! Did we mention we’re also expanding your studio branding options? We have a lot to cover!
Keep reading to learn more about how Galleries 4 provides enhanced speed and security, upgraded customer experience, customizable branding, and more.
Mobile-Friendly & Lightning Fast

Through our research, we determined that a whopping 88% of all PhotoDay orders were placed on mobile devices. This means that the large majority of our active shoppers are accessing their galleries and placing orders through their phone’s web browser. For this reason, Galleries 4 is thoughtfully designed to be mobile-first, but still computer-friendly, of course, because everyone deserves a top-notch experience.
One of the biggest and most exciting changes is that Galleries 4 is now a Progressive Web Application—PWA for short. PWAs deliver a refined app-like experience without needing to download an actual app. It can be viewed right in your mobile or desktop web browser and automatically adjusts for any device’s screen size. The result? Galleries 4 is highly responsive, 4x faster than the typical e-commerce portal, and even more secure than HTTPS.
With this foundation, the entire customer gallery experience was rebuilt from the ground up to maximize customer engagement and increase conversions and overall sales. This brings us to the marketing updates!
Direct, Hassle-Free Access
With Galleries 4, all three gallery types can now be shared and accessed through deep links. Deep links are a type of link that sends users directly to specific locations. To put it simply, PhotoDay’s deep links provide a frictionless way for parents already subscribed to the gallery to access their photos—without getting lost in the process of re-entering an access code.
The direct, deep links are shared through all of PhotoDay’s built-in communications, including smart text marketing, manual flyers, and automatic email campaigns. Studios can also use the gallery deep link in their own marketing outside of the PhotoDay platform. By clicking the link shared in those communications, your opted-in customers can enter their galleries without entering their access code and without sacrificing security, making it a win-win for everyone!
While this capability is already available for public galleries in PhotoDay, we’re ecstatic to introduce it to group and private gallery types! This direct linking system significantly improves the user experience by enabling customers to access their galleries twice as fast. Additionally, when a studio changes a gallery’s status from AdvancePay to Published, accessing the correct gallery will be easier than ever.
Gallery deep links will be shared with customers through PhotoDay’s text (SMS) marketing, manual flyers, and automatic email campaigns. We hope you’re ready for fewer “I lost my access code” messages!
Secure & Seamless Customer Onboarding

Now you can know exactly who is viewing their galleries! To enter a gallery and view their photos, all customers must first create an account, meaning they will no longer have the option to checkout as an anonymous guest. Having each customer create an individual account not only bolsters security but also paves the way for robust future updates and marketing developments.
Additionally, studios using private galleries have the ability to send targeted marketing emails to subjects who have either viewed or not viewed their gallery, as well as those who have not purchased photos from their gallery—even if they have viewed it.
When creating their accounts, customers can opt-in to further communications—such as text and email campaigns—to be compliant with TCPA and CAN-SPAM. This flow is not only respectful to your customers but safer, too, by allowing each subject to be associated with a parent/guardian/responsible party.
Overall, we’re excited about how much this customer onboarding step will improve opt-in rates—making communication with your customers that much easier. If you haven’t caught on already, that’s what PhotoDay is all about: creating simplified, elevated experiences for you and your customers.
Showcase Your Studio Branding

Keep your unique studio branding front and center in Galleries 4! As highly requested by PhotoDay users, studio names are now included in the gallery’s header. Along with the studio name, any uploaded job logos will also be displayed in the header of each gallery. Studios can choose to make the job logo their own business logo to level up their brand awareness.
This fresh design not only solidifies your studio’s identity and builds brand recognition for your customers, but it also differentiates studio galleries from one another. Rest assured that if another photographer is also using PhotoDay, you can feel confident that your galleries will be visually distinct to the end-shopper. You worked hard on that logo, so why not let it shine?
Filter & Search Intentionally

As you photograph the same schools, leagues, events, etc. season after season, you’re bound to have wonderful repeat customers. With Galleries 4, those customers can easily sort the gallery list to view their most recent photos first.
If a customer has opted into multiple galleries, they are now listed chronologically from the most recently published. This is a dream for those repeat clients and customers! We also added sorting options so galleries can be filtered alphabetically and by publish date, making it effortless to access older galleries (and encouraging passive income).
We also streamlined the tag search process. Tags in PhotoDay are an easy way for studios to add structure and organization to their group and public photo galleries. Using tags (e.g. team name, age group, picture day date, etc.) allows customers to filter their searches and find their photos quickly. We enhanced this process, so customers can now search for tags without needing to scroll through a list. Tags can also be selected and stacked to further optimize their search efforts! Because life is way sweeter without aimless scrolling.
The All-New Favoriting Workflow

We completely revamped the way customers select their favorite photos to purchase—making the customization and checkout process faster and more intuitive than ever. It’s a total game-changer for the gallery experience.
To get started, customers will tap to favorite their photos in the gallery before moving on to the rest of the shopping experience (where they can select products and print sizes, choose themes, customize text, etc.). Customers can also “Favorite All” to make proceeding to the shopping cart a breeze. In group or public galleries, customers can favorite all once they’ve narrowed down their search through tags or FaceFind; in private galleries, customers can favorite all photos in their gallery with one click.
Choosing their favorite photos at the beginning of the shopping experience prevents customers from needing to return to the main gallery to search for other favorite poses. And if Instagram has taught us anything, it’s that everyone loves tapping hearts. ❤️
A Transformed Storefront Experience

Last but not least, the Galleries 4 storefront has been transformed to be more user-friendly, organized, customizable, and all-around streamlined. And we might be biased, but it’s also quite pretty. Here are some of the highlights:
- Package descriptions are now displayed clearly, and in a new pop-up, customers can get a quick view of the package contents. This alleviates having to open the package fully, then go back to compare it with the rest of the package offerings.
- Products are organized into fully searchable categories, allowing for efficient picking without scrolling.
- The customization process for both individual images and packages has been intuitively refined. After selecting a package or an à la carte product, the all-new Product Customizer appears, allowing customers to quickly adjust their photo choice, custom text, and graphic themes on their products.
- The Product Customizer especially shines when customizing products included in a package.
- Retouching is available right from within the customizer, as well, making it more visible and accessible than ever before.
- The checkout section has also been revised for optimal efficiency. If a customer wants to, they can make final adjustments and edit their products right from within the shopping cart.
But don’t just take our word for it! We’d love for you to take a look around one of our sample galleries to get the full customer experience. This new gallery experience exists at my.photoday.com, so we recommend updating your marketing materials to reflect the updated address!
Text LMDEMO23 to 90738 to experience our text message marketing and receive a link to see the new Galleries 4 in action.
Prefer not to text? Just go to https://my.photoday.com/ and enter LMDEMO23 or click this direct link.
The release of Galleries 4 is an exciting and significant step forward in PhotoDay's mission to provide the best experience possible for our studios and their customers. Not only does Galleries 4 make for a quicker and easier shopping experience, but it also provides valuable tools to promote your studio's brand and improve your overall sales and engagement.
Galleries 4 is out now! Sign up for a free PhotoDay account and create your first job today. If you’d like some help getting started, our Customer Success team is ready to guide you through the process. Onboarding is always free and fast—we’ll have you set up and selling in no time!
For current PhotoDay users, all galleries published or in AdvancePay mode before 7/5/23 will not be affected at this time and will remain on galleries.photoday.io. Starting 7/5/23, all new jobs and galleries in PhotoDay can be accessed on my.photoday.com.
Stay tuned to learn what other exciting releases we have in store for SPF 23!

On the Road with PhotoDay: Summer 2023 Events
At PhotoDay, we believe that investing in continuing education is essential for expanding your volume photography business. By attending conferences and workshops, you can improve your photography skills, get inspired creatively, learn from industry-leading professionals, and so much more.
The PhotoDay Team is excited to sponsor and attend many fantastic events throughout each year, and we want to share some of our upcoming dates with you! Whether you’re still considering ditching paper order forms or have already jumped into the world of online selling, further education is a great way to keep your business moving forward.
Kick off the summer season at the workshop or conference of your choice—or join us in attending them all. Participating in live education is a fantastic way to network and learn—plus, we can’t wait to meet you!

Boatwright Bootcamp
June 5-7, 2023
Canton, GA
At Smax Photography’s Boatwright Bootcamp, you will learn shooting, editing, and sales methods that are proven by Jay Boatwright and his team to turn quality photography into profits. Being a successful photographer is more than just taking exceptional photos. You must also learn how to present your products to your customers in order to maximize sales.
Attendees receive “all day, hands-on training, in the field for volume sports photography. Badass photography, on the field of play, straight out of the camera! No matter the subject, location, or time of day.”
PhotoDay is honored again to be sponsoring and attending another Boatwright Bootcamp! Learn more on their site or in this local news feature. Currently sold out, but be sure to sign up for notifications so you can register for the next one!

Do It Different Workshop
June 23-24, 2023
Oklahoma City, OK
This summer, PhotoDay is excited to sponsor Emily Hart Davis and Rose Coleman’s Do It Different Workshop! Join these amazingly talented and successful photographers for a two-day photography and business workshop that will take you to the next level.
At this workshop, attendees will learn how to…
- Set Specific Goals & Make A Plan To Achieve Them
- Advance Your Lighting Techniques
- Learn How To Scale & Build Your Team
- Solidify Your Posing Flow
- Gain Confidence In Direct Prospecting New Clients
Learn more — Only one ticket remaining! Please reach out to Rose and Emily to claim it. In addition to sponsoring this workshop, part of the PhotoDay Customer Success Team will also be attending and speaking!

School Photographers of America
July 10-13, 2023
Greenville, SC
The School Photographers of America Conference is a place to connect with other studios and “industry suppliers from across the nation (and sometimes from across the world!) as we celebrate the best that our field has to offer and explore the ways we can grow both as individual companies and as an industry.” Don’t miss out on this opportunity for education, networking, exhibits, workshops, and more!
PhotoDay will be exhibiting in Booths 48 and 49, so be sure to come by and meet the team! Learn more and register.

IncredibleU Workshop
July 14-16, 2023
Charlotte, NC
Cane Sampson of CL Photoz is launching his new IncredibleU Workshop this summer! Attendees will get a hands-on approach to learn all about…
- Live lighting setups and demonstrations
- How to land more business (proven to work)
- Tips for video creation, graphic design, and branding that will “wow” your clients
- Building confidence
- And more!
PhotoDay is thrilled to be sponsoring IncredibleU! Learn more and register to attend.

Pas de Deux
July 21-23, 2023
Chicago, IL
If you're not already familiar, Pas de Deux is a premiere conference for dance photographers known for its enriching hands-on learning with top photographers working in dance photography. Attendees can participate in classroom presentations, photo walks, demonstrations and studio setup classrooms, trade show exhibits, social events, and more.
PhotoDay will be exhibiting, so come by and meet the team! Use the code PD100 for $100 off your 3-day conference ticket (valid through 6/15/23). Learn more and register.
Virtual Events
If traveling or in-person events aren’t in the cards for you this summer, don’t worry! We have some amazing virtual events coming up. Keep an eye on our webinars page for all of the details!
PhotoDay is also hard at work creating a whole new online education series for volume photographers. Stay tuned for more information coming soon!
We hope to see you at some of these incredible photography workshops and conferences this summer!

Bulk Shipping Made Easy with PhotoDay
If you’re a volume photographer, you know that snapping pictures of students and athletes is only a small facet of the overall job. What happens after the picture day is over, the photos are edited, the gallery is published, and the customers have ordered their prints and products? Shipping! PhotoDay’s e-commerce shopping options include direct-to-consumer drop shipping for all gallery types. Additionally, studios using Miller’s Professional Imaging and private galleries can also offer free bulk shipping to their customers. Bulk shipping allows studios to specify one shipping destination for all orders tied to a job to be shipped together—completely free and overnight. This feature will not only save you time and money, but it will delight your customers and organizations!
Why choose bulk shipping?
Long have photographers batched orders together and delivered them back to the schools, leagues, and other organizations. The free bulk shipping option for private galleries using Miller's to fulfill their orders reduces this process to the mere click of a button. Here are five reasons why bulk shipping is an ideal choice:
- Shipping is completely free—for you the studio and your customers!
- Overnight shipping once processed.
- Low bulk unit pricing with a minimum lab cost of $15 for the entire bulk order.
- Offer both bulk and drop shipping—if you’re torn between the two options, let each customer decide!
- Keep selling with drop shipping once the bulk order deadline has passed.
When to use bulk shipping?
Why choose bulk shipping instead of direct-to-customer shipping? Here are a few scenarios where choosing bulk over drop shipping might make sense for your studio:
- If one of your organizations is a school requesting a gallery of class photos to be shipped to their location so they can be manually handed out to students and parents.
- You want to offer your customers free shipping but don’t want to absorb the cost of offering a discount code.
- If you prefer to pass out fulfilled orders manually, you can use your studio or home address as the bulk shipment destination.
How it works—it’s easy!
Publishing a gallery with bulk shipping in PhotoDay is a quick and seamless process. With our easy-to-use platform, you can set it up yourself using our guide as a reference or book a one-on-one demo with our Customer Success Team for a walk-through. How to get started:
- Create a free PhotoDay account.
- Create a Miller’s price sheet with bulk shipping selected.
- Publish your private gallery and watch the sales roll in thanks to automatic email and text campaigns.
- As customers order, you can easily view and track them in the PhotoDay studio panel (more on that in the next section).
- When the deadline date passes, the bulk order processes automatically and ships overnight from Miller’s directly to the address you chose!
How does tracking work for bulk shipments?
Just because these orders are batched, doesn’t mean you lose any of the valuable insights PhotoDay offers! You can view all the details about your processed bulk shipments, as well as a list of every order included in each bulk shipment—all directly in the PhotoDay studio panel. Additionally, you can see every order’s associated sales information, shipping status, and tracking information.PhotoDay’s Reports section provides even further insight with detailed monthly reporting of your overall sales, orders, and products. You can view, compare, and export all for free.


Ready to try bulk shipping?
At this time, bulk shipping in PhotoDay is available exclusively for private gallery types with Miller’s. We know you’re going to love the combination of image-first online selling in our modern galleries and Miller’s quality products and swift turnaround time.PhotoDay allows you to say goodbye to additional work and equipment—this workflow is entirely free of QR codes, barcodes, and tethering. Explore all of our game-changing features including the magic of FaceFind and our Capture app. PhotoDay is free to use and you only pay when you sell, so no expensive licensing fees, contracts, subscriptions, or credit cards on file. The setup process is quick and easy—we’ll even walk you through it with a complimentary one-on-one demo!
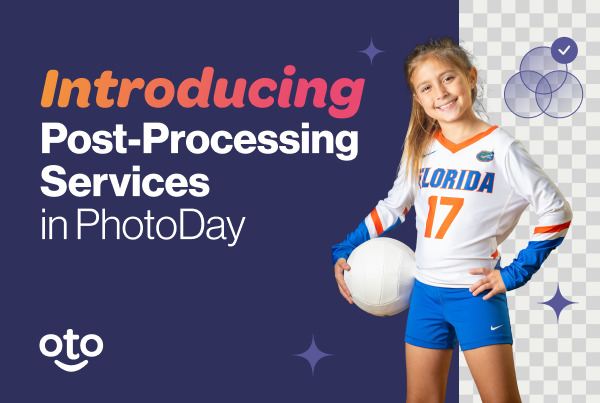
Introducing Post-Processing Services in PhotoDay
Every professional photographer knows the importance of post-processing. Taking pictures is only part of the job; next comes color correction, extractions, cropping, retouching, composites, and more. To help simplify your process, PhotoDay is excited to announce new and improved Post-Processing Services that will revolutionize your workflow!
Our long-standing Knockouts feature has been completely revamped and upgraded—Knockouts are now 40% cheaper and the turnaround time has gone from days to mere minutes! We also added an intuitive, time-saving Color Correction service to polish your photos effortlessly.
These features will streamline your after-picture-day workflow so you can post galleries (and start selling) faster than ever. With prompt turnaround times for quality color correction and knockouts from most background types, get ready to save valuable time and money.
What are Knockouts, exactly?
PhotoDay’s updated background extraction feature is called Knockouts. By definition, Knockouts extract the subject from a solid background for the purpose of adding a custom background behind the subject. In the past, when photographers wanted to do background extractions, they had to photograph on a blank background (green, blue, gray, white, etc. screens). Next, they used editing software to manually and meticulously remove the backgrounds or they outsourced to third-party companies—all of which can be costly and hard to keep track of as they juggle platforms and software.
With PhotoDay Knockouts, photographers can upload photos, remove backgrounds, and start selling all in one place—without ever leaving the PhotoDay Studio Panel!


PhotoDay Knockouts will remove all background types—so you can shoot with natural backgrounds or against any traditional backdrop, and still offer digital backgrounds for your customers. In the world of online selling, your photos are your inventory, so the more you have to offer, the more you can make!
How PhotoDay Knockouts Have Improved
PhotoDay’s Knockouts services prior to February 2023 were much more limited. We can’t wait for you to see how much faster, affordable, and versatile this service is now! Let’s break down some of the exciting changes:
- The turnaround time used to be 48 hours, but now it’s a matter of minutes.
- The approval process is automated, so you can get started right away. Previously, our Customer Success team had to manually approve the process to ensure your photos were optimized for quality Knockouts.
- Now, a subject can be extracted from any background, not just the previous green or blue screen. So whether you photograph on white, gray, black, or even a natural setting without any backdrops—we can extract it!
- The cost of Knockouts has been drastically reduced. Knockouts now cost only $0.20 per photo compared to the previous $0.35 per photo.
What is Color Correction? (Hint: It’s not just color correction)
PhotoDay’s brand new Color Correction service intelligently edits your photos so you don’t have to! Color correction is defined as the process of editing a digital image to match how overall color, hues, and tones appear in the natural world.
PhotoDay’s Color Correction service goes beyond the basics by intelligently adjusting exposure, contrast, white balance, saturation, and even gamma to deliver a professional look for every image.


Just like Knockouts, our Color Correction service is a one-stop shop, so you can upload, edit, and sell all in one platform. You won’t have to adjust sliders or modify any individual parameters, because PhotoDay’s Color Correction is an intuitive, AI-driven solution.
All Post-Processing jobs process in a matter of minutes, so your workflow can keep rolling smoothly. You’ll save precious time that can be spent doing absolutely anything other than applying presets in Lightroom—take a vacation, start a new hobby, cook more dinners…the options are endless!
It’s as easy as 1-2-3!
The process for both of our Post-Processing Services (Knockouts and Color Correction) is incredibly simple and fast. Here’s how it works:
We told you it was easy! Thanks to improvements in AI editing technology, your Post-Processing jobs will be ready at lightning speed and for a fraction of the cost.

What about those credits you mentioned?
PhotoDay Credits are the currency we use in PhotoDay! You can purchase these credits right within the PhotoDay Studio Panel to use in exchange for Post-Processing services.

Credits are now only $0.10 per credit, down from the previous $0.35 per credit. All credits purchased before this release have been converted to the new credit value—so 1 old credit = 3.5 new credits. Knockouts jobs cost 2 credits per photo. Color Correction jobs cost 1 credit per photo.
Ready to simplify your post-picture day process?
Are you ready to save time, streamline your process, and delight your customers more than ever? If so, give PhotoDay’s Post-Processing Services a try! We’re confident that automating your post-processing can help improve your work-life harmony.
If you’re already a PhotoDay User, just sign in to try it out. You can start by running a sample job with just a few test photos. This support article will walk you through it.
If you’re not a PhotoDay User yet, create a free account to get started. Since you can download your extracted and/or edited photos to your own computer, you don’t have to sell your photos on PhotoDay to use these services!
P.S. Our Customer Success Team is here to help you every step of the way. When you’re signed into PhotoDay, just click the orange bubble in the bottom right corner of your screen to start a live chat or schedule a one-on-one call.

Boost Your AOV with AdvancePay
Moving picture day online is a thrilling step into a world of possibilities. By taking your volume photography business online, you will not only save countless hours of tedious paperwork but also provide a whole new, elevated experience for your customers. All while increasing your sales.
Our goal at PhotoDay is to help streamline your workflow so you can focus more on what you love. One of our most popular features is AdvancePay—which gives photographers the benefit of getting paid before picture day without limiting sales after picture day. We’ve also found that it significantly boosts your Average Order Value (AOV).
Simply put: our AdvancePay feature will help you work less and make more.
AdvancePay, Explained
AdvancePay is PhotoDay’s answer to traditional pre-pay. It gives your customers the opportunity to purchase credits before picture day that they can apply to their photo order after pictures are published.
We didn’t think it made much sense to ask customers to order a package before seeing all of the amazing images captured and created by studios. Our team brainstormed how to modernize pre-pay for the digital world without capping overall sales. So we took a risk, brought something new to the photography industry, and we now have plenty of data to back up our claims.
The AdvancePay Workflow
Here’s how it works.
- The studio sets up AdvancePay credits and special offers that make purchasing an AdvancePay credit simply irresistible.

- Customers can opt-in to the gallery and purchase an AdvancePay credit to use when the photos are published.
- When a customer purchases an AdvancePay credit, the studio gets paid half of the credit amount minus the PhotoDay fee and the Stripe fee. The remaining half is held on reserve until the customer applies their credit to a purchase.
- When the photos are uploaded and the gallery is published, the opted-in customer receives a notification that it’s time to redeem their credit and take advantage of their special offer.
- The customer enters the gallery, views their photos, and orders their products. During checkout, their AdvancePay credit is applied to the purchase. After the customer purchases their products, the remaining reserved AdvancePay studio funds go toward lab costs, taxes, and/or fees. Then the studio receives the balance.
- Customers have 14 months to use their AdvancePay credits. If they don’t use the whole balance in the gallery for which they purchased, they can use the credit on any of your other galleries.
Our revenue per person practically doubled.— Jason Marino, Strada Studios • Shifting Focus & Saving Time with Jason Marino
Spend Now, Save Later
AdvancePay both qualifies potential buyers and incentivizes them to spend more, sooner. The function of AdvancePay + the simplified versatility of PhotoDay’s text & email marketing = a winning combination.
The first step in setting up a successful picture day using AdvancePay is to determine your messaging to the customer. Are you requiring a pre-payment prior to taking photos and the editing process? Are you photographing everyone and speculating that they will buy later? Are you using AdvancePay as a session fee that the customer can apply toward prints & products? All of these methods are effective ways to sell and market photography services online. Once you decide on the method, it’s time to sell your AdvancePay credits.
Replacing Pre-Pay with AdvancePay
If this is your first time using AdvancePay in PhotoDay, keep things as simple as possible.
First, determine or estimate your average order value for the type of event you’re photographing. Then set that amount as your AdvancePay credit purchase amount. In this example, we’ll make one credit available for $35.
Second, create an AdvancePay Marketing Flyer right within PhotoDay. This flyer has all the information customers need to know. Customers are able to purchase credits as long as the gallery is in AdvancePay status.
Once picture day is over and the gallery is published, AdvancePay sales stop automatically and text marketing takes over to help convert views to sales. No need to set this up—it’s completely automatic with PhotoDay!
AdvancePay with Speculation
If you’re photographing every subject at a picture day and want to dangle a carrot to start sales early, you can encourage your customers to purchase an AdvancePay credit prior to publishing the gallery by creating an AdvancePay offer. Every time a customer texts their unique access code to 90738 or enters the gallery via mobile or desktop web browser, they are prompted to purchase a credit to receive their special offer.
AdvancePay as a Session Fee
From dance costume changes to senior portraits to mini-sessions and everything in between, AdvancePay can be utilized to connect your customer to a gallery and cover your time and expenses—all while giving them the flexibility to redeem their credit amount for anything in your online store. You control the price sheet and the required credit purchase amount while PhotoDay does the rest.
My first year of doing PhotoDay, my AOV for a particular dance studio was $101. This year, for that same studio and about the same number of people photographed, my AOV is $138.— Meghan Goering, Meghan Goering Photography • Diving Into Digital Volume Sales with Meghan Goering
Incentivizing AdvancePay
Qualifying your potential buyer and integrating offers into your overall strategy are more important than ever. AdvancePay with an offer is a powerful method to help accomplish this goal. Only you know what will work best for your organizations and customers, but we’ve collected data from PhotoDay to help guide you through this decision.

Another important benefit of AdvancePay is the data! These valuable insights give you a glimpse into the future of a job’s performance. Since AdvancePay sales happen prior to publishing, you’ll have a good idea of where your sales will end up shortly after going live. If you’re new to online, this can provide a level of comfort since the online sales cycle can take approximately 30 days.
Communication is Key
When it comes to online selling, communication with your customers is essential. Before they can order photos, they must know how to access their gallery—making gallery opt-ins one of the most important aspects of boosting your gallery sales.
While PhotoDay’s combination of automated and manual marketing methods is available for all users, the AdvancePay workflow helps ensure that each customer who purchases a credit is subscribed to the gallery and receives timely notifications when the photos are ready to be viewed and products ordered.
All of PhotoDay’s features are designed to work together beautifully and easily. From the simple versatility of our text and email communication to the ease of creating offers and selling AdvancePay credits. It’s a game-changing combination that results in more sales, higher AOVs, and less time tied to your desk.
If you’re ready to dive in and see what PhotoDay can do for you, check out all of our features and create a free account to get started!
Check out our additional publications
Get more info on PhotoDay and begin your picture day transformation!
